Asmodus Minikin V2 180W
The new Minikin V2 from Asmodus is a heavy redesign of their previous model which features upgraded firmware and a redesigned body that extremely comfortable to hold. The USB Port has been repositioned and the battery door has been remodelled to add magnetic closure.
-
by VapeMaster

Share on:

Asmodus Minikin V2 180W
The new Minikin V2 from Asmodus is a heavy redesign of their previous model that I reviewed a while ago. The new model features upgraded firmware and a redesigned body that extremely comfortable to hold. The USB Port has been repositioned and the battery door has been remodelled to add magnetic closure. In addition the venting has been improved to ensure greater heat dissipation.
Powered by the new GX-180-HT chip the Minikin V2 incorporates the same battery saving capacity of its predecessors and the maximum Wattage has been increased to 180W. The mod also features a convenient to use touch screen. It all sounds seriously good but does it truly deliver? We shall see.
Asmodus Minikin V2 180W features
- Zinc Alloy and Stainless Steel Construction
- Soft Rubberised Finish
- Compact Ergonomic Design
- Requires 2x 18650 Batteries (Not Included)
- Touch Screen
- Stainless Steel 510 Connector
- Spring-Loaded 510 Pin
- Wattage Range: 5-180W
- Wattage Range in Temperature Control Mode: 5-120W
- Atomizer Ohm Range: 0.1 - 2.5ohm
- Maximum Output Voltage: 7.5V
- Peek Output Current: 45A
- Temperature Control Range: 212° - 572°F / 100°C - 300°C
- Charging Parameters: DC 5V/1A
- Firmware Upgradeable
What’s in the box?
- 1x Asmodus Minikin V2 180W
- 1x Micro USB Cable
- Warranty Card
- User Manual
Asmodus Minikin V2 180W styling and build quality
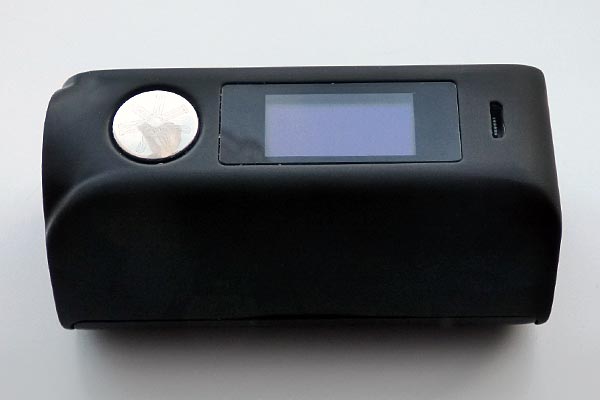
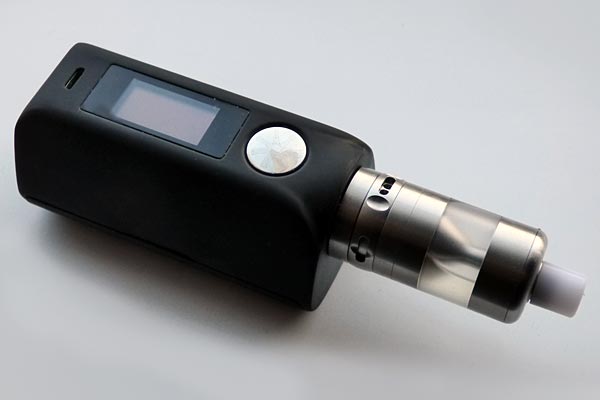
Considering the Asmodus Minikin V2 is a dual 18650 device it is surprisingly compact. The form factor is superb and the soft but quite thick rubberised coating makes for an excellent grip. The Minikin V2 is of a comfortable weight when batteries are fitted and the RX200 style rhomboid shape of the device makes for a very good feel in the hand. Despite the similarity it is somewhat shorter than Wismec devices but ever so slightly thicker.
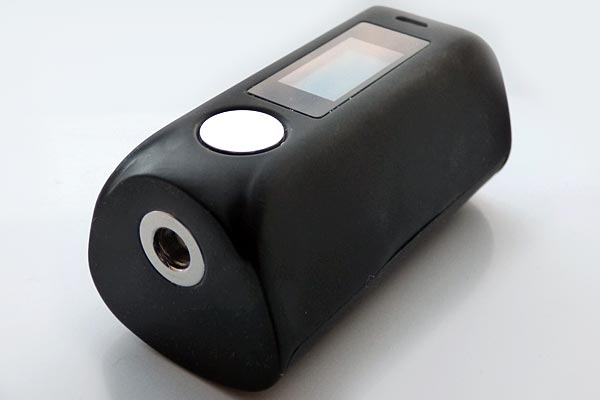
The 510 connector is made from Stainless Steel with excellent threading so you can expect it to last you a considerable amount of time. The 510 pin is spring-loaded so all of your atomizers should sit flush. The fire button is nicely recessed and it does have the Asmodus logo lightly engraved on it which does prevent your thumb from slipping and reduces the chance of a misclick. I found the button to be highly responsive and the device fired immediately every single time the button was pressed.
Located beneath the fire button is the touchscreen display which is both bright and clear. All information is clearly conveyed such as Wattage, Resistance and Voltage. In addition the number of puffs you have taken and the duration of your last vape are shown which might be useful if you are trying to restrict your usage. The current mode is also clearly shown as either Power (Variable Wattage) or Coil (Temperature Control). When using Temperature Control the screen will also display the current temperature. Finally the current life of both batteries is clearly shown.
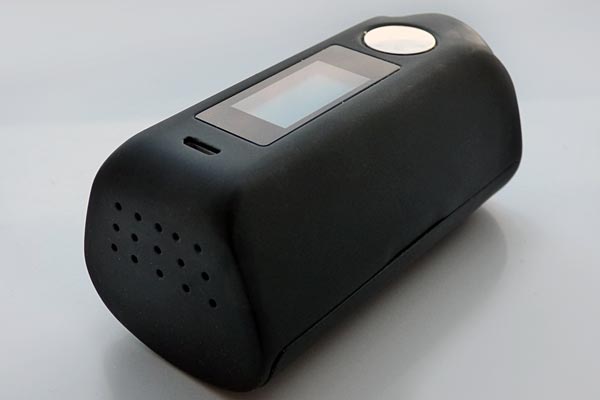
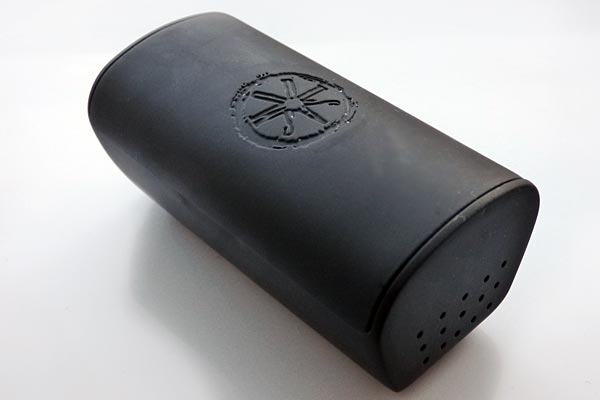
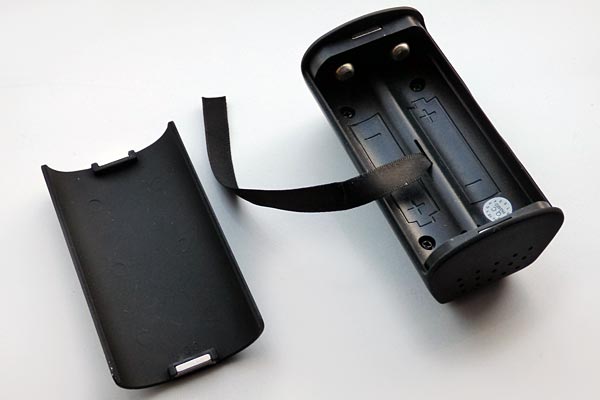
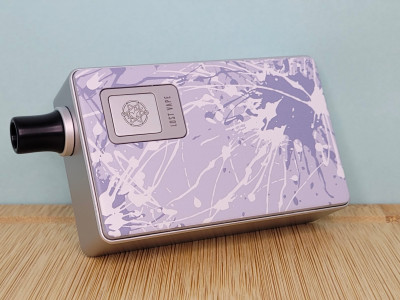
At the bottom front of the device is the Micro USB port so you can simply connect it to your computer to charge it or to perform firmware updates. The back of the device features the battery compartment which has a nice press fit lid that is secured by strong magnets. The fit is almost seamless except on one edge where there is small groove to enable you to remove the lid. The compartment itself is nicely done and the correct orientation for the batteries is clearly marked. In addition there is also a ribbon to assist with battery removal. For the most part the battery lid is a good fit but there is an ever so tiny amount of play so it does occasionally shift slightly when the device is held but it is so minor I very much doubt it will bother anyone. The Asmodus logo is nicely engraved on the lid but funnily enough it always looks like the symbol for the Galactic Empire to me, I guess I watch the Star Wars movies too often.
The device has a good amount of ventilation and features fifteen holes in the base.
Ease of use
- Unlocking the touch screen is done by simply sliding your finger down the screen. Touching the Wattage will allow you to change the Wattage using the "+" and "-" buttons that appear on the screen. Pressing the fire button will set the Wattage and take you back to the main screen. The menu of the device is accessed by pressing the firing mode when the screen is unlocked. Within the menu you can check the Resistance, select a mode, and enter the set up.
- Checking Resistance: Once in the main menu, clicking the "Res" button enters you into the Resistance menu. On this screen you will see "Set Res" on the top and on the bottom you will see a "CHECK" button. By pressing the "CHECK" button, it will give you a Resistance and "YES" and "NO" buttons will appear. Pressing "YES" will take you back to the main menu with your Resistance set. Pressing "NO" will cause "+" and "-" buttons to appear which allow you to manually change your Resistance. Note: The manual changing of Resistance only applies when using Temperature Control Mode.
- Picking a mode: In the main menu, the 2nd option found is called "Mode". By pressing "Mode" you will enter a mode selection menu that allows you to choose which mode to fire the device in. You will see "PWR" which is your standard variable Wattage mode and within that mode you will see two different options: "W" Power which is Wattage mode, and a new mode called "Curve". "Curve" is a unique firing mode within traditional power mode that manually imitates the abilities of temperature control by setting 5 different Wattage-Over-Time pre-sets. For example you can set the device to fire at 80W for .5 seconds then 90W for 0.5 seconds then 75W for 0.5 seconds (for up to 5 different pre-sets). Doing this will run through your pre-sets in a cycle for an extremely fine-tuned vaping experience. Wattage in "Curve" can be adjusted in 0.1 watt increments and seconds can be adjusted in .1 second increments. The other options found in the mode selection screen are "Coil" which is used to select which type of wire you are firing against (supports Ni200, SS316, SS317, and Ti), and then "TCR" and "TFR" modes.
- Using set up: The last option in the main menu is called "Set Up". In the "Set Up" menu you will see three different pictures. The first one (which looks like a light) controls the brightness of the screen. The screen can be adjusted on a scale of 1 - 10 based on user preference. The 2nd option (which looks like a piece of paper) is used to set a puff limit. This sets a maximum number of puffs that can be taken if you are trying to limit and monitor the amount that you vape. If you try to fire the device and have exceeded your maximum puffs, a warning symbol along with the text of "PUFF LIMIT" will display on the screen and the device will not fire. Setting the limit to 0000 will not set a maximum number of puffs but will still record the amount of puffs taken. The last option (which looks like a garage can) reset the puff counter so can have a fresh gauge of how much the device is being used.
Asmodus Minikin V2 180W performance
To test Temperature Control Mode I used my Achilles II RDA which is currently fitted with a 316 Stainless Steel 0.5ohm coil. I manually set the TCR and my desired temperature and I got a cracking vape with no weird Resistance fluctuations or temperature spiking. It certainly performed just as well in this mode as the RX2/3 that I recently reviewed but remarkably enough Temperature Control doesn’t seem to drain the batteries nowhere near as fast as my older devices such as the IPV4S and the Sigelei 150W so in my opinion the chip in the Asmodus Minkin V2 seems very efficient at what it does.
In fact efficient is exactly how I would describe this device when using Variable Wattage Mode and I certainly got a few more hours of use out of it than other dual 18650 devices. Using my Kayfun 5 at a typical 15 Watts meant I was getting at least two full days of fairly heavy use and on one occasion when I vaped a little bit more modestly it did border on a third day of use. It did make me wonder just how much mileage a very restrained vaper would get out of this device, four days maybe or five? Personally I’m too heavy a vaper to even attempt that particular experiment.
One thing I will say about this device is that the slide unlock method for the touchscreen did take me a little getting used to but the real trick to it is to do a long consistent stroke of your finger rather than a quick swipe so at the end of the day it isn’t an issue. Once you get used to it the touchscreen and the menu are very convenient and it is highly responsive.
Conclusion
As someone who really liked the Asmodus Minikin when I reviewed it I unfortunately never managed to get my hands on one since it was often out of stock whenever I thought about buying it. Since a lot of my mods are in a sorry state these days due to the sheer amount of use the Minikin V2 was something I was definitely going to pick up. It has a similar styling to an RX200, the feel of the original Minikin, a simple to use and responsive touchscreen and the reassuring durability of the older Sigelei mods. Simply put, I love this device! It can also take its fair share of knocks too and I have accidentally dropped it twice without causing any damage.
The Minikin has excellent battery life for a dual 18650 device and I certainly get a few more hours out of it compared to other comparable mods that I own and it works brilliantly whether you choose to use Variable Wattage or Temperature Control! Firmware Upgradeability, manual TCR adjustment and being able to adjust the Wattage Curve are other valuable features and make this a very attractive device that is certainly well worth the price!
I purchased the Asmodus Minikin V2 from Grey Haze and you can get it directly from them for £78.99 Remember to use code POTV10 for 10% off your purchase.

VapeMaster
Reviewer at POTVJoin the discussion

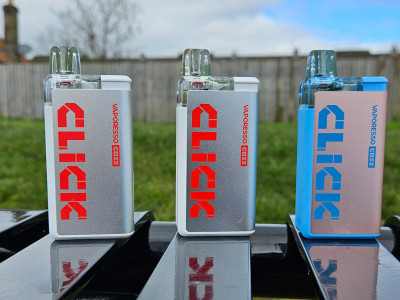
VAPORESSO COSS Click
VAPORESSO sent in their latest kit to take on traditional disposable vapes, the VAPORESSO COSS Click
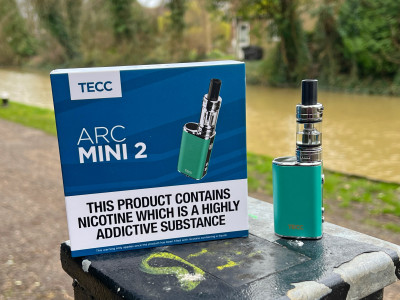
TECC arc Mini 2
TECC have sent in their latest pint sized powerhouse, the TECC arc Mini 2
Lost Vape Centaurus B80 AIO
Antony takes a deep dive in to the Lost Vape Centaurus B80 AIO
-
by Antony Lord

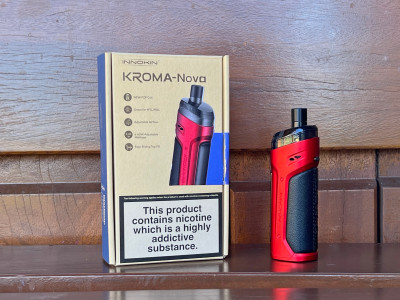
Innokin Kroma Nova Kit
Innokin continue their amazingly strong run with the all new Kroma Nova kit