Boro compatible devices seem to be all the rage again in recent months and this time it’s Steam Crave’s turn to throw their hat in the ring with their highly anticipated Meson AIO kit. They were apparently showing off late prototypes of this at last October's Vaper Expo (I didn’t attend because I was on holiday) but it’s only just now becoming available in any numbers so I asked our good friends over at Sourcemore if I could take a look.
Specifications
- Size 88.5 x 31 x 52mm
- 187 Grams
- Zinc alloy/Aluminium alloy construction
- External 21700 battery
- Output 5~100 watts / 1~8.0 volts
- Resistance range 0.1~3.0 ohms
- Power/Voltage/TC/Bypass modes
- Kit includes the Meson Boro tank with two build decks
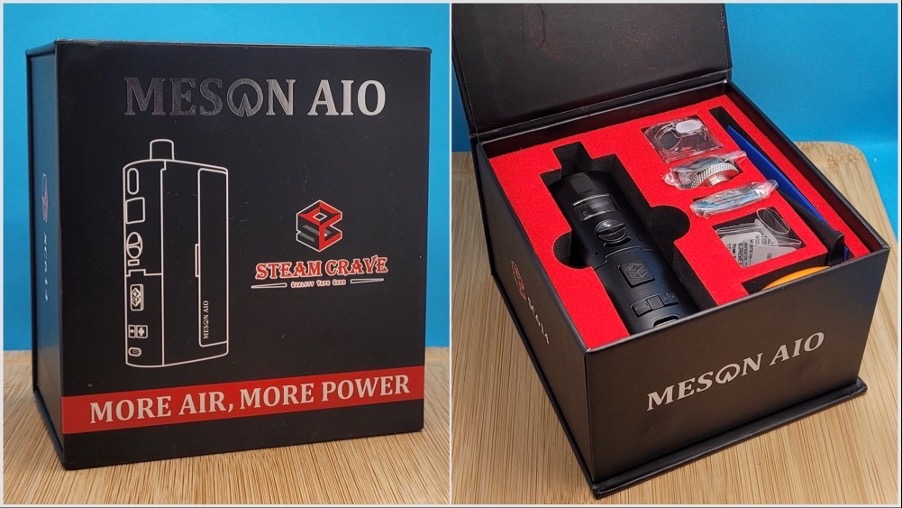
The Meson AIO comes in typical Steam Crave packaging although this box is substantially bigger than most of their other products and once you start digging down into the contents, it soon becomes apparent why as they've literally thrown everything except the kitchen sink into the box!
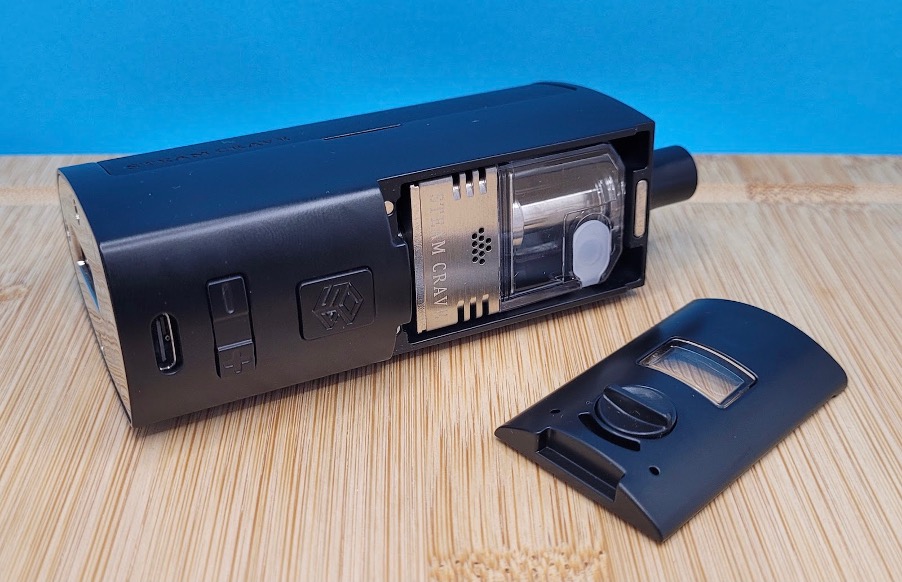
First up you have the Meson AIO itself with the Meson Boro tank and mesh build deck installed and the standard airflow control front panel. This also includes a 510 nut and drip tip plus an 18650 battery adapter hidden in the battery compartment and a second more open front panel.
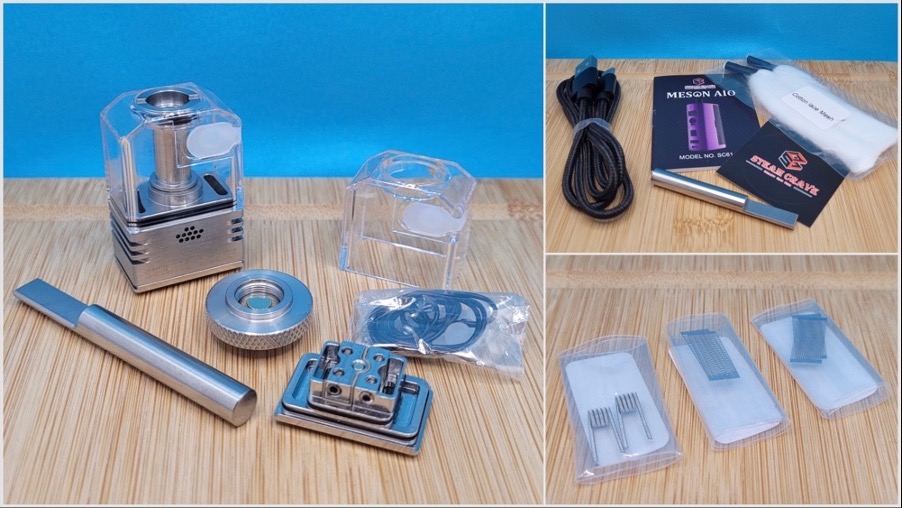
To go with the Meson Boro tank, you get a 510 base adapter for installing your coils on a standard 510 mod, a coil rod, a spare tank section (which is always welcome), and even a second build deck for single or dual coil use. Then you have multiple sets of mesh strips and fused clapton coils, cotton, and finally the usual extras like a USB-C cable, battery wraps, and manuals. I think it’s safe to say that barring a battery and e-liquid, Steam Crave have given you everything to get started on your Boro mod journey.
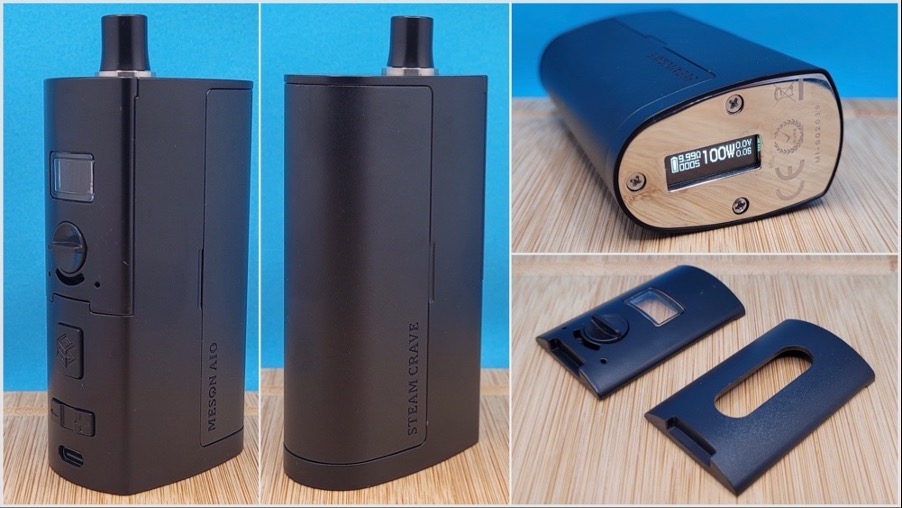
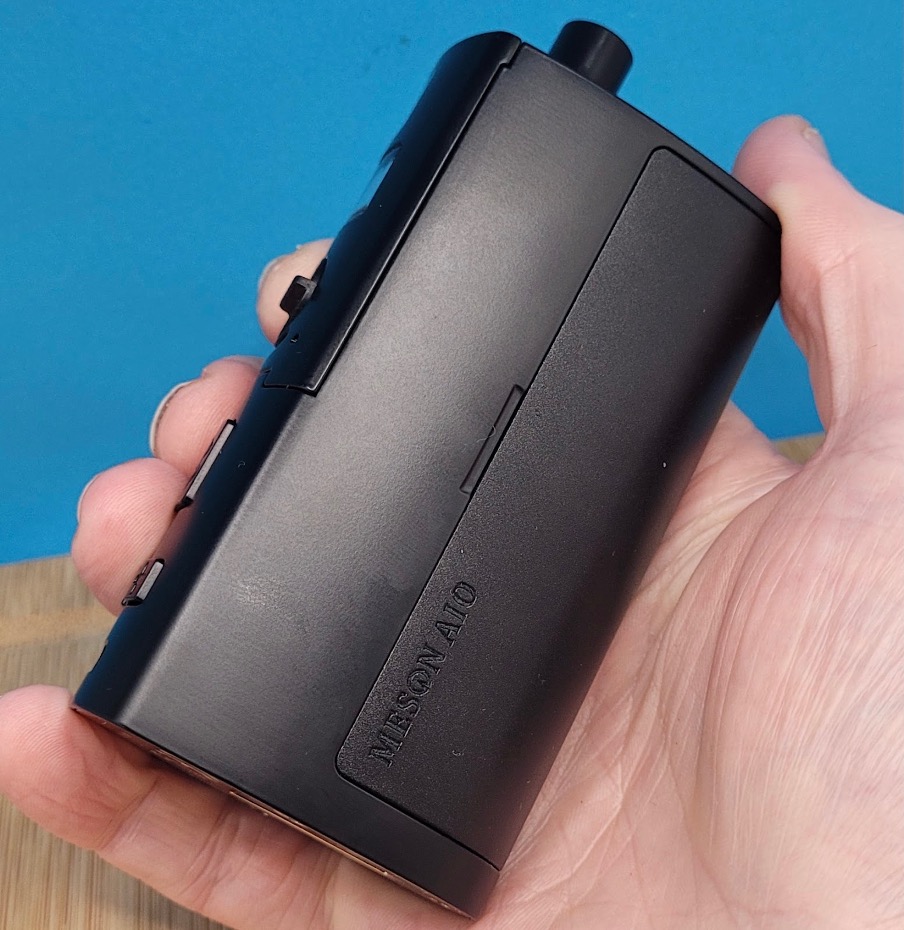
The Meson AIO feels quite chunky, fully laden with a Boro tank and 21700 battery, it weighs in at a not inconsiderable 295 grams. Having said that, the teardrop shape with the boro tank fitted sideways at the front of the chassis means that this isn’t overly large at just 31mm across the front panel and 52 mm from front to back which makes it comfortable to use even with my small hands. There’s a bright but basic screen at the base which is easy to read, and you have all the modes you would ever need like power, voltage, temperature control and bypass with on board USB-C charging which hit a peak charge rate of 1.92 amps although it should be noted that the chassis does get quite warm to the touch whilst charging so I’d perhaps recommend only using this in emergencies.
I know there are quite a few people who might dislike the position of the fire button lower down on the front of the chassis rather like you would find on a side by side mod, but this is something I’m used to, so I quickly adapted to this layout. Whilst using the Boro cover with the integrated airflow controller I also found that this provided a great tactile clue for positioning my fingers which meant that I didn’t end up blocking the airflow either.
Out of the box it comes with an innovative Boro cover that includes adjustable airflow and a small viewing window, this is largely metal and feels fairly substantial although the airflow control portion is plastic so only time will tell how durable this will be in long term use. There is a second more open Boro cover included but I was disappointed to find that this is plastic which makes it feel cheap and insubstantial compared to the default cover. I’ve stuck to the adjustable airflow section throughout and I’m happy to report that the airflow adjustment system is quite effective giving you a degree of fine control you don’t find on many other Boro mods. One downside of this arrangement is that there is a bit of a gap between the front of your boro tank and the cover so this is another area where condensation can form, and I have found myself regularly having to clean up this area once or twice a day.
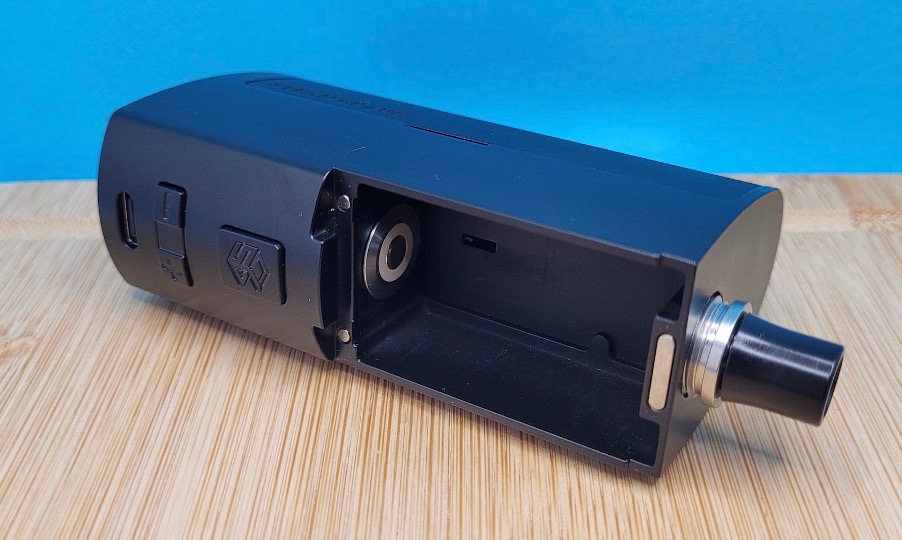
The Boro covers are held in place with three magnets and a small retaining lip at the base. The metal cover snaps into place with quite a satisfying clunk as the magnets grab hold and that small retaining lip helps hold everything in place, only once have I come close to the panel coming off accidentally whilst I was trying to retrieve the Meson AIO from a particularly deep jacket pocket. Whilst we’re here we might as well take a look at the positive connector; this seems well insulated although I haven’t taken this apart to see how well things are sealed underneath.
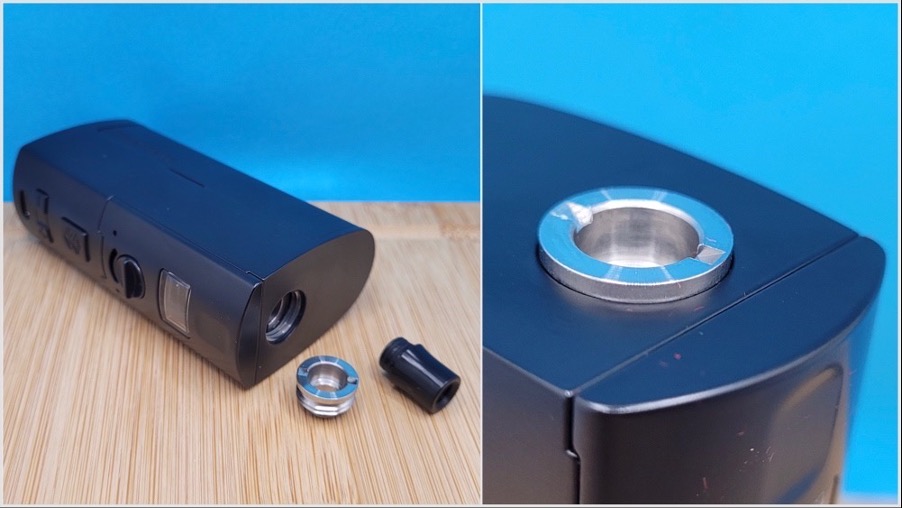
You do get a 510 nut included in the box, this isn’t a flush nut however and it protrudes 1.2mm from the chassis even when screwed all the way down. I found myself quite liking the included 510 nut and drip tip combination so I’ve continued to use it, but this also uses standard Billet Box threads so most of your integrated drip tips should work here if you want a more elegant solution.
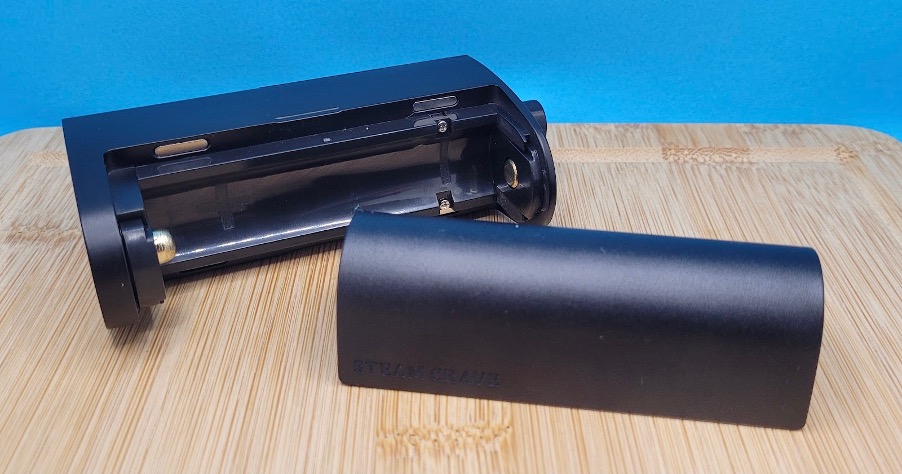
The battery door is a little old school simply being held in place by four magnets with the battery compartment having a well labelled sprung loaded positive contact. This has been a pleasure to use and I’m sure many will be relieved that Steam Crave didn’t go down the screw in battery tube route here. Unlike the main chassis which has a shiny finish and can become a bit of a fingerprint magnet on this black edition, the battery cover has a contrasting dull matte finish. I did notice that on the other colour variants (Purple, Gunmetal, Blue, and Red) the battery door still has this matte black finish, so it’s probably been done to make manufacturing a little easier across the board.
Personally I’d have been quite happy if things had ended here but Steam Crave have gone the extra mile with the Meson AIO kit and included a rebuildable Boro tank solution in the box as well in the shape of their new Meson Boro tank (which is also available separately).
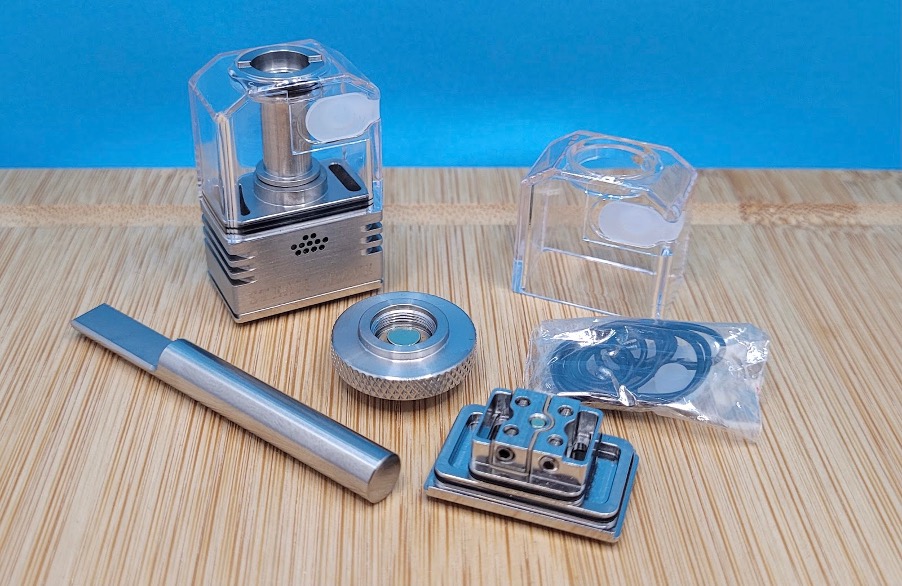
Once again Steam Crave have gone all out on the extras. Out of the box you will find a mesh build deck installed but they also supply a second build deck designed for single or dual coil builds, as an extra touch they’ve even included a spare PCTG tank section as well.
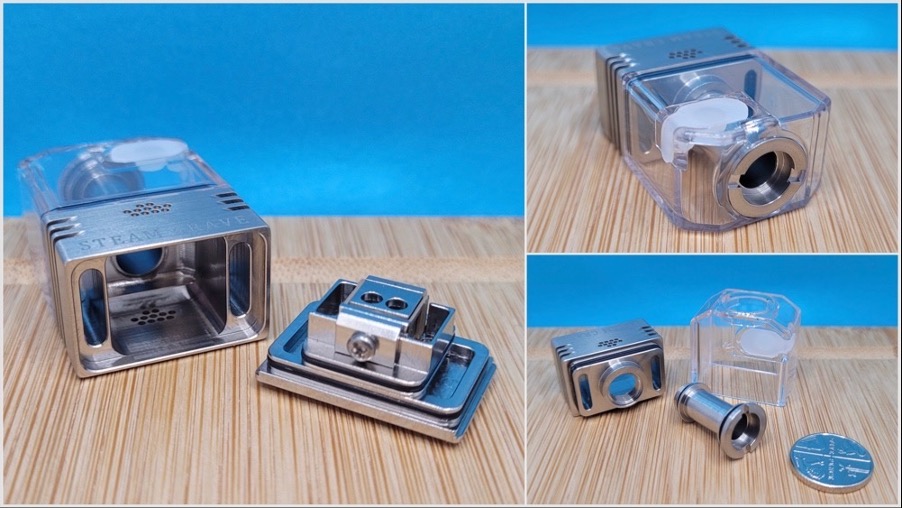
The build deck is accessed by pulling away from the bottom, this is held in place with two O-rings with just the right amount of grip so there’s no worries about the deck falling out when handling this outside of the Meson AIO. This features a classic Steam Crave RDTA design philosophy with eliquid coming down the large ports you can see on either side which then floods the base of the build deck to go under your wicks with a honeycomb side airflow system. In case you’re wondering, the fins on the side are to allow air in from the front to reach the rear airflow.
The 5ml capacity PCTG tank is held securely in place by the chimney section which can be unscrewed with a five pence piece for cleaning or replacing the tank and has a pod style bung filling system. The one area of frustration here has been the fill port which in all honesty could do to be a fraction larger, I have got the hang of using it now but on several occasions, I have found this getting backed up with larger fill nozzles.
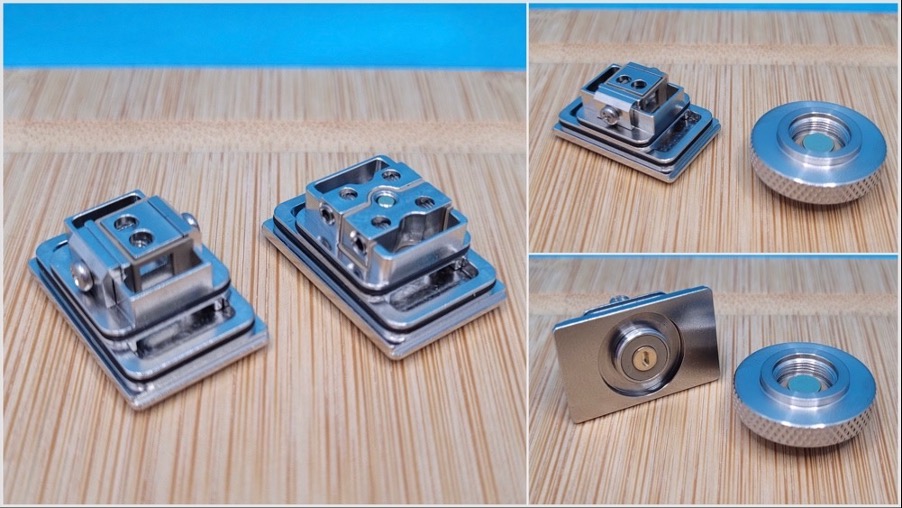
With two build decks included, I now had to make a decision which way to go with my first build… as I’d had great success with the Vandy Vape Kylin M tank I decided to go with the mesh build first. There is a handy 510 adapter included and this screws onto the bottom of the deck so you can dry burn your coils.
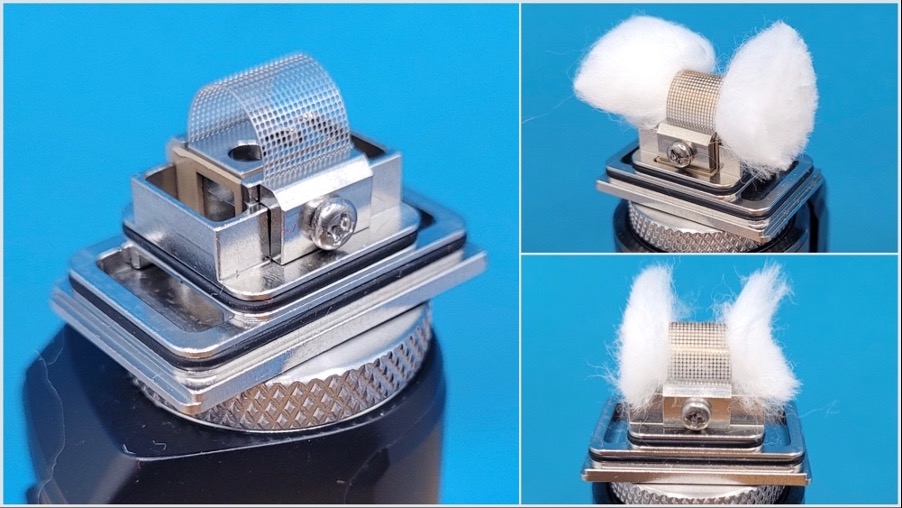
With a Kanthal mesh strip installed I proceeded to cut the cotton to the edge of the deck but this somehow didn’t look right so I had to refer to the manual to see what Steam Crave suggested. They recommend cutting the wick right up to the edge of the wicking ports, fluffing and trimming the cotton until it just covers the top of the wicking ports but doesn’t actually go into the ports themselves. This also looked weird, and I was sceptical that this would work…. I needn’t have worried as this method has worked an absolute charm!
This gave me an absolutely cracking vape, mesh is quickly becoming one of my favourite ways to use a Boro device especially with fruity flavours which really seem to pop with this kind of build. This is a semi-restricted draw as you might imagine with a Boro device but even so I found myself using the adjustable airflow on the front panel to further dial my vape in. I ran this for a week solid and the cotton was still relatively clean, so this seems to wick extraordinarily well.
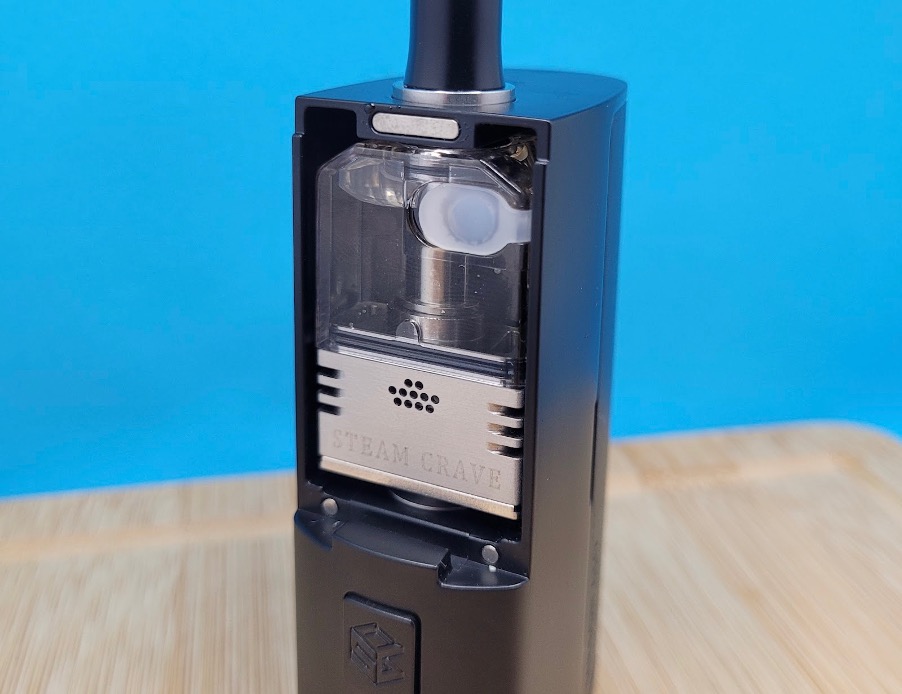
The eagle eyed amongst you might have noticed that the Meson Boro tank completely fills the Boro chamber and has side airflow so with this in mind I was curious how well this would perform in a Billet Box with the traditional airflow coming in from the base on one side. Surprisingly it still works but this restricts the airflow even more, perhaps even a bit too much, but it is usable.
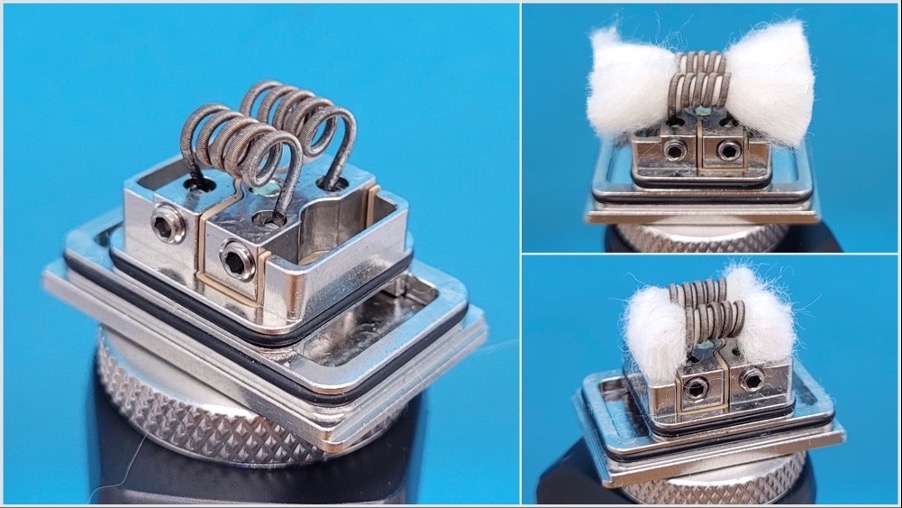
With the mesh build conquered it was time to tackle the postless build deck. The manual and online blurb for the Meson Boro tank concentrates on using this as a single coil affair so I decided to get a bit ambitious and install a dual coil build with 2.5mm inner diameter fused claptons! Here Steam Crave recommends cutting the wicks to the inside edge of the build deck, thinning things out a little, and then tucking the wicks about two to three millimetres into the wicking ports.
This gave me a really flavourful and dense vape although at 0.28 ohms I was needing 60 to 65 watts to get the best results here, good job the Meson AIO uses a 21700 battery as I think an 18650 would struggle to power this for long. This also wicked beautifully keeping my cotton nice and saturated throughout.
You really can’t go wrong with either of the supplied build decks and I’m really torn as to which one is my favourite, top marks to Steam Crave they’ve done a cracking job on the Meson Boro tank.
Pros
- Everything you need in one box
- A great aio/Boro device
- Easy to use Boro tank with two build decks
Cons
- Boro tank can be tricky to fill
- A bit on the heavy side
Conclusion
Steam Crave have knocked it out of the park with the Meson AIO kit, not only do you get a great Boro/AIO device but the fact that you also get the stellar Meson Boro tank with two build decks included in the package as well make this a bit of a steal. I’ve already seen this offered at discounted prices and Sourcemore currently have this at just $78.79 (plus shipping) so if you’re looking for your first Boro device, I’d say that this is probably a good place to start.
Antony Lord
Reviewer at POTVI was a twenty a day smoker for 25 years and like most smokers I was always going to quit "next week". Having hit my mid forties and having the usual smokers cough and difficulty with anything more than moderate exercise it was obviously time to give up the cancer sticks. I bought my first e-cigarette in 2013 when they were expensive, difficult to find and quite frankly... crap. I used it for about a week then went back to the roll ups, mark up another failed quit attempt. The fact that I had just changed jobs and was under quite a lot of stress probably didn't help. Move on to 2016 and whilst I was browsing eBay I noticed that one of the suggested items that would occasionally pop up was for a cheap e-cigarette. It looked similar to the one I'd bought 3 years earlier but it was only £5 (about 8 times cheaper than before) so I decided to give it another go on a whim. Once the kit arrived I managed to gradually replace the cigarettes with my new kit over a two month period and got into watching YouTube reviews for newer kit. My cheap and cheerful kit was replaced by a more upmarket affair, and being a noob I made a mistake once it arrived... I put in the supplied direct lung coil, this was of course a complete revelation and I haven't touched a cigarette since. Oh and I no longer spend the first five minutes of every day having a coughing fit either.
Join the discussion
VAPORESSO COSS Click
VAPORESSO sent in their latest kit to take on traditional disposable vapes, the VAPORESSO COSS Click
TECC arc Mini 2
TECC have sent in their latest pint sized powerhouse, the TECC arc Mini 2
Lost Vape Centaurus B80 AIO
Antony takes a deep dive in to the Lost Vape Centaurus B80 AIO
Innokin Kroma Nova Kit
Innokin continue their amazingly strong run with the all new Kroma Nova kit


