Supplied by Vaporesso for review purposes.
https://www.vaporesso.com/vape-kits/target-pm80 (Worth a look for more info I may have missed)
https://store.vaporesso.com/products/target-pm80 (Currently $39.99)
Having tried a few PodMod’s and AIO’s for DTL (Direct To Lung), I haven’t been too impressed by them and preferred my traditional mod and tanks for sub-ohm DTL vaping, so I have to admit I wasn’t expecting too much from the Target PM80 – boy, was I in for a great surprise!
Vaporesso simply introduce this kit with the following boast:
- MORE POWER
- MORE CLOUD
- MORE FLAVOR
- IT’S SUB-OHM
which pretty much sums up this kit, though there is a lot more they could have boasted as it turned out as it’s one of the most impressive DTL devices I have ever tested.
They do go on in more detail, taken from Vaporesso’s official website:
'The most power-focused SUB-OHM PODMOD device you have ever met on the market TARGET PM80, which is built with quality and design for its small size and big capability.
Capable of reaching max output of 80W with a 2000mAh battery, and equipped with 0.001’s insta-fire AXON chip, it brings powerful and extra intelligent vaping experience. TARGET PM80 meets all your real SUB-OHM DIRECT-TO-LUNG vape.'
- Sub-ohm for DTL
- Max Output of 80W
- GTX Coils
- 0.96 TFT Screen
- Intelligence Involved
- Compact Design
Now it’s rare I agree with most official descriptions/introductions, but I can hand on heart confirm all of the above is true so there is no point in me going any further in this review.
The End
----------------------------------------
Just kidding, there’s so much more to say on this kit!
Let’s kick off with what’s in the box
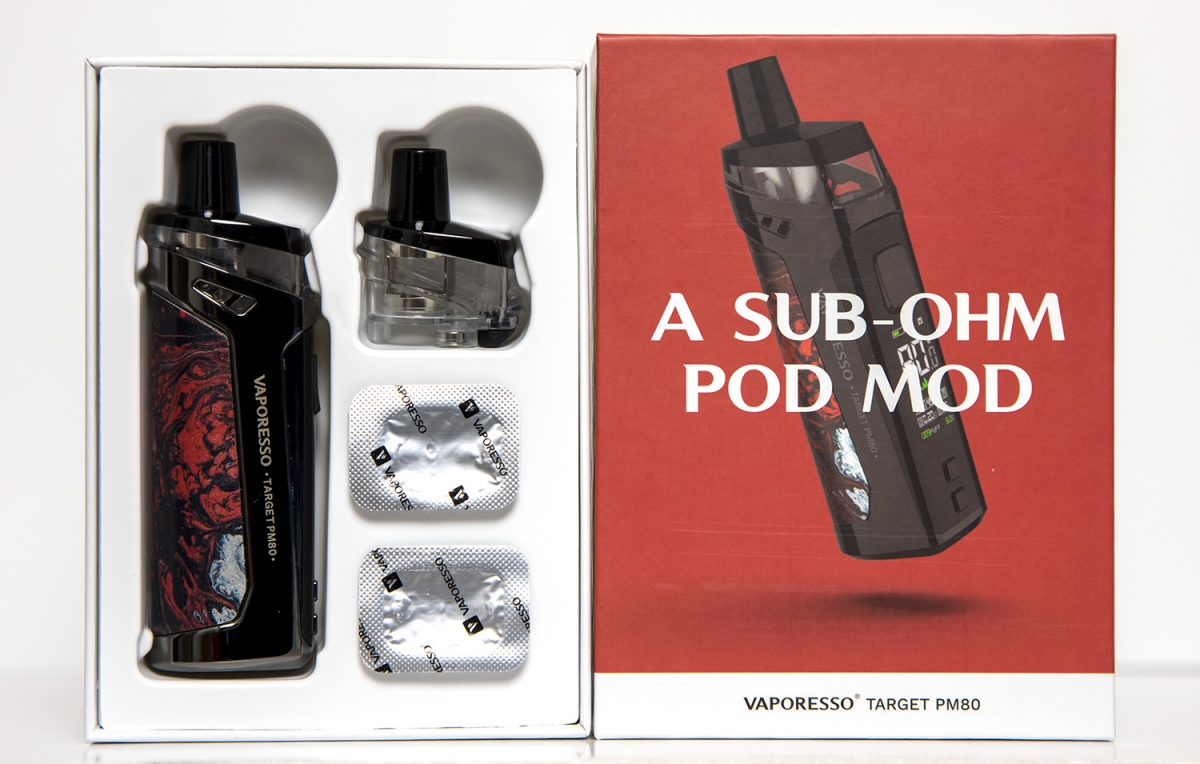
- 1 x VAPORESSO TARGET PM80 Battery
- 2 x VAPORESSO TARGET PM80 POD (4ml)
- 1 x GTX 0.2Ω MESH COIL
- 1 x GTX 0.3Ω MESH COIL
- 1 x Micro USB Cable
- 1 x User Manual
- 1 x Warranty Card
- 1 x Reminder Card
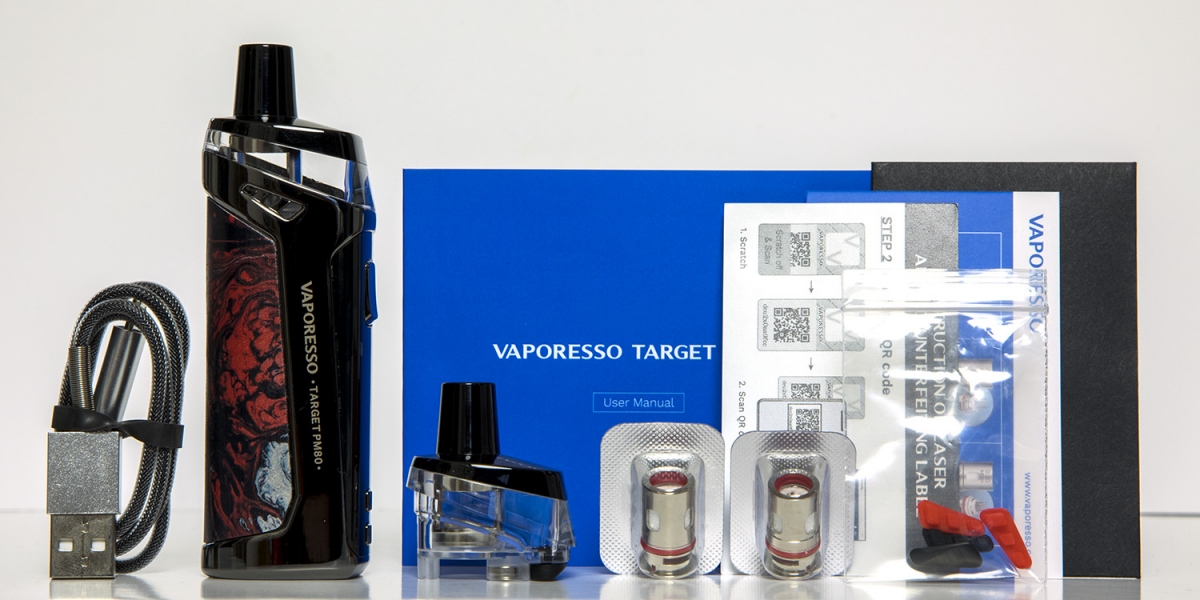
Straight away it started to impress as it has a much welcomed second tank, which is a big pro. There are also two new GTX mesh coils designed especially for this kit, a charging (and firmware?) micro USB, which sadly isn’t USB-C but it turned out to be no big deal, some curious silicone bungs which turned out to be airflow restrictors and colour options, and finally some bits of card that I almost never read - a sign of a good kit is if it’s intuitive, and a manual is a last resort for me.
The battery section has a nice look and feel to it, it feels solid and very well crafted. I dry fitted a pod into it and was impressed how easily it popped in and held itself securely with two magnets, no play or rattle. It felt really good in the hand, similar in height to the Geekvape Aegis boost though a little smaller and more comfortable.
Dimensions
102mm x 24.8mm x 33.4mm
So after a brief inspection, I put the battery on charge. It already had a partial charge of 60% so I’m guessing it’s a LiPo battery inside. I was surprised how quick it charged up to full, it seemed around 15 minutes as I didn’t time it.
While it was charging, I turned my attention to the ‘pods’ (essentially a tank), which look and feel really high quality but the biggest pro is that they are CLEAR – at last a company that listens.
The benefit of having a spare tank is you can try both coils with different juices with a quick swap of the pods.
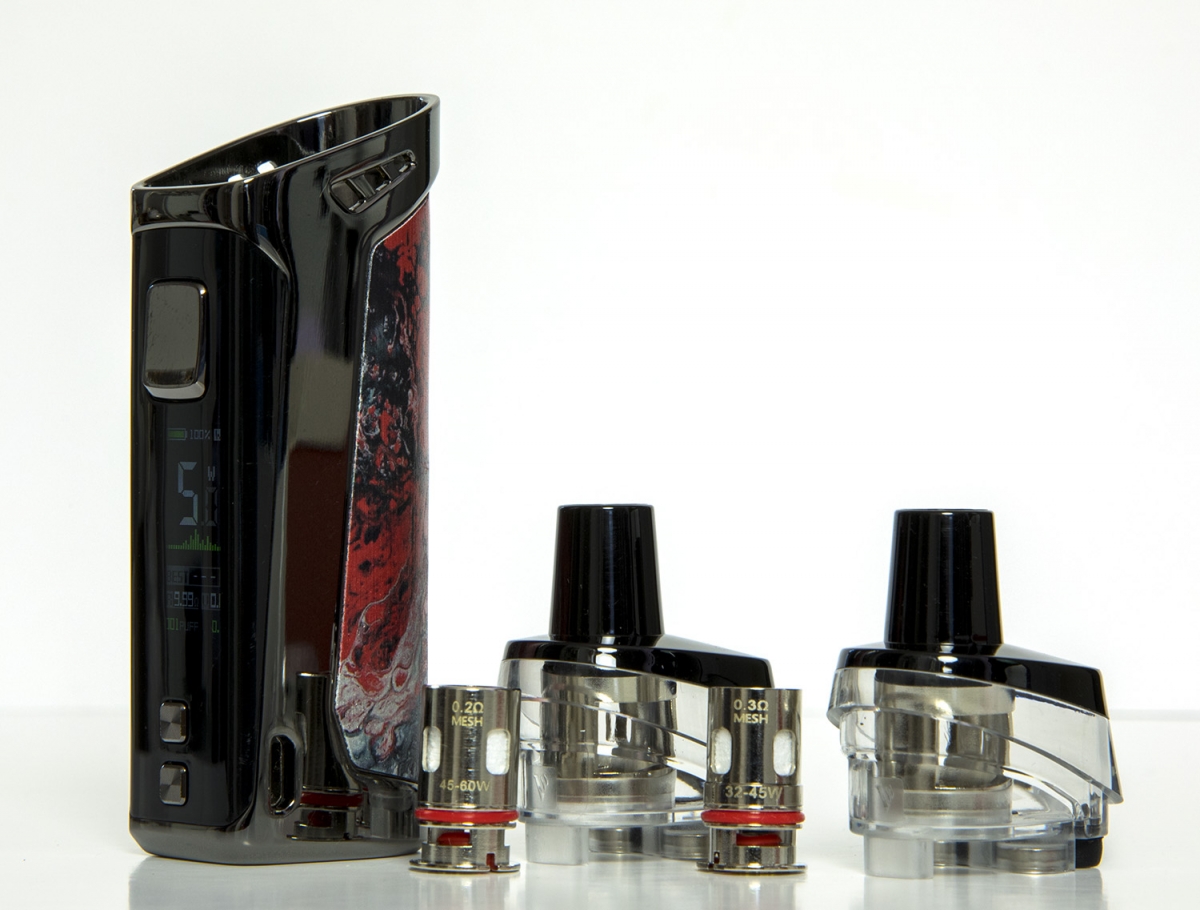
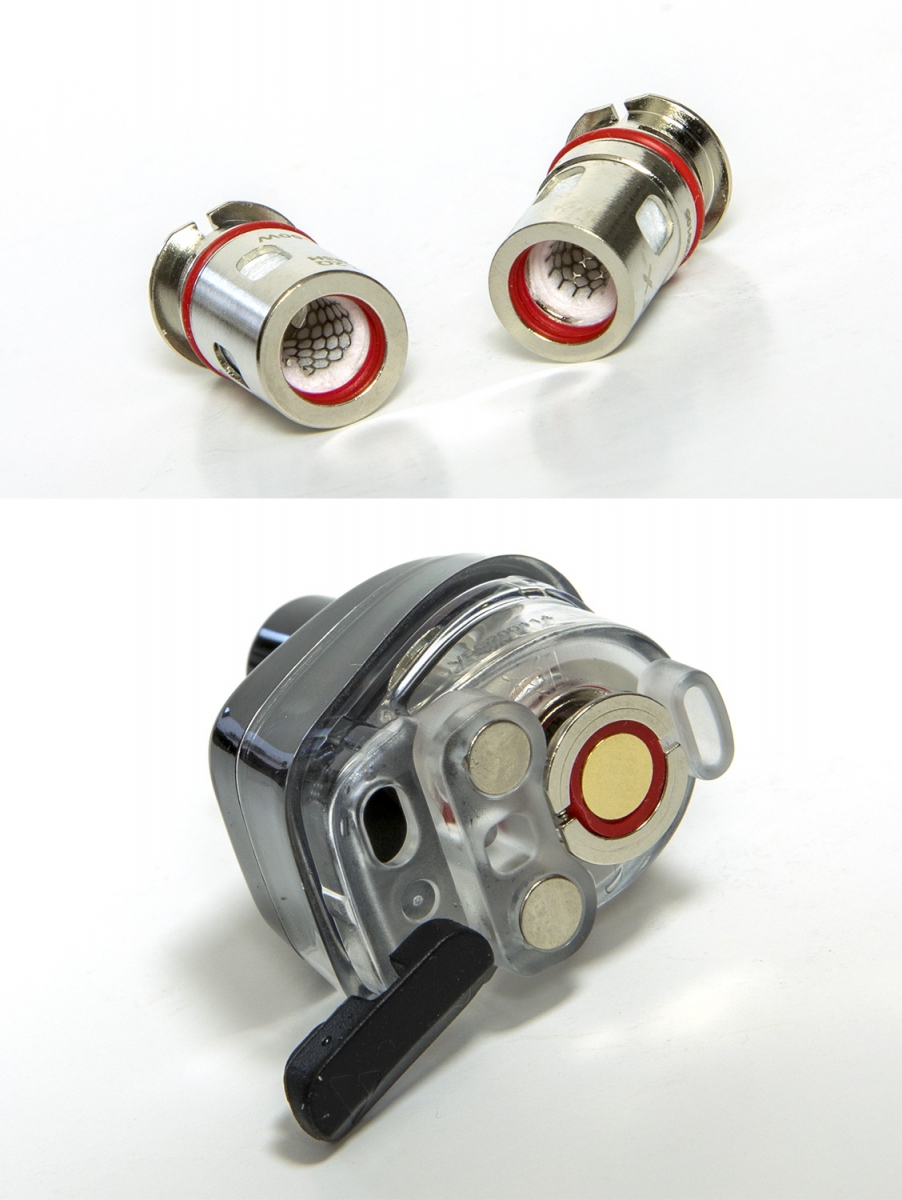
I primed up the coils with a little eliquid into the cotton slots and a drop into the bore.
The coils are a simple press fit, take note of the two flats which need to be orientated with the corresponding flat edges in the aperture, simple enough as you can’t fit them incorrectly as they will not press in if they are in the wrong position.
Filling the pod is done via the base and a silicone bung which is easy to open and close. I used a 50ml shortfill bottle with no problems and no airlocks, so it’s clean and very easy to see your juice level with the clear plastic.
The problem with text is it sounds longer than it really is, priming the coil, fitting it and filling it up took around a minute and was mess free. I can’t recall an easier pod/aio or tank that’s this simple.
Looks and Ergonomics
I understand looks are subjective, but I really like the styling and overall look of this kit, and the clear tank actually added to the aesthetics.
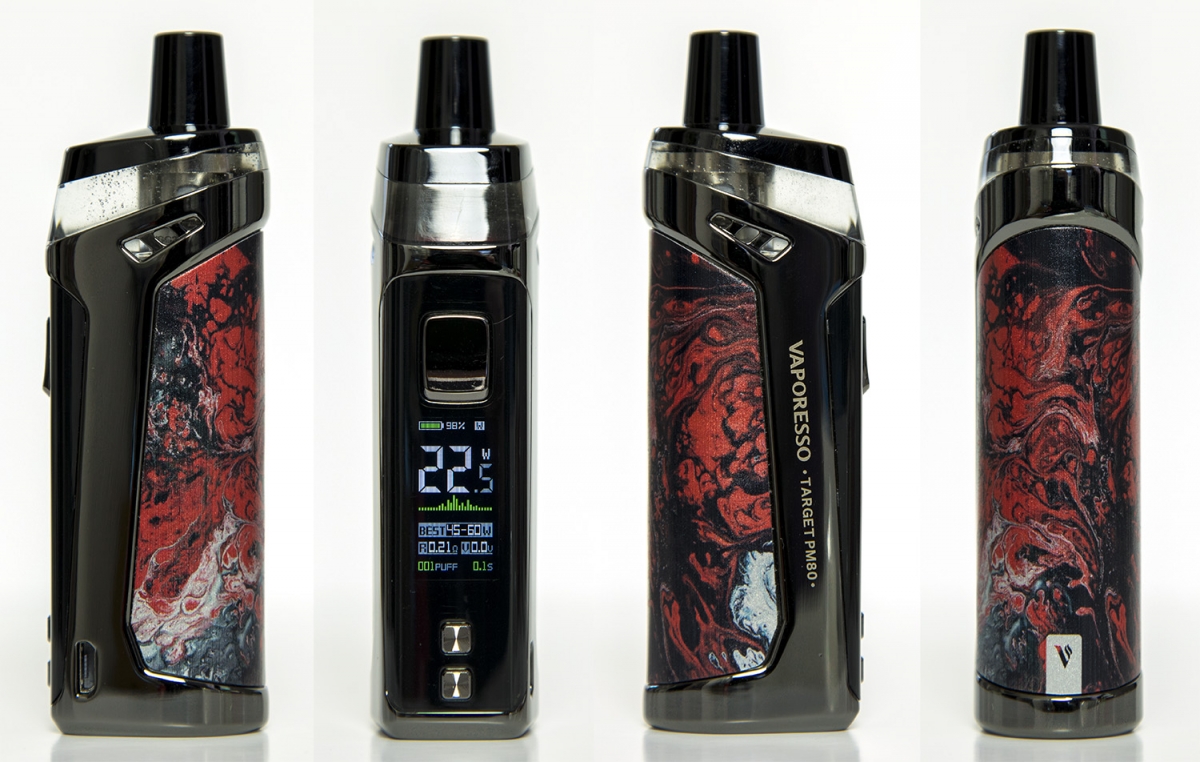
The main chassis has a gun metal plated finish with a resin style wrap which has an almost leather like feel to it. Whatever the material is, it does add to the grippy feel to it. The screen side is well laid out, there is a metal fire button which is contoured and well positioned for thumb or finger firing, the adjustment buttons are tiny but easy to click without issue and also resistant enough to avoid accidentally changing the settings.
The screen was the best surprise. One of my constant gripes with manufacturers using dark plastic is it comes at a cost of dimming the screen, but the PM80’s screen is spot on, very clear and bright with all the info you need on the colourful screen.
(The screen is brighter than in the photograph as I used bright lighting)
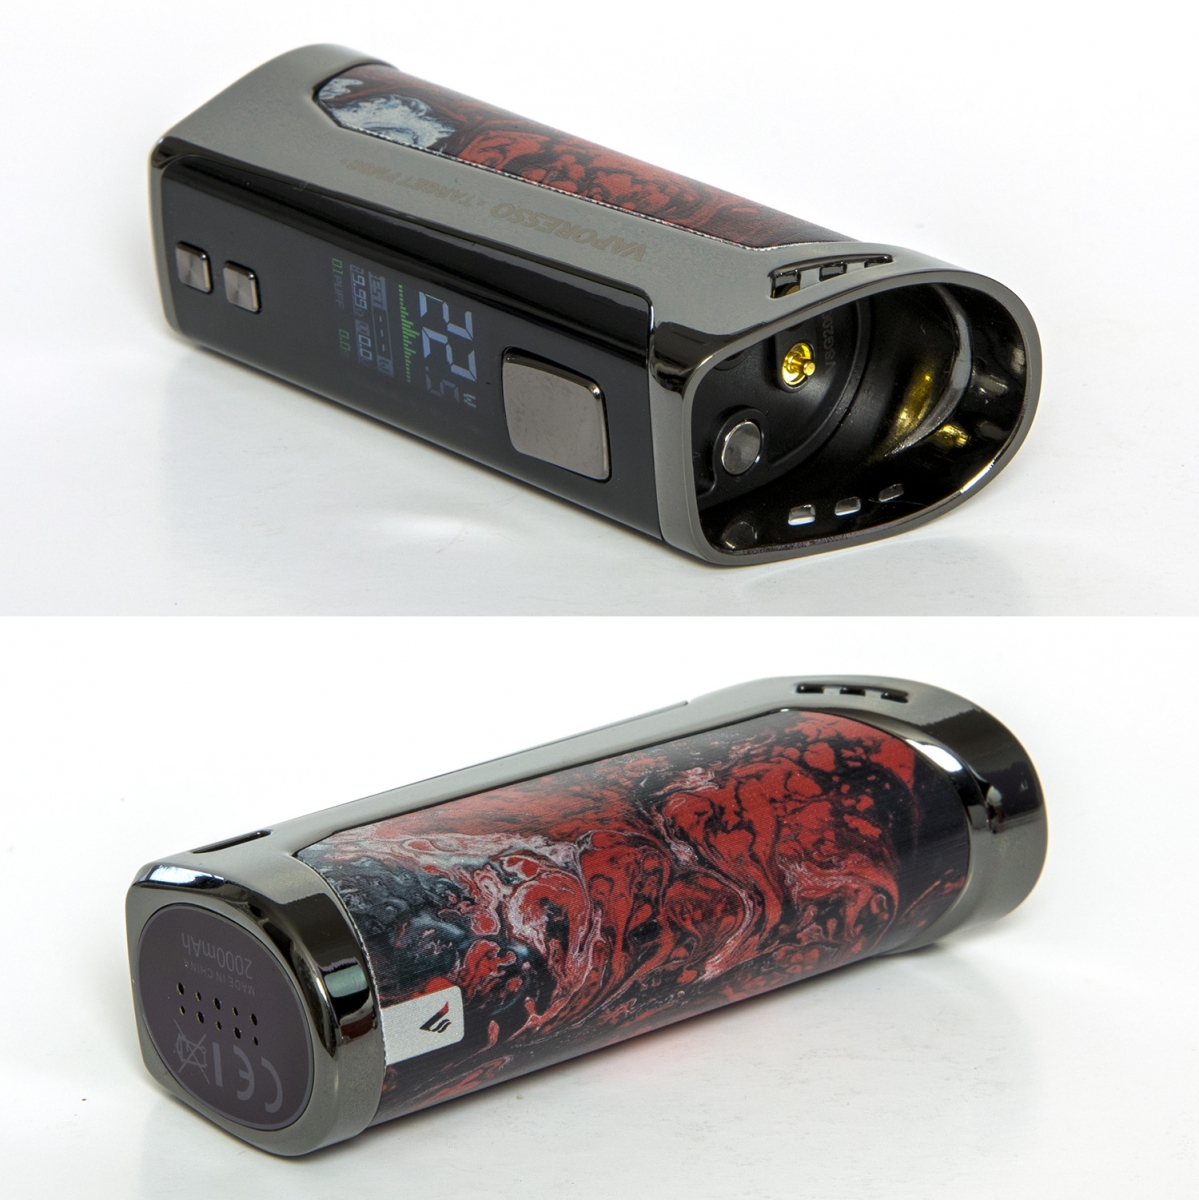
The inside of the tank socket is clean and basic, two magnets, two spring loaded connection pins and airflow slots. I couldn’t tell if the spring loaded pins are sealed or not without taking it apart, but they are on the opposite side to the board so leaking damage shouldn’t occur. At the base, there are battery vent holes and the battery capacity 2000mAh.
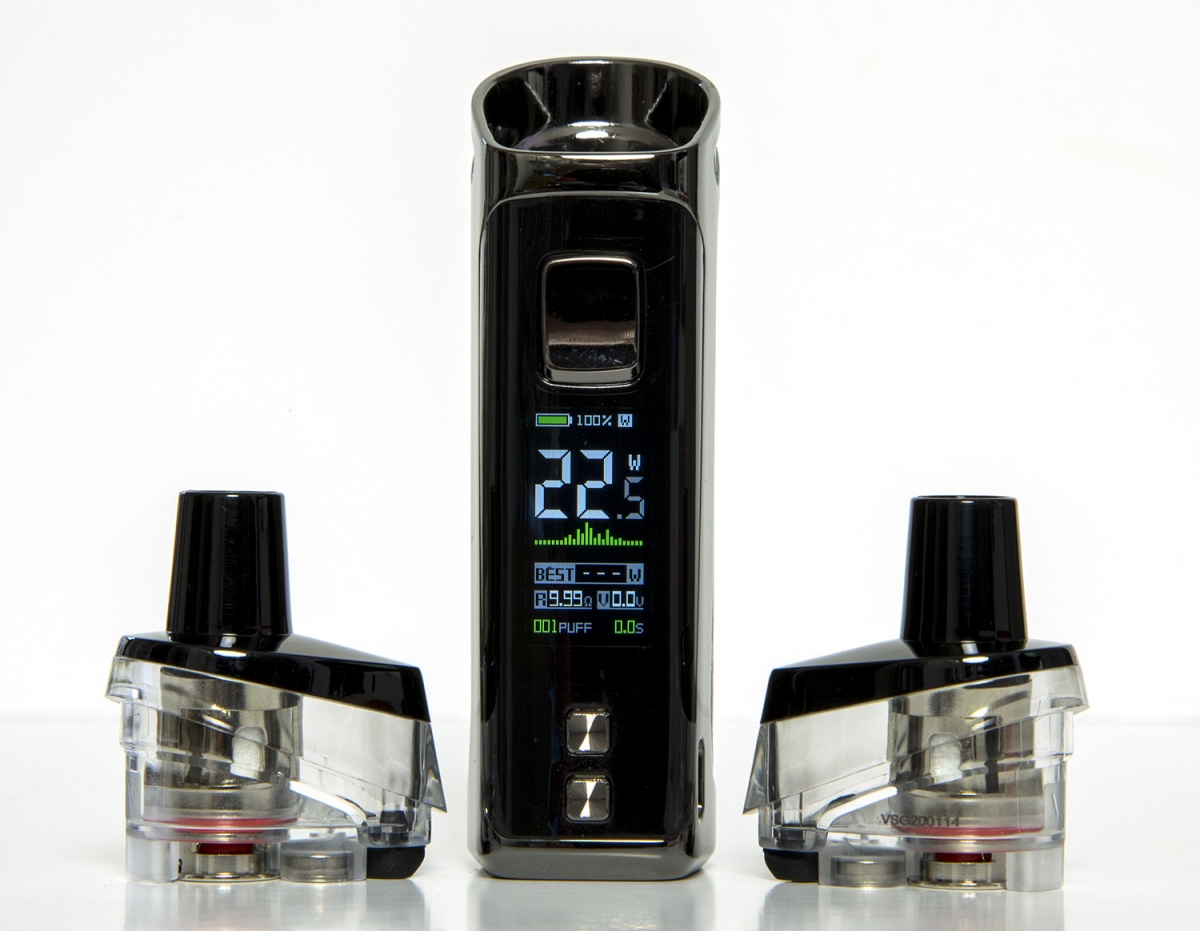
The tank has a fixed drip tip so no option to pop your own on, but I found it comfortable and to be fair, it’s just right for the DTL draw this kit gives. There is also no adjustable airflow as such, instead they offer you silicone bungs to restrict the airflow if you prefer a tighter draw.
The PM comes in various colour options which are mostly different faux resin wraps. They all appear to have the same shiny gunmetal. I’m not sure if the silicone bungs are colour matched as with my red and black version. There is also a chrome version I have seen and it is on my wishlist.

Operation and Performance
The PM80 uses the Axon chipset but not as we’ve seen it before. It is customised for the PM80 perfectly and is very simple to operate. I didn’t find the need to refer to the manual once with its common sense interface and options.
- 5 x clicking the ‘FIRE’ button = Turns the mod on/off
- 3 x clicking the ‘FIRE’ button = Locks/unlocks adjustment buttons.
- Press and hold ‘Up/Down’ buttons to enter the options menu.
- Click either ‘UP’ or ‘DOWN’ buttons to increase/decrease wattage or voltage.
Once in the menu, navigation is achieved using the ‘UP’ and ‘DOWN’ buttons and the ‘FIRE’ button to confirm your selection. Menu options are:
- VW = Variable Wattage.
- VV = Variable Voltage.
- SMART VW = Smart Variable Wattage – This option scans your coil and sets the wattage to the optimal setting.
- PUFF = Puff Counter info and reset.
- THEME = Colour scheme (GREEN, BLUE or PINK)
- DEFAULT = Restores to factory settings.
- EXIT = Exits (shock horror)
Wattage adjustment is in 0.5 watt increments from 5.0 watts to 80.0 watts. It doesn’t round robin, but it scrolls so fast there is no need for it. Variable voltage adjustments are in 0.1 increments, and range from 0.0 up to 4.0 Volts and, to my surprise, the screen even shows the recommended voltage range – wow!
The menu isn’t bloated with options you’re unlikely to use so it is kept simple and clean. The strongest feature is the SMART VARIABLE WATTAGE which is superb. It scans your coil, detects which coil you are using and sets the wattage to the optimal settin. It also displays the recommended wattage range which is a huge pro. You can still adjust your wattage if you prefer a cooler or warmer vape, but I found the it to be right in the sweet spot, a reasonably warm vape and the flavour was incredible.
Another wow moment was as soon as I popped on another pod/tank, the coil scan was almost instant and it literally is plug-n-play, whack a pod in and vape without having to tweak anything.
Both coils performed incredibly well. I preferred the 0.2Ω coil, but I found the 0.3Ω perfect for taking out for the day with the battery life lasting longer.
I’ve kind of skipped ahead of myself without mentioning my first vape on this device. I still remember my first reaction, “holy s**t!!!”. The vape is simply amazing. Flavour is the first thing that smacks you round the face, it really was a game changing flavour from such a small device. Then there were the clouds – clouds to rival most of my high wattage sub ohm mesh tanks. The draw is equally impressive, I expected it to be restrictive but I found it to be very close to what I would have chosen from an adjustable airflow tank (around 2/3rds open). I then tried the airflow restriction plugs for the sake of it. For me, it restricted it too much and simply was not as good a vape, but it’s there for those that prefer a tighter draw.
The speed from pressing the fire button to vape was lightning fast, I expect this from mesh coils but this seemed so much faster with no noticeable ramp up.
Screen Display
I love the layout and look of the screen which features all the information you need.
Smart Wattage mode display example:
- Battery status bar including %
- Mode ‘S’ for Smart VW
- Current Wattage (pun intended)
- A rather cool pulse wave graphic which fluctuates while vaping
- BEST bar which displays recommended wattage for your current coil 45-60W for example (using the 0.2Ω coil)
- R which is followed by the resistance of your coil
- V which is followed by the voltage applied when vaping (not that you can see it)
- Puff counter – guess what this does – yeah, it counts puffs
- Puff timer in seconds with 1 decimal place (3.6 for example)
Now that’s what I call an informative screen, though I have to admit I needed reading glasses to see some of the smaller details. Fortunately the major info you need is clearly visible.

Battery Life
The built in 2000mAh battery lasted a lot longer than I expected, vaping at 55 watts with the 0.2Ω coil lasted me most of the daytime, with the 0.3Ω coil at 40 watts, it easily lasted me all day and night of moderate to high use, which is a lot better than some of my lower wattage pods/aios.
Coils
As mentioned earlier, the PM80 uses the brand new GTX coils. I’m very impressed with both options, if you are a cloud chaser I think you will be amazed at the vapour production from both. At 40 watts, the vapour it produces is impressive, but for me, I will always go for flavour over clouds and I wasn’t disappointed with either coil. Obviously the 0.2Ω option gave a warmer and more intense flavour and would be my coil of choice, but for review purposes I exclusively used the 0.3Ω at 40 watts for a few days and thoroughly enjoyed it. It was only when I went back to the 0.2Ω that I noticed the difference and my preference.
Coil life is also superb. This has been a godsend as I received an advance kit to review prior to mainstream release so I couldn’t get my hands on replacement coils. By the time you read this, they should be released and easy to obtain. I am around three weeks into my 0.2Ω coil and I've hammered it. It has become my tool of choice when leaving the house so it has had a fair amount of use, and the coil still going strong with no loss of flavour.
Conclusion
As you can probably tell by now (if you’ve managed to read this far), I am blown away by the flavour and performance of the Target PM80 kit. Almost everything on this kit is close to perfection, the novelty factor wore off to a degree, but even after finishing the review period, I cannot put this device down. It really is that good.
I am getting fantastic flavour with low power and juice consumption – what’s not to like?
I never thought I would see myself vaping DTL sub-ohm with a pod mod when I have so many other great mods and tanks, but this little beauty has won me over big time. There are so many pros and for days while testing it, I really had to rack my brain to come up with any cons. I have managed to nit pick a couple but I think even the most ardent anti-pod vaper would be surprised by the Target PM80’s performance.
Pros
- High quality construction
- CLEAR Pods! (Finally I can see my juice)
- 2 pods included
- Easy fill
- Zero leaking
- Bright & stylish screen
- Easy navigation
- Easy pod swap
- Smart VW is amazing
- Compact & Ergonomic
- Stylish looks
- FLAVOUR, FLAVOUR & FLAVOUR
- Dedicated Sub Ohm DTL kit
- Huge vapour production (if you like your clouds)
- Airflow is balanced well
- Battery life
- Coil life
Cons
- No USB-C
- Fixed Drip Tip
- No airflow control ring (though I didn’t need it and there are bungs to restrict)
That’s all the cons I could come up with, none of these affect the score or are anywhere near deal breakers.
Final Thoughts
It’s all too easy to get carried away with shiny new gear, especially as there’s always something new around the next corner, and I was all too aware of that while testing this device, but each and every day I used the PM80 I was becoming more and more impressed.
For DTL and sub ohm, I tend to prefer self build RTAs, RDAs or the odd high wattage mesh coil tanks, but this kit has wormed its way into my regular rotation.
Sick of the whole Pod/AIO/Pod/Mod craze? So was I until this – bring it on IF it gets better than this.
Score: 9/10 – Near perfection
(it would have been 9.5 without the small cons)
Thanks again to Vaporesso for providing the Target PM80 for review.
https://store.vaporesso.com/products/target-pm80

Si Davies
Reviewer at POTVMy background is Engineering and Professional Photography. Mostly from POTV users knowledge I learned so much about pretty much all styles of vaping and equipment, Cloud Chasing, Squonking, Mouth To Lung, Direct To Lung, Pods, Mechs, Rebuild-able tanks and atomisers etc, and have experience with many many devices and atomisers, it's become a hobby and enjoy trying out the latest gear. I like to think my reviews are plain speaking and informative without getting too technical, if I have to resort to reading the manual then I don't consider it user friendly!
Join the discussion
Smok Novo Pro Pod Kit
Smok have been busy refining their Novo range and we have a look at the results with the Smok Novo Pro Pod Kit
SKE Crystal 4in1 Pod Kit
The SKE Crystal 4in1 pod kit is a clear winner, read on to see why
Nevoks Feelin AX Kit
Stephen checks out the Nevoks Feelin AX pod kit to see what it has to offer
VOOPOO Argus P2 kit
VOOPOO take things up a notch whilst keeping things small and tidy with the new Argus P2 kit


