Building a Kayfun Lite
Learn how to rebuild the fantastic Kayfun Lite with this article from Blademansw
-
by Toby Kilroy

Share on:

If you don't have a resistance meter, I would highly recommend you purchase one as it makes building so much easier.
(Note this is not a guide on building a microcoil!)
Take three 9 inch lengths of 0.2mm Kanthal and form an L-shape bend in one end of the wires. Grip this in the chuck of a drill. Carefully line up the wires so they are equal and grip the other end firmly with a set of pliers. Slowly start twisting the wires using the drill until the Kanthal has formed a nice even twist along its length.
Once its completed the wire will be very straight and have the appearance of rope. It the Kanthal snaps you have gone to far, you may need to repeat this several times until you get it right, you will soon get a feel for when the wire is ready.
Give the completed twisted wire a good rinse under hot water, then heat it to cherry red using a blowtorch or gas stove.
When you make a coil for a Kayfun, you need both legs to come out on the bottom of the coil, so you actually add another half a turn to your completed coil.
Make 7 wraps of this wire around a 2mm drill bit, and pinch it tight. Remove it from the drill bit and grip it with some strong tweezers and heat it again to cherry red using a blowtorch or gas stove. Make sure you hold it tight until it has cooled.
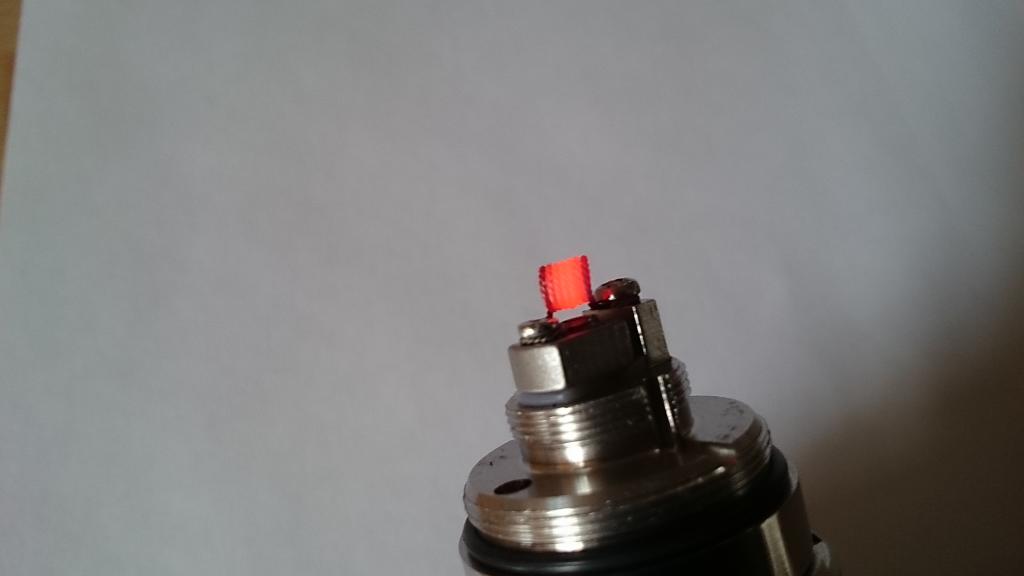
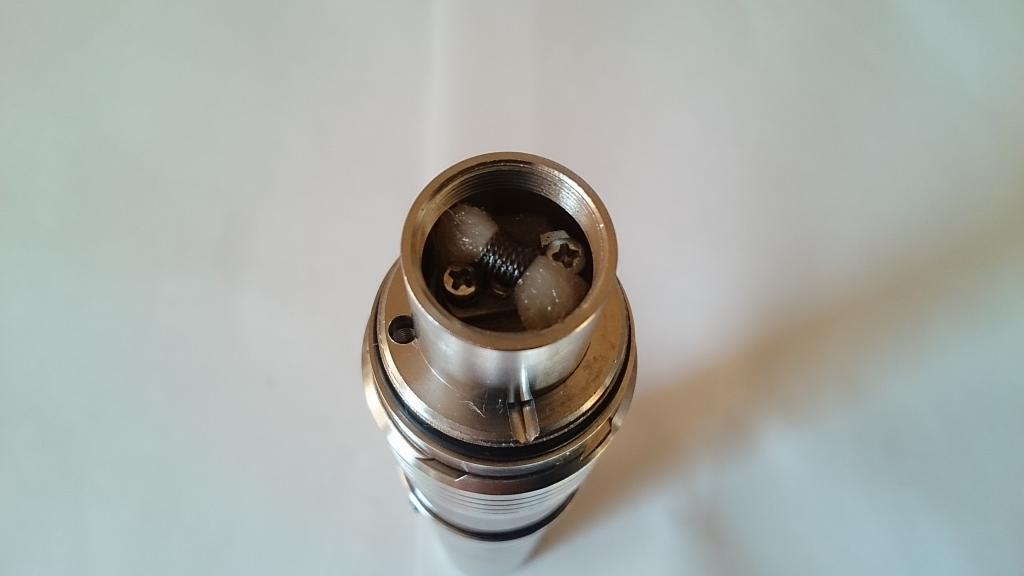
Slide the coil back onto the drill bit, and install it onto the build deck as shown. Note the 45 degree angle of the coil. Some builds require the coil to be parallel to the juice channels, but this coil performs best angled like this. You want the coil to be lifted about 1 - 2 mm above the airhole. Any higher than this and you will loose flavour. Make sure the negative leg doesn't touch the positive post!
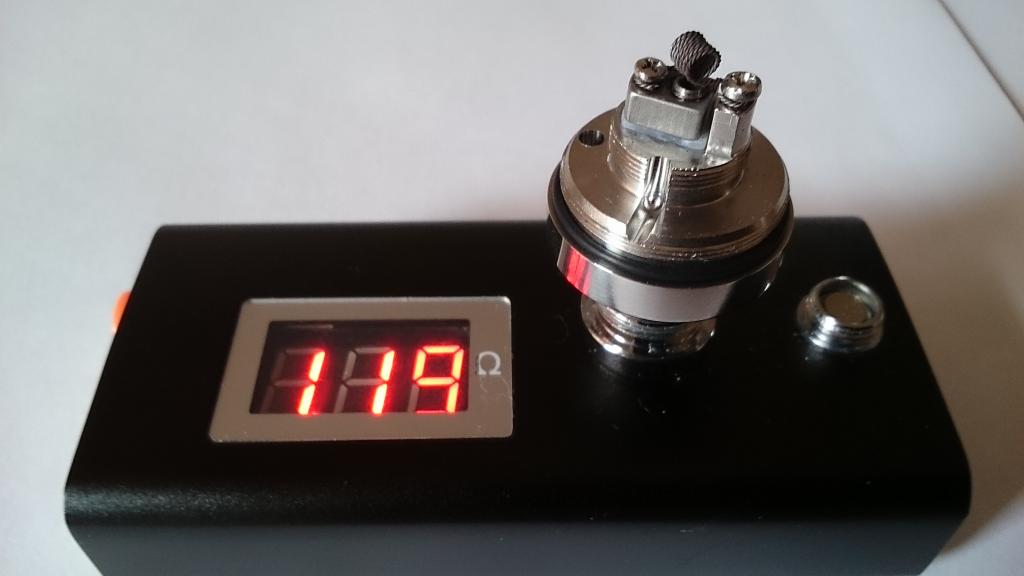
This should come out to around 1.2 ohms. You can now install the base onto a mod and pulse the coil and tighten it further using tweezers as normal to make sure the coil heats evenly from the center.
Once you are happy with the coil, pull a nice fluffy organic cotton wick through the coil as shown.
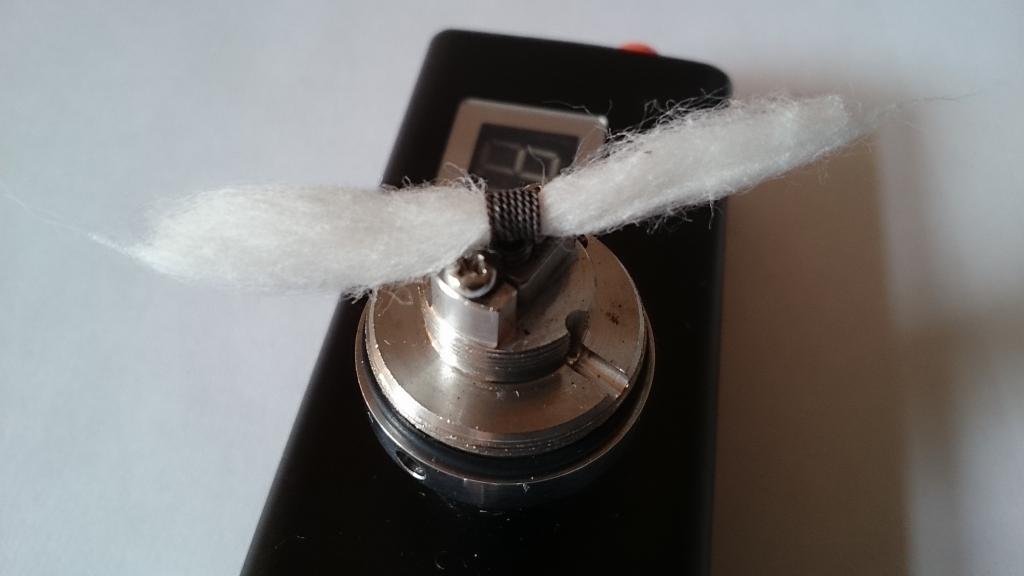
Cut the tail of the wick off level with the outside edge of the base, and juice it up. Pull the tails back down and around as shown in this picture.
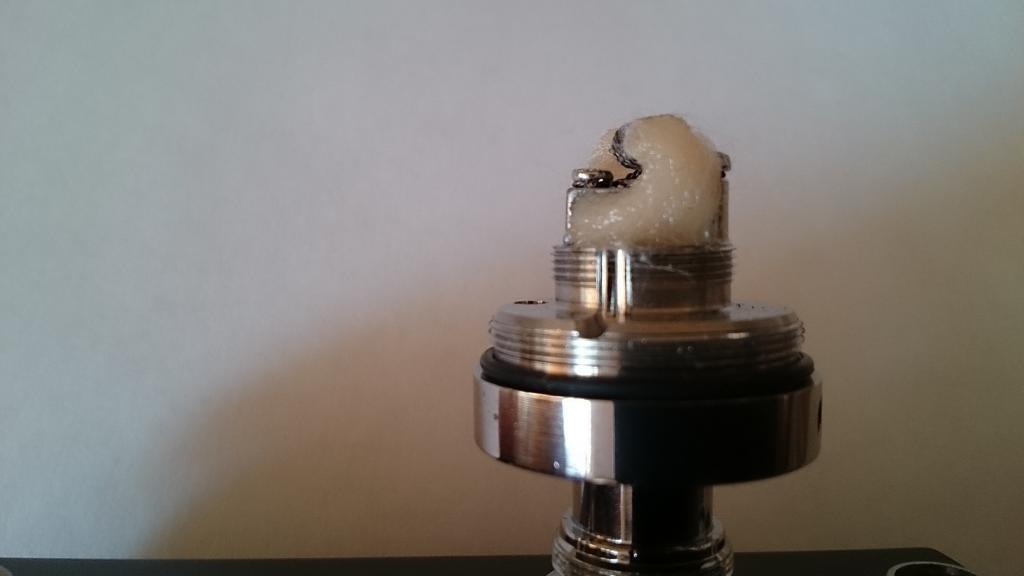
The wick should touch the deck above the juice channels, and be touching the vertical part of the positive and negative posts.
If you are using a particularly thick juice, pull the wick slightly away from the juice channels, but make sure it still touches the deck. For a thin juice you can cover the juice channels.
Carefully screw the bottom chimney section onto the base, making sure you haven't disturbed the wick.
Now add a little bit more juice to the wick and test fire. If you have done everything correctly you should get a lovely cloud of vape.

Screw the top section of the chimney on, install the tank section and the top cap (don't forget the o-ring in the top cap!). When you look through the top of the top cap, you should be able to see the chimney inside the o-ring.
Fill the KFL and enjoy!
Toby Kilroy
Writer at POTVToby has been vaping since early 2012 and has used an array of devices and kit in that time. He sometimes writes up reviews but is often found with his head stuck in pages of code with a confused smile on his face. Toby also helps run his wife's site gethistory.co.uk and has two children. He sometimes fondly remembers having free time and occasionally manages to sneak away to put his head into a good book!
Join the discussion


The POTV Guide To Batteries
The POTV guide to batteries aims to answer all of your questions regarding lithium-ion cells for vaping
-
by Dave Cross


The POTV Guide to the Politics of Vaping
This guide looks at the laws that control what, how and where we vape as well as introducing the groups, charities and organisations that work to influence government policy
-
by Dave Cross

Can Pregnant Women Use Ecigs?
There are compelling reasons to quit smoking when pregnant, but should expectant mothers switch to vaping?
-
by Dave Cross
POTV’s Vape Tank and Atomiser Guide
With hundreds of options to choose from, how can anyone be expected to know what is a good buy when it comes to tanks?
-
by Dave Cross