What's new

My journey into the world of coil building

Right then.. here goes!

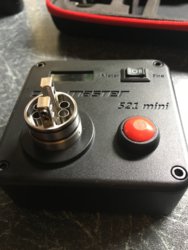
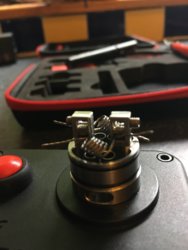
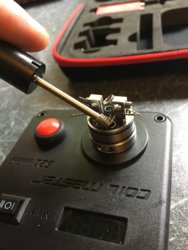
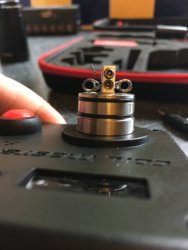
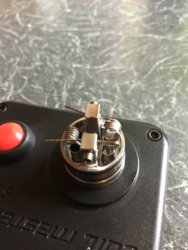
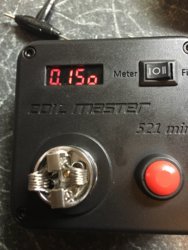
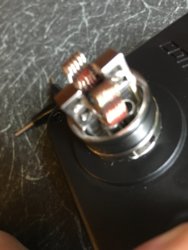
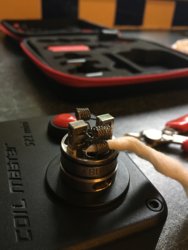
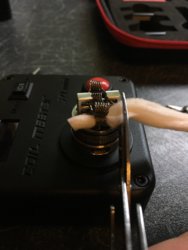
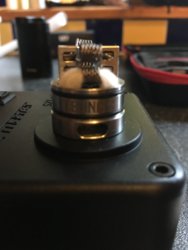
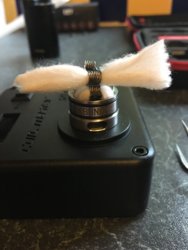
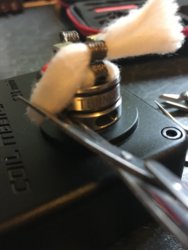
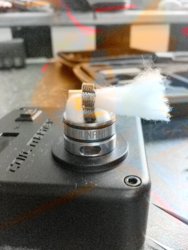
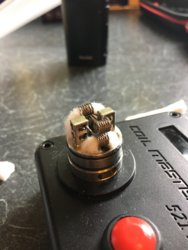
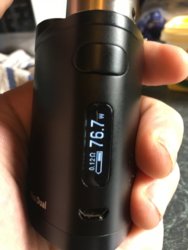
So some pictures of the building itself, this is coming in on the ohmmeter at 0.15 but is showing as .12 on the mod..

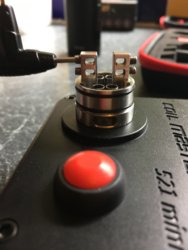
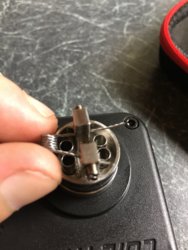
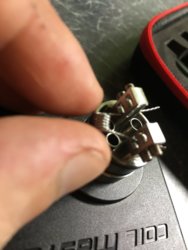
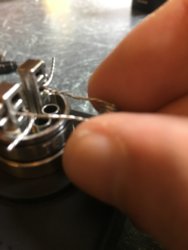
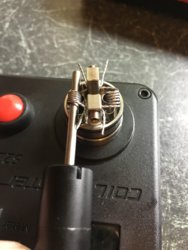
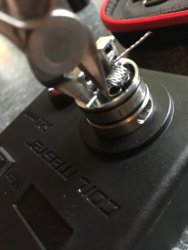
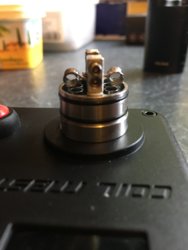
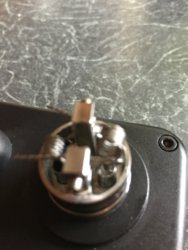
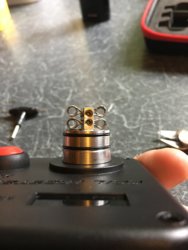
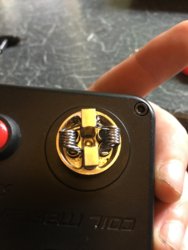
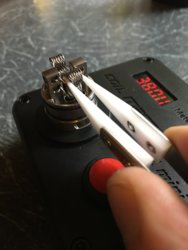
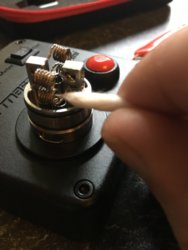
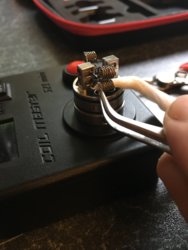
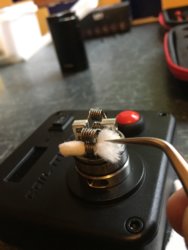
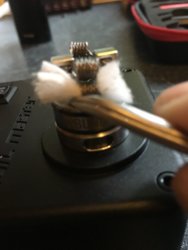
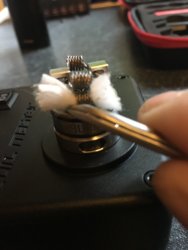
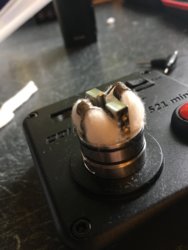
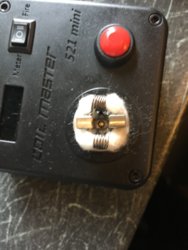
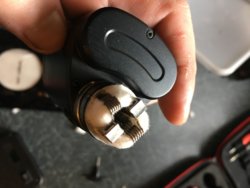
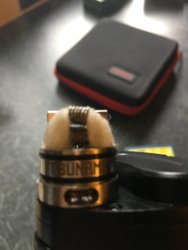
So load the base onto the ohmmeter, then undo the grub screws so there is loads of room for the wires to go through... then start building the bottom two coils.. I get them in place just above the airflow holes then tighten down the grubs... doesn't matter if they don't sit straight as you can adjust them once in place by putting the jig back in and moving them and straighten them up..
 

Attachments

  • IMG_1085.JPG
    IMG_1085.JPG
    1.6 MB · Views: 190
  • IMG_1086.JPG
    IMG_1086.JPG
    1.2 MB · Views: 241
  • IMG_1087.JPG
    IMG_1087.JPG
    1.3 MB · Views: 219
  • IMG_1088.JPG
    IMG_1088.JPG
    1.1 MB · Views: 187
  • IMG_1091.JPG
    IMG_1091.JPG
    1.2 MB · Views: 163
  • IMG_1092.JPG
    IMG_1092.JPG
    1.4 MB · Views: 202
  • IMG_1093.JPG
    IMG_1093.JPG
    1.6 MB · Views: 210
  • IMG_1094.JPG
    IMG_1094.JPG
    1.7 MB · Views: 214
  • IMG_1095.JPG
    IMG_1095.JPG
    1.4 MB · Views: 207
Then snip of the tail ends and start on the top... same idea as before!
 

Attachments

  • IMG_1096.JPG
    IMG_1096.JPG
    1.5 MB · Views: 197
  • IMG_1097.JPG
    IMG_1097.JPG
    1.2 MB · Views: 154
Repeat all the other steps until your deck looks like this...
 

Attachments

  • IMG_1102.JPG
    IMG_1102.JPG
    1.3 MB · Views: 243
  • IMG_1103.JPG
    IMG_1103.JPG
    1.3 MB · Views: 216
Then you can check the resistance on the ohmmeter as you can see a nice 1.5 ohms
 

Attachments

  • IMG_1108.JPG
    IMG_1108.JPG
    2.1 MB · Views: 162
Then you can start pulsing the coils to check for hotspots etc... if you see any give the coils a squeeze with the ceramic pliers.. with a little bit of fiddling about it will be nice and even...
 

Attachments

  • IMG_1105.JPG
    IMG_1105.JPG
    1.3 MB · Views: 193
  • IMG_1106.JPG
    IMG_1106.JPG
    1.4 MB · Views: 157
  • IMG_1107.JPG
    IMG_1107.JPG
    1.2 MB · Views: 191
Now it's time to put some cotton wick in... with a quad build I tend to leave the bottom ones a lot shorter than the top coils, this allows the bottom coils wick of the upper coils wick.. just remember to fluff the cotton up nicely before tucking into the juice well!
 

Attachments

  • IMG_1109.JPG
    IMG_1109.JPG
    1.9 MB · Views: 198
  • IMG_1110.JPG
    IMG_1110.JPG
    1.5 MB · Views: 202
  • IMG_1111.JPG
    IMG_1111.JPG
    1.7 MB · Views: 207
  • IMG_1112.JPG
    IMG_1112.JPG
    1.4 MB · Views: 213
  • IMG_1113.JPG
    IMG_1113.JPG
    1.6 MB · Views: 147
  • IMG_1114.JPG
    IMG_1114.JPG
    1.5 MB · Views: 190
  • IMG_1115.JPG
    IMG_1115.JPG
    1.3 MB · Views: 207
  • IMG_1117.JPG
    IMG_1117.JPG
    1.3 MB · Views: 201
  • IMG_1118.JPG
    IMG_1118.JPG
    1.4 MB · Views: 197
  • IMG_1119.JPG
    IMG_1119.JPG
    1.4 MB · Views: 188
  • IMG_1120.JPG
    IMG_1120.JPG
    1.5 MB · Views: 175
  • IMG_1121.JPG
    IMG_1121.JPG
    1.5 MB · Views: 203
  • IMG_1122.JPG
    IMG_1122.JPG
    1.4 MB · Views: 156
  • IMG_1123.JPG
    IMG_1123.JPG
    2.5 MB · Views: 148
  • IMG_1124.JPG
    IMG_1124.JPG
    1.5 MB · Views: 151
  • IMG_1125.JPG
    IMG_1125.JPG
    1.3 MB · Views: 139
  • IMG_1126.JPG
    IMG_1126.JPG
    1.4 MB · Views: 156
Then onto the mod and time to juice her up!! We want to saturate it, all over the coils wick and I drip juice into the bottom until it stops wicking..
 

Attachments

  • IMG_1130.JPG
    IMG_1130.JPG
    1.2 MB · Views: 207
  • IMG_1133.JPG
    IMG_1133.JPG
    1.2 MB · Views: 197
  • IMG_1134.JPG
    IMG_1134.JPG
    1.2 MB · Views: 217
  • IMG_1135.JPG
    IMG_1135.JPG
    1.1 MB · Views: 189
  • IMG_1137.JPG
    IMG_1137.JPG
    1 MB · Views: 220
And that's how I make a quad coil very low resistance build... this dinner ladies lemon tart taste amazing on it, and the vapour is smooth and dense...

Hope this will help someone!!
 
Back
Top Bottom