

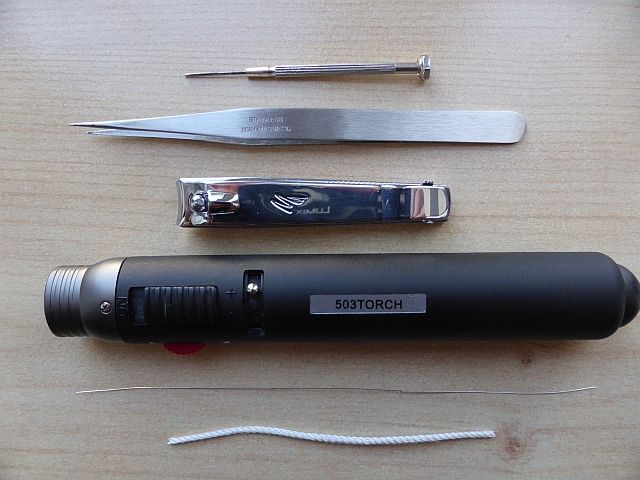
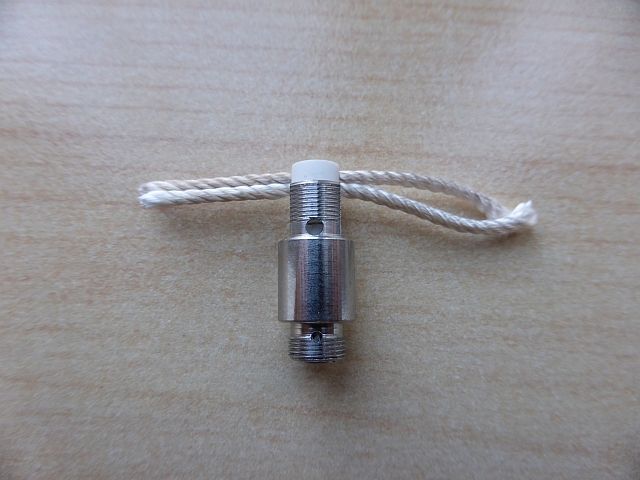
Tools required:
1 x 1mm flat head screwdriver ( i use this for making adjustments to the coil)
1 x Tweezers (for holding the wick when torching)
1 x Nail clippers (for cutting the wick)
1 x Blowtorch or Lighter (for torching the wick)
1 x Res/Non res wire of your chosen resistance
1 x 2mm Silica wick around 10cm in length
Preparation for the Sophia:
Clean the Sophia in warm water and dry thoroughly.
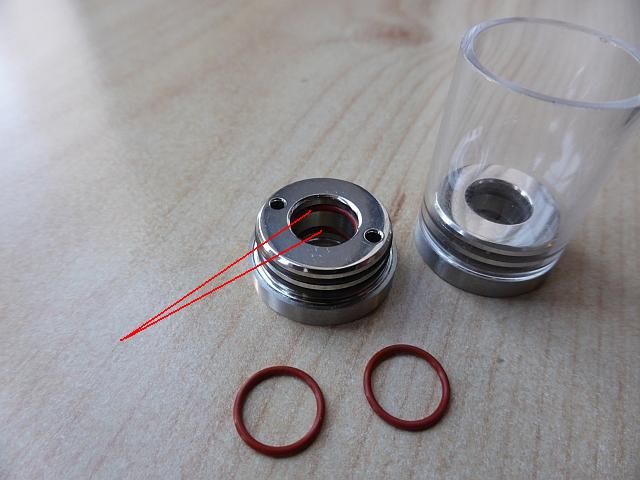
Preparation for the SnP tank:
Clean the SnP tank in warm water and dry thoroughly.
Remove the top part of the SnP tank and replace the 2 x inner brown hard Viton© food grade internal O-rings 9 x 1 mm and replace them with 2 x red soft Viton© food grade internal O-rings 9 x 1 mm, this will help when trying to turn the juice control on the Sophia as the red o-rings have less grip.
Before starting make sure your hands are clean as anything on them like grease etc will be going onto the wire and wick.....you don't want that.
Building the Sophia:
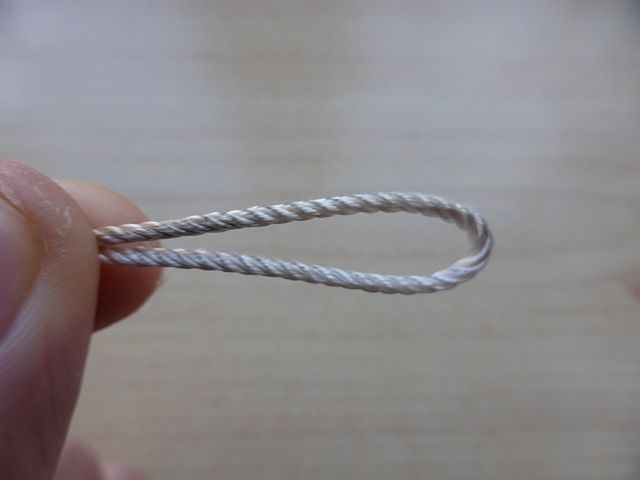
Step 1: Hold the 2mm silica with your tweezers and torch the wick using your blowtorch or lighter to burn of any impurities:

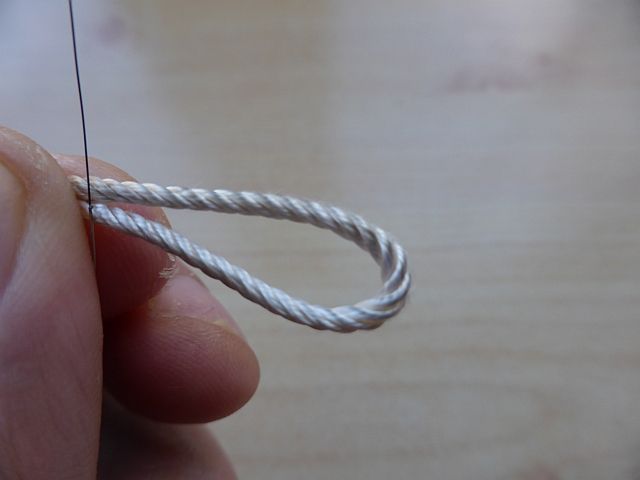
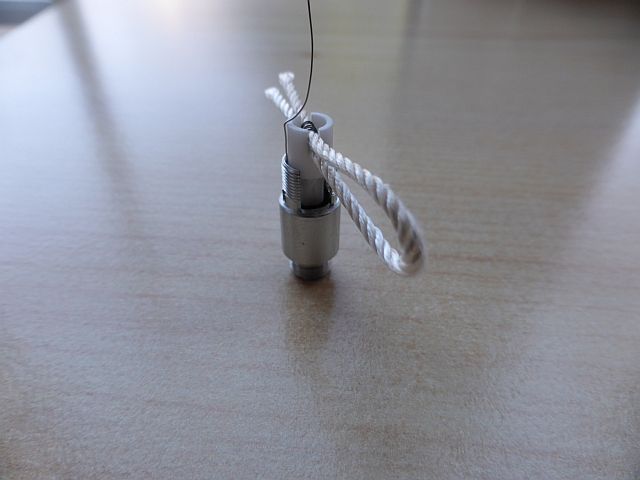
Step 2: Fold the 2mm silica wick in half:
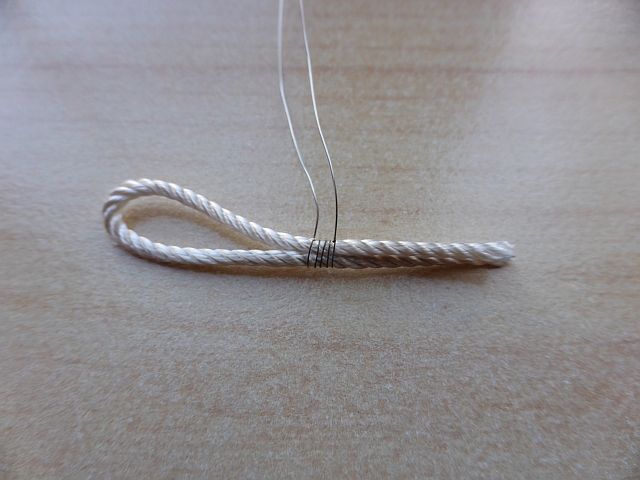
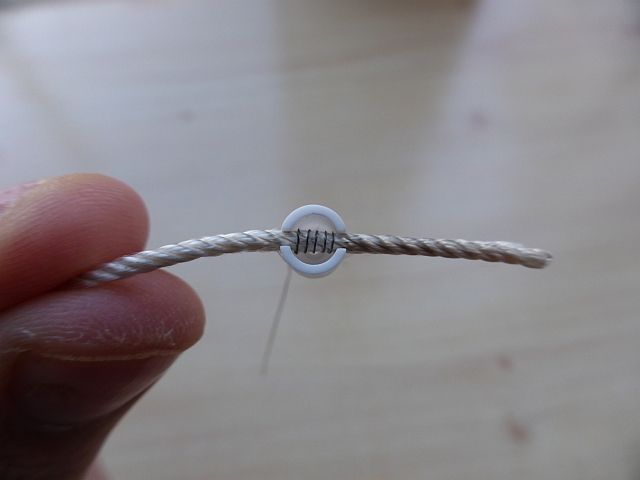
Step 3: Hold the wick just before halfway and place your coil onto the wick with one leg facing downwards and the beginning of the res part of the wire starting at the bottom wick:
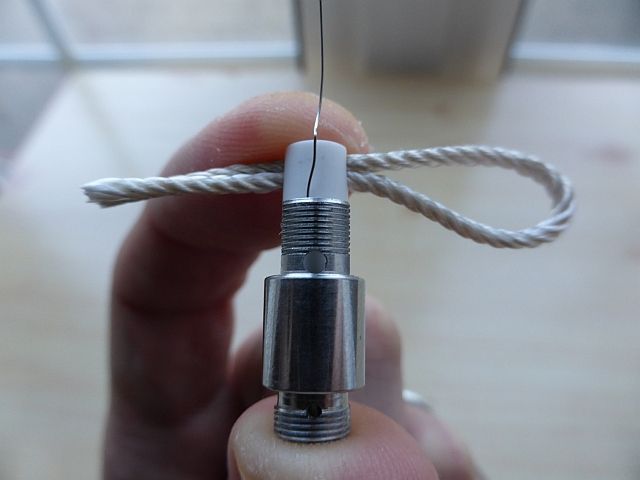
Step 4: Wrap your coils around the wick until there is no more res wire left to wrap (not to tight and not loose):
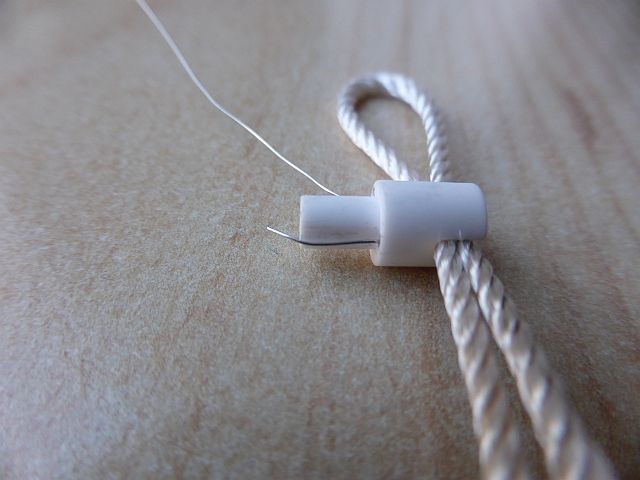
Step 5: Cut one of the legs of the res/non res wire shorter than the other, this will help when fitting the wires though the holes in the ceramic:
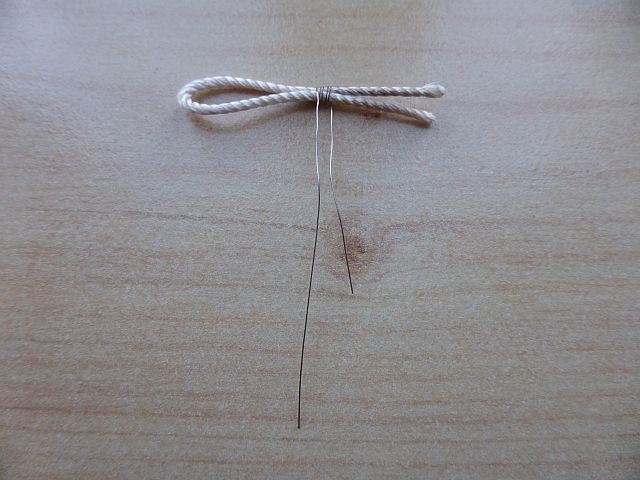
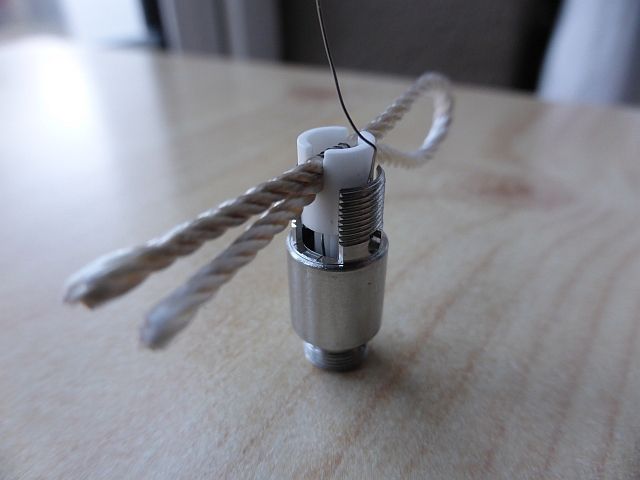
Step 6: Whilst holding the wick/coil in your fingers with the legs of the coils facing downwards thread both legs through the holes, start with the longest leg first:
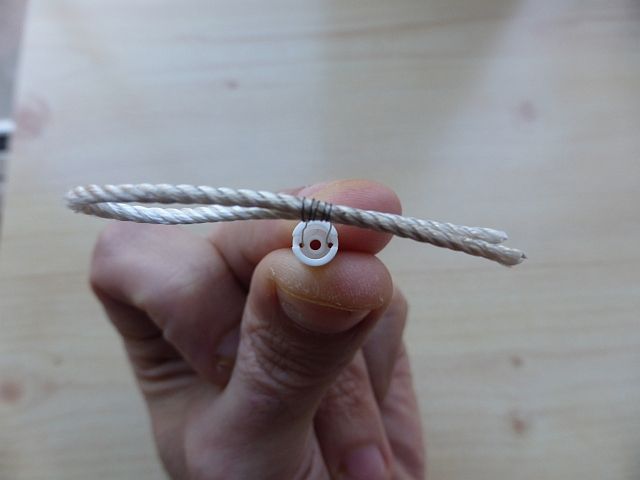
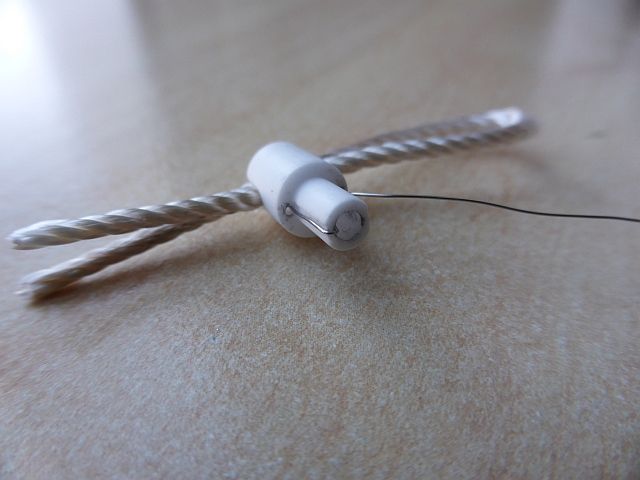
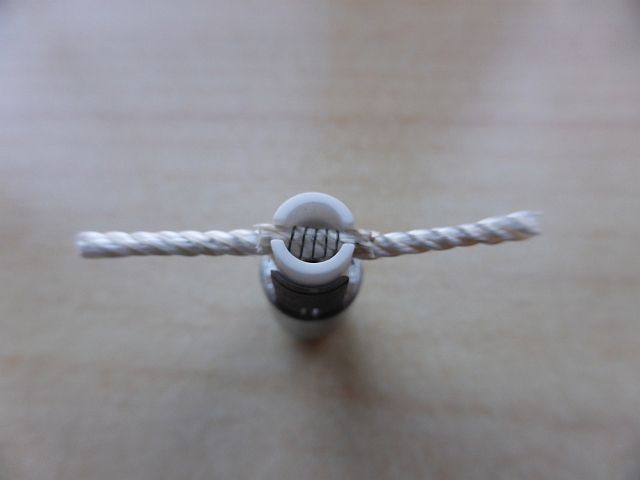
Step 7: Once you have threaded the legs through the ceramic holes pull both legs so that it pulls the wick right down to the bottom of the ceramic slits:
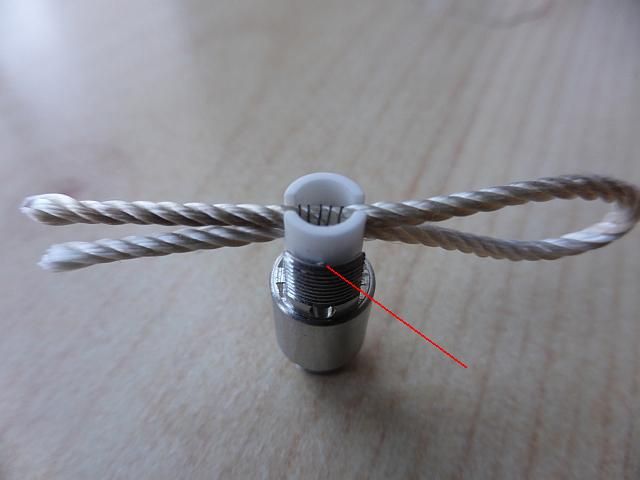
Step 8: Tidy up the coils to make them all evenly spaced:
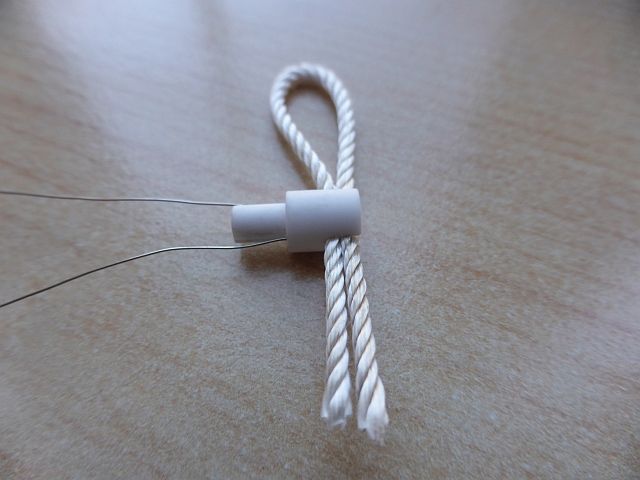
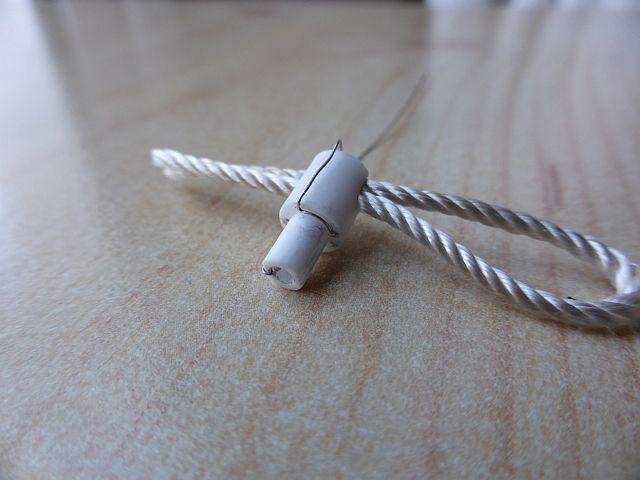
Step 9: Keep an eye on the wick/coil to make sure you have not done it too tight or too loose when doing the following, Get one of the legs and you need to feed it into the center hole of the ceramic, you only want it to be about 2-3mm inside you you will have to cut the wire to size (this will be your positive wire) :
Step 10: Keep an eye on the wick/coil to make sure you have not done it too tight or too loose when doing the following, Get the remaining leg and run it under the ridge of the ceramic and then run the wire along the ridge to halfway so it's between the two slits either side and then bend back up over the ridge (this will be your negative wire) :
Step 11: Place the ceramic into the Sophia base (wicks should be dead center with the gaps of the sophia base) when all in place hold your thumb on the base of the sophia and your finger on the top of the ceramic and using your thumb and finger togethor push the ceramic down until it stops (you have to give it quite a push but don't over do it) :
Step 12: Wiggle of the remaining negative wire for a clean snap:
Step 13: Cut the loop of the wick so you end up with two loose wicks either side:
Step 14: Trim the top wick (not the bottom) to the edges of the ceramic:
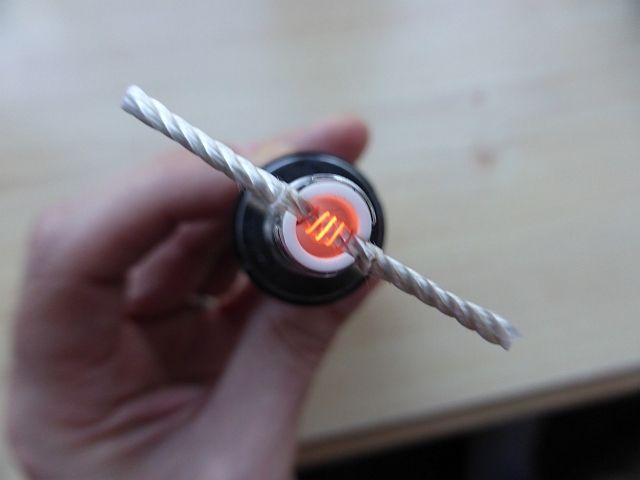
Step 15: Have a check of the coil and give it a tidy up if any of it has moved then connect the base onto a device and check your resistances are fine then do some dry burns too make sure all coils are heating up evenly, if they ain't keep adjusting until they do:
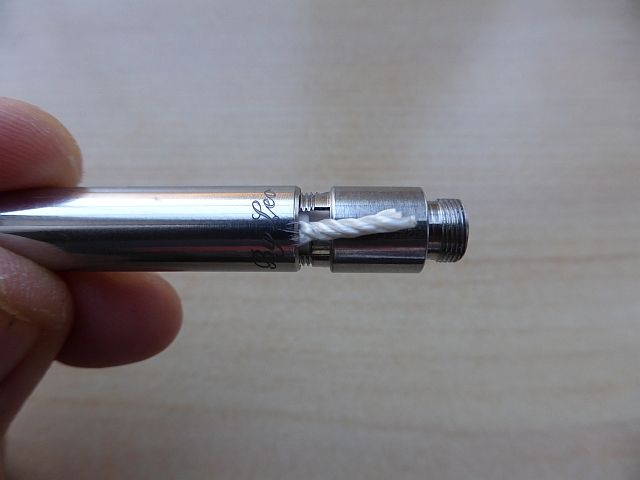
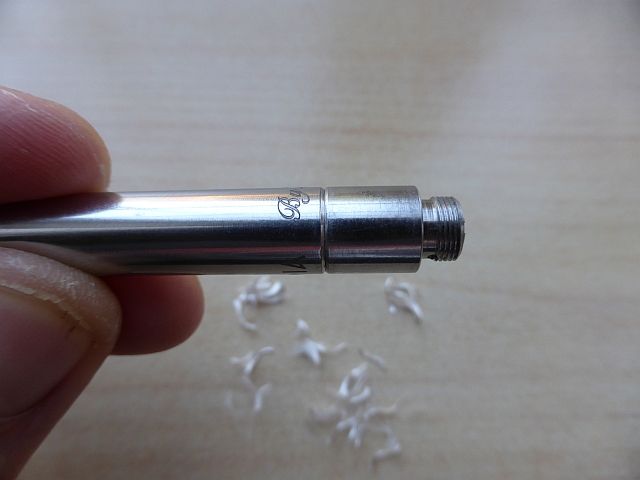
Step 16: Whilst holding the base and wicks in place screw the top part of the Sophia onto the base all the way down, the top part will cut the remaining wick off as it has a internal cutter, if it does not give a clean cut then just un-screw a little and go back and forth until all wick has been removed:
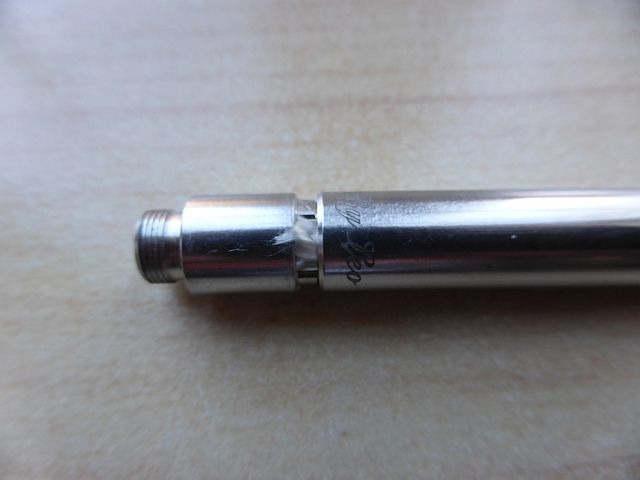
Step 17: Open up the the top part of the sophia a bit and blow away and hidden strands of wick that the cutter may of left behind inside and close back up again (Optional: wet the wick with your chosen juice and test again for hot spots, if all is good put the top part back on and screw all the way until closed) :
Step 18: Lubricate the o-rings on the SnP tank with your chosen juice.
Step 19: Slide the sophia into the bottom of the SnP until all in place.
Step 20: Fill up the SnP tank using one of the holes on top.
Open up the juice control on the Sophia slowly and you should see air bubbles, i normally open around 3 full turns but it all depends what thickness juice you are using, leave it to rest a bit and do some dry pulls and you should be good to go.
Hope this helps
1 x 1mm flat head screwdriver ( i use this for making adjustments to the coil)
1 x Tweezers (for holding the wick when torching)
1 x Nail clippers (for cutting the wick)
1 x Blowtorch or Lighter (for torching the wick)
1 x Res/Non res wire of your chosen resistance
1 x 2mm Silica wick around 10cm in length
Preparation for the Sophia:
Clean the Sophia in warm water and dry thoroughly.
Preparation for the SnP tank:
Clean the SnP tank in warm water and dry thoroughly.
Remove the top part of the SnP tank and replace the 2 x inner brown hard Viton© food grade internal O-rings 9 x 1 mm and replace them with 2 x red soft Viton© food grade internal O-rings 9 x 1 mm, this will help when trying to turn the juice control on the Sophia as the red o-rings have less grip.
Before starting make sure your hands are clean as anything on them like grease etc will be going onto the wire and wick.....you don't want that.
Building the Sophia:
Step 1: Hold the 2mm silica with your tweezers and torch the wick using your blowtorch or lighter to burn of any impurities:
Step 2: Fold the 2mm silica wick in half:
Step 3: Hold the wick just before halfway and place your coil onto the wick with one leg facing downwards and the beginning of the res part of the wire starting at the bottom wick:
Step 4: Wrap your coils around the wick until there is no more res wire left to wrap (not to tight and not loose):
Step 5: Cut one of the legs of the res/non res wire shorter than the other, this will help when fitting the wires though the holes in the ceramic:
Step 6: Whilst holding the wick/coil in your fingers with the legs of the coils facing downwards thread both legs through the holes, start with the longest leg first:
Step 7: Once you have threaded the legs through the ceramic holes pull both legs so that it pulls the wick right down to the bottom of the ceramic slits:
Step 8: Tidy up the coils to make them all evenly spaced:
Step 9: Keep an eye on the wick/coil to make sure you have not done it too tight or too loose when doing the following, Get one of the legs and you need to feed it into the center hole of the ceramic, you only want it to be about 2-3mm inside you you will have to cut the wire to size (this will be your positive wire) :
Step 10: Keep an eye on the wick/coil to make sure you have not done it too tight or too loose when doing the following, Get the remaining leg and run it under the ridge of the ceramic and then run the wire along the ridge to halfway so it's between the two slits either side and then bend back up over the ridge (this will be your negative wire) :
Step 11: Place the ceramic into the Sophia base (wicks should be dead center with the gaps of the sophia base) when all in place hold your thumb on the base of the sophia and your finger on the top of the ceramic and using your thumb and finger togethor push the ceramic down until it stops (you have to give it quite a push but don't over do it) :
Step 12: Wiggle of the remaining negative wire for a clean snap:
Step 13: Cut the loop of the wick so you end up with two loose wicks either side:
Step 14: Trim the top wick (not the bottom) to the edges of the ceramic:
Step 15: Have a check of the coil and give it a tidy up if any of it has moved then connect the base onto a device and check your resistances are fine then do some dry burns too make sure all coils are heating up evenly, if they ain't keep adjusting until they do:
Step 16: Whilst holding the base and wicks in place screw the top part of the Sophia onto the base all the way down, the top part will cut the remaining wick off as it has a internal cutter, if it does not give a clean cut then just un-screw a little and go back and forth until all wick has been removed:
Step 17: Open up the the top part of the sophia a bit and blow away and hidden strands of wick that the cutter may of left behind inside and close back up again (Optional: wet the wick with your chosen juice and test again for hot spots, if all is good put the top part back on and screw all the way until closed) :
Step 18: Lubricate the o-rings on the SnP tank with your chosen juice.
Step 19: Slide the sophia into the bottom of the SnP until all in place.
Step 20: Fill up the SnP tank using one of the holes on top.
Open up the juice control on the Sophia slowly and you should see air bubbles, i normally open around 3 full turns but it all depends what thickness juice you are using, leave it to rest a bit and do some dry pulls and you should be good to go.
Hope this helps


