(including RBA Build Tutorial)
A bought with my own money review.
Current price, cheapest I have found for the 3ml is under £20 ($25 USD).
https://www.fasttech.com/p/9699197
Official Pasito spec page (definitely worth a browse for any details I may have missed)
https://smoant.com/pasito-rebuildable-pod-kit
In a nutshell & Rating
The Pasito is a superb entry into the AIO (Pod?) market and the best I have tried to date, the RBA makes it even better. A benchmark that will take some beating – A must buy.
(Read on if you want to know why).
Rating 9/10 – Game Changer
The highest mark I can give, as I don’t believe in 10/10. Perfection is subjective.
POD/AIO/MOD??? – Blurred lines
I would put this into the AIO category, but technically you could class it as a Mod & Tank with changeable coils. The lines get blurrier with the evolution of Pods, which has led to devices like the Pasito – call it a Catfart for all I care! It’s a Compact vape device and I like the way the market is evolving.
Main Features
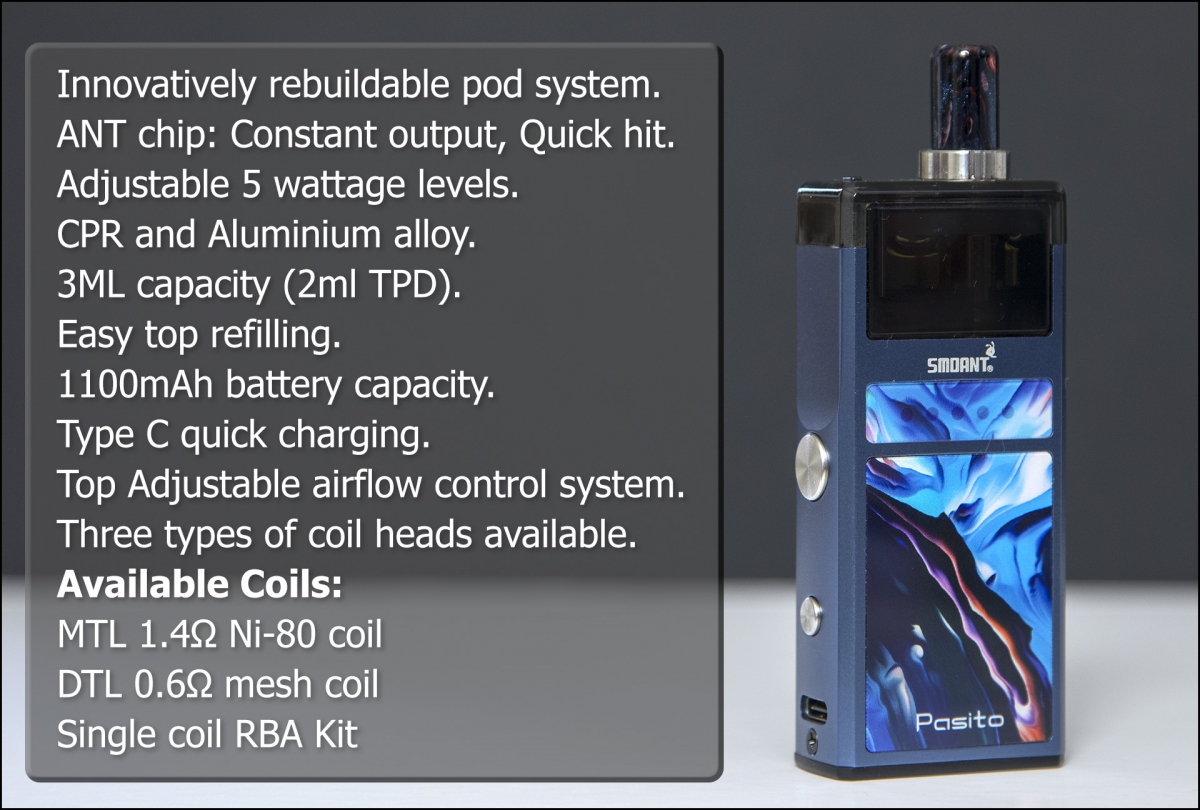
The Pasito is feature packed for such a small device, here’s a few:
Unboxing and contents
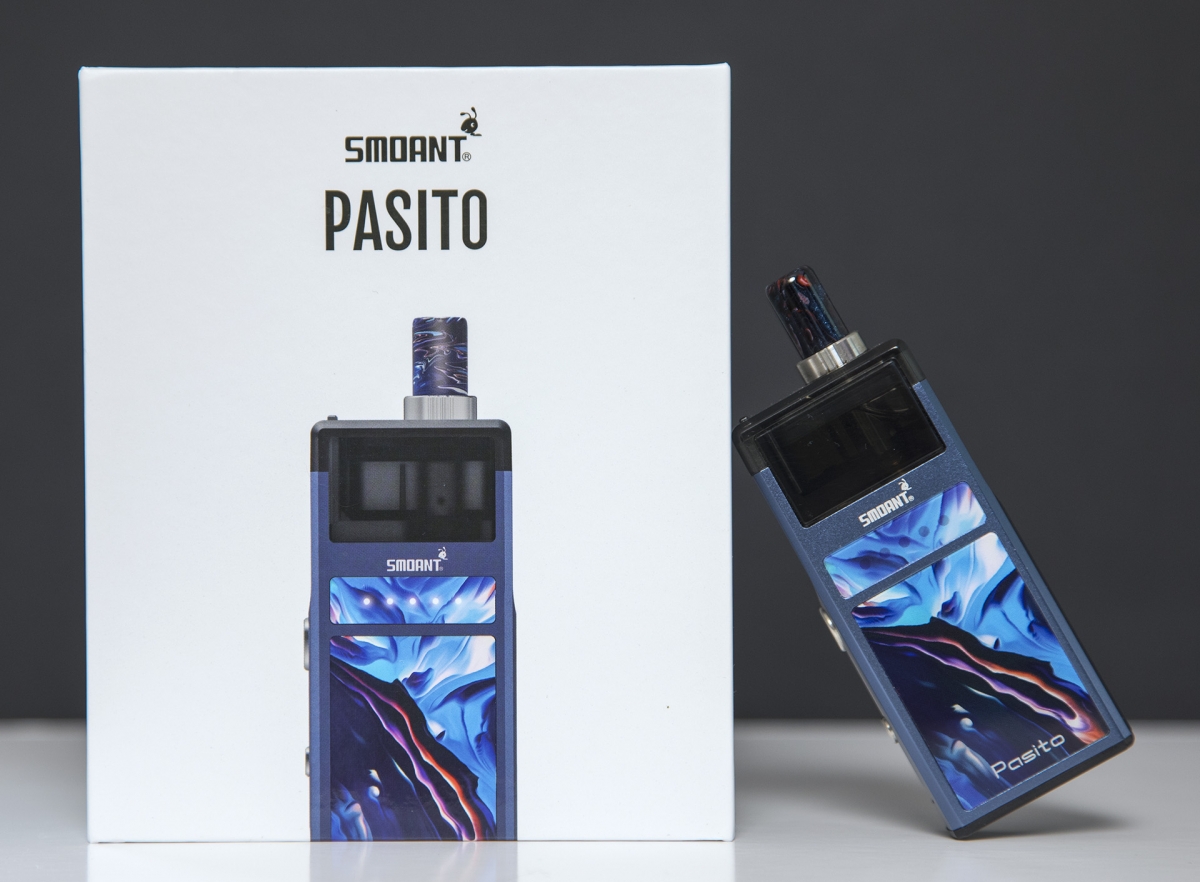
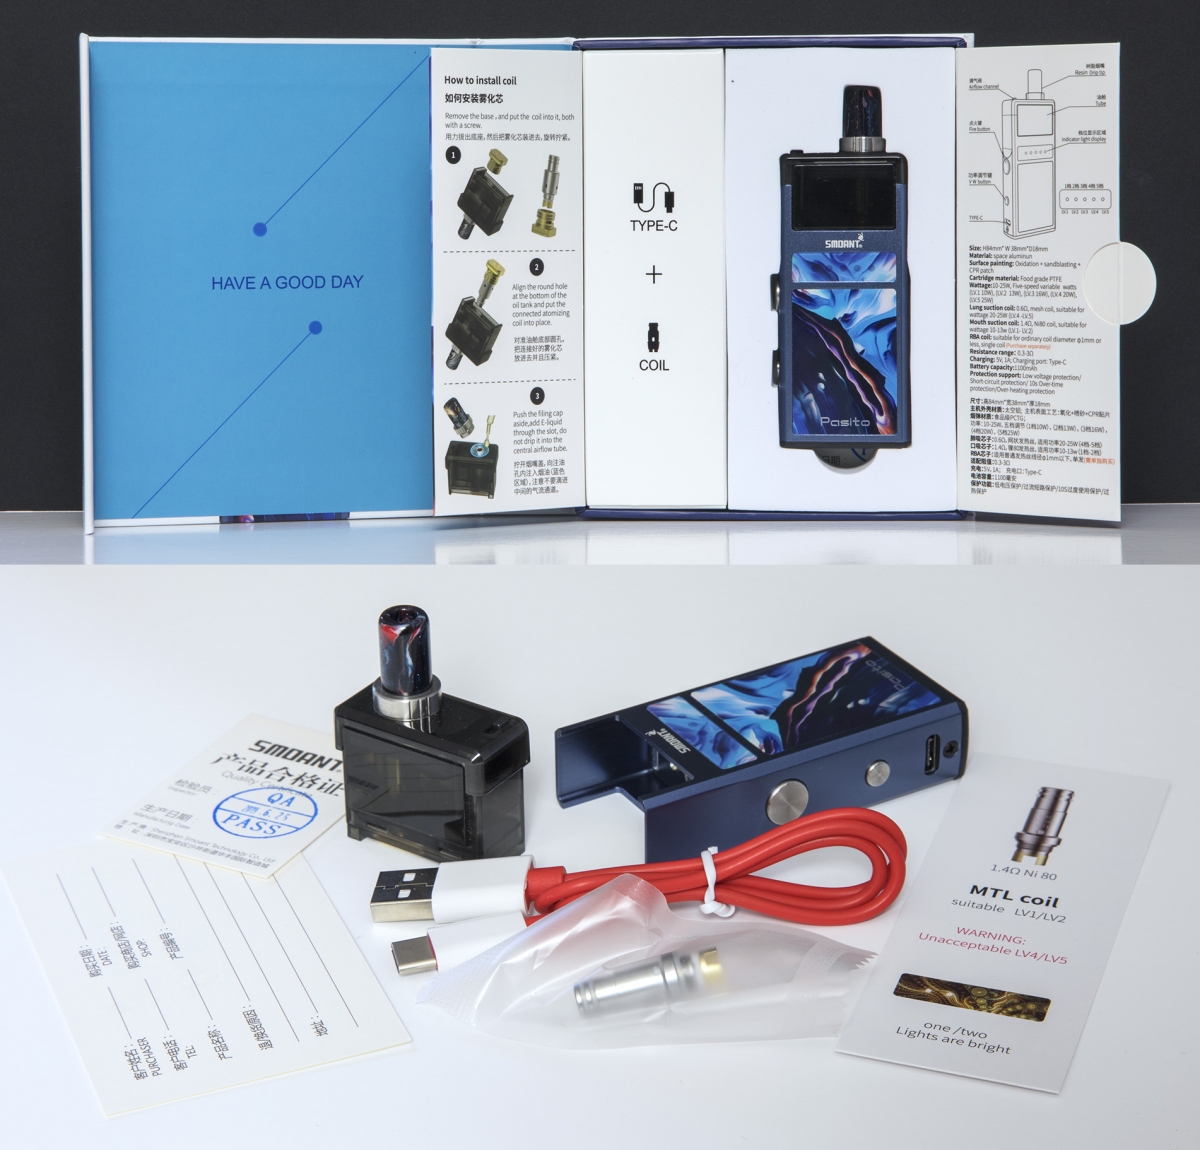
Right off the bat you know you’ve bought something special; the box is one of the best presented packages I have seen, with a magnetic flap opening up to reveal a bi-fold which in turn reveals the Pasito. Then there is some printed information inside the flaps and a box containing the welcome USB-C cable, an extra coil and some cards you won’t bother to read (well I didn’t).
Very impressive over all, though it would have been nice if the RBA was included.
Contents
- 1 x Pasito mod
- 1 x Pasito cartridge
- 1 x MTL 1.4Ω Ni-80 coil
- 1 x DTL 0.6Ω mesh coil
- 1 x Type-C charging cable
- 1 x Coil warning card
- 1 x Certificate card
- 1 x Warranty card
- 1 x User manual
First Impressions
First impressions were already good with the unboxing, onto the actual Pasito itself! It is a very nice bit of kit indeed, solid, well designed, and the magnetic connection makes removing and replacing the coil a breeze. The styling has met a mixed reception, personally I love it. Smoant claim the following:
“INNOVATIVE CPR TECHNOLOGY
CPR was used as an design materiał which result in more colorful and durable stunning finish. No finger print.”
Gramma aside I have no clue what CPR is?
- Cardiopulmonary Resuscitation?
- Colourful Printed Resin?
- Cow Piss Reaction?
My best guess is the 2nd option but who knows? That aside, Smoant have reacted and released a carbon fibre styled addition that should satisfy the haters. After briefly admiring the mod, I put it on charge via the speedy and welcome USB type C with the supplied cable. I then proceeded to prime the coil in the pod section. It pulls out from the base, then simply unscrew the coil from the connector, all very easy. Then I primed the coil with a few drops of my favourite Nic Salt juice, and screwed it back in and pushed it back together.
To fill the pod, you unscrew the drip tip section and open to pour your ejuice without airlocks. Though it is a dark plastic, it’s still easy to see the juice level. Once filled, replace the drip tip and leave it 15 minutes to soak in and then it’s ready to vape.
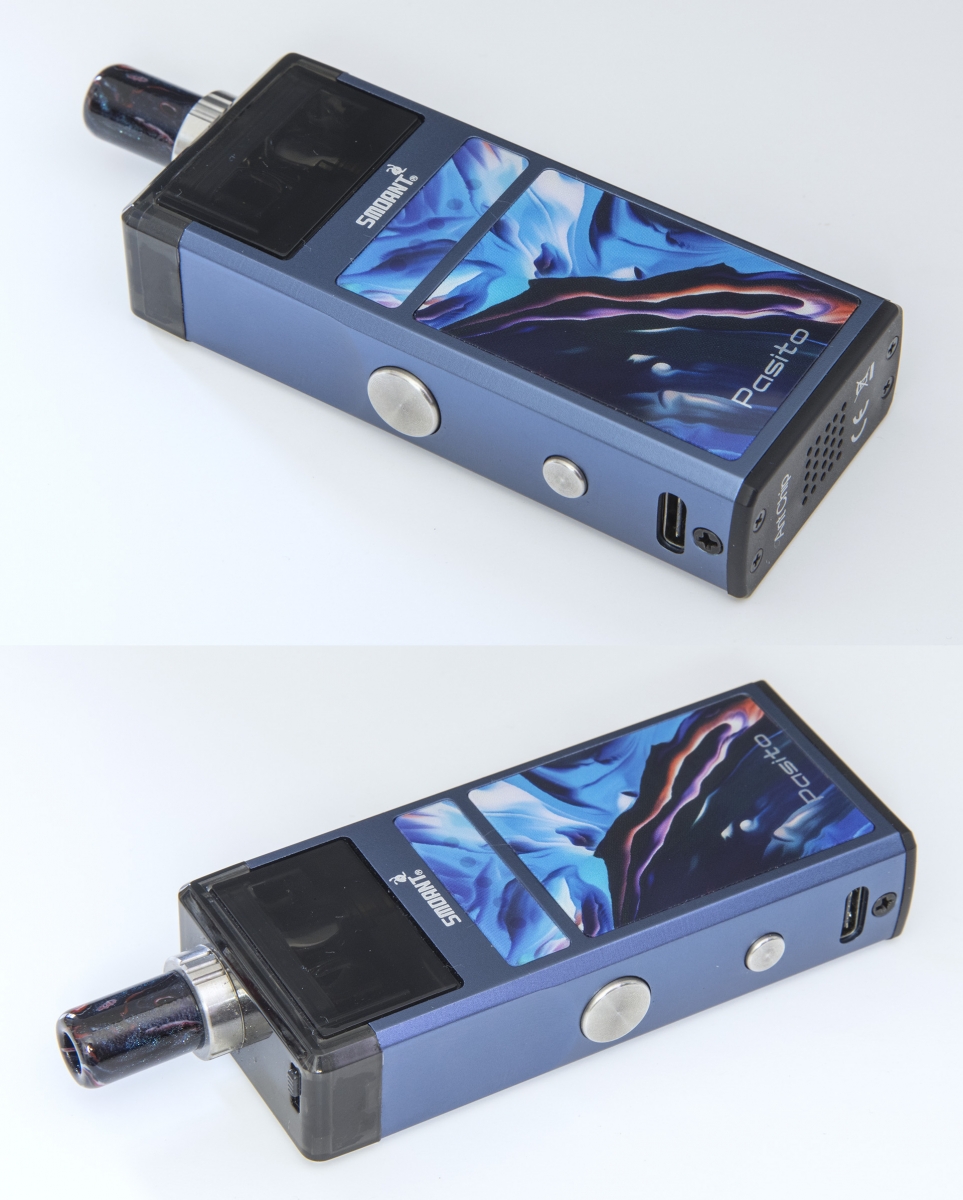
The Pasito hasn’t ignored one of the most desired features of an AIO, and that’s adjustable airflow. This is handled with a convenient little slider on the top of the pod section. This suits MTL (Mouth To Lung) and DTL (Direct To Lung). Although it’s a little fiddly to adjust, it is a welcome feature and a pro for me. It's size isn’t the smallest, but it’s still nicely compact and very pocket friendly:
- 102 x 38 x 18mm
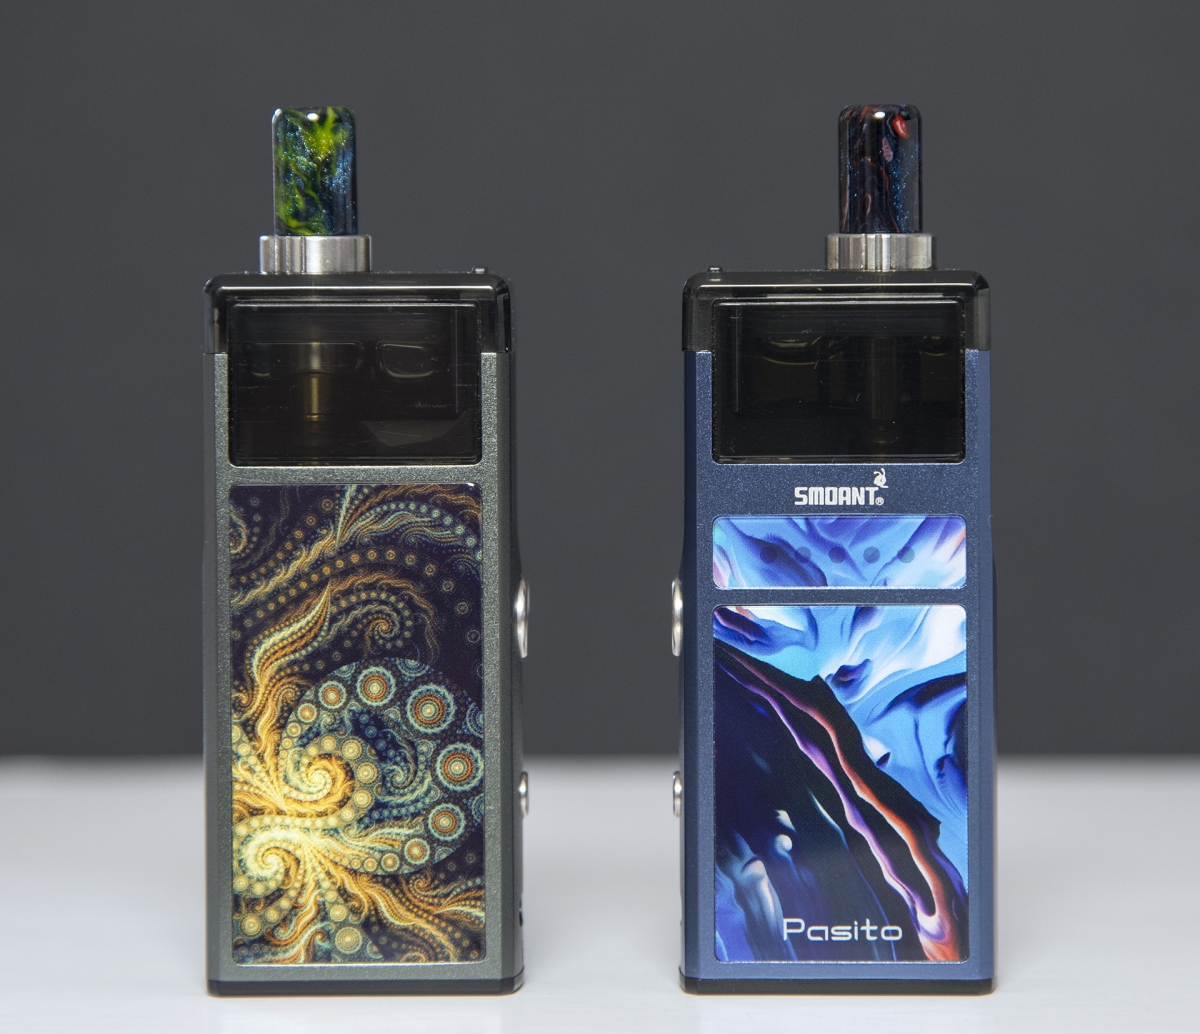
Features, coil review and operations
On the one side is the fire button, USB-C port and a power adjustment button. The fire button is strangely set dead centre, which felt weird at first but I soon got used to i. I found it easy to fire in multiple holding positions with fingers or thumb, though it protrudes, it never ‘pocket fired’, and has a nice resistance to it. The power setting button adjusts 5 power levels from soft to hard, the lowest power setting suited me but you notice a nice warm vape as you increase the power:
Power Wattage Increments: 10 – 13 – 16 – 20 – 25 watts.
At the base there are plenty of ventilation holes, the opposite side to the fire button is blank, the rear is simply a CPR panel with no functions. The front has two separate CPR panels, the top one has 5 LED’s which serve a few functions:
- Power Level – click the power button to increase the desired power and you will see each dot light up accordingly.
- Battery Status – pressing the fire button will light up all five lights on full charge and decrease how many dots display as the battery level drops.
- Battery Charge Level – Each dot reflects the charge level: 20% - 40% - 60% - 80% - 100%
Pressing the Fire button 5 times puts the device in standby mode and 5 clicks to turn it back on.
That’s all there is to it, very intuitive and easy to operate. As mentioned earlier, the pod has a magnetic connection and pulls out with ease, but still holds it firm. You can shake the hell out of it and it will stay in place.
The ‘pod’ cartridge has a propriety slip on drip tip which can be replaced with other Pasito tips. The bore is a compromise to meet the needs of both MTL and DTL users and to be fair, it’s actually good for both. There is also a tiny plastic slider to control the airflow, wide open gives a restrictive DTL draw, almost closed gives a nice MTL draw.
Battery life is excellent and far better than I expected from an 1100 mAh battery, and it also charges pretty fast even at its 1amp charge rate. It should last the day at moderate usage.
Coils
- MTL: 1.4ohm Ni-80 coil,
- DTL: 0.6ohm DTL mesh coil,
- RBA single coil re-buildable kit.
Already VERY impressed with everything about this kit, I had high expectations for the coils. Fortunately they met them and then some. The flavour is sublime with a long lifespan. The 1.4 Ohm MTL handles Nic Salts perfectly and delivers a really smooth vape without gurgling or spitback. Power level 1 is plenty for this coil, giving a nice warm vape and fast ramp up thanks to its Ni80 material. The 0.6 Ohm Mesh DTL kicks like a mule in a good way. I was taken aback how good this was as a DTL vape at such low power, full rich flavour even at power level 1. The highest I took it to was level 3, which was very warm and provided plenty of clouds if you’re into that. I originally tried 50/50 juice but tried 70/30 and it handled that well too.
Compared to

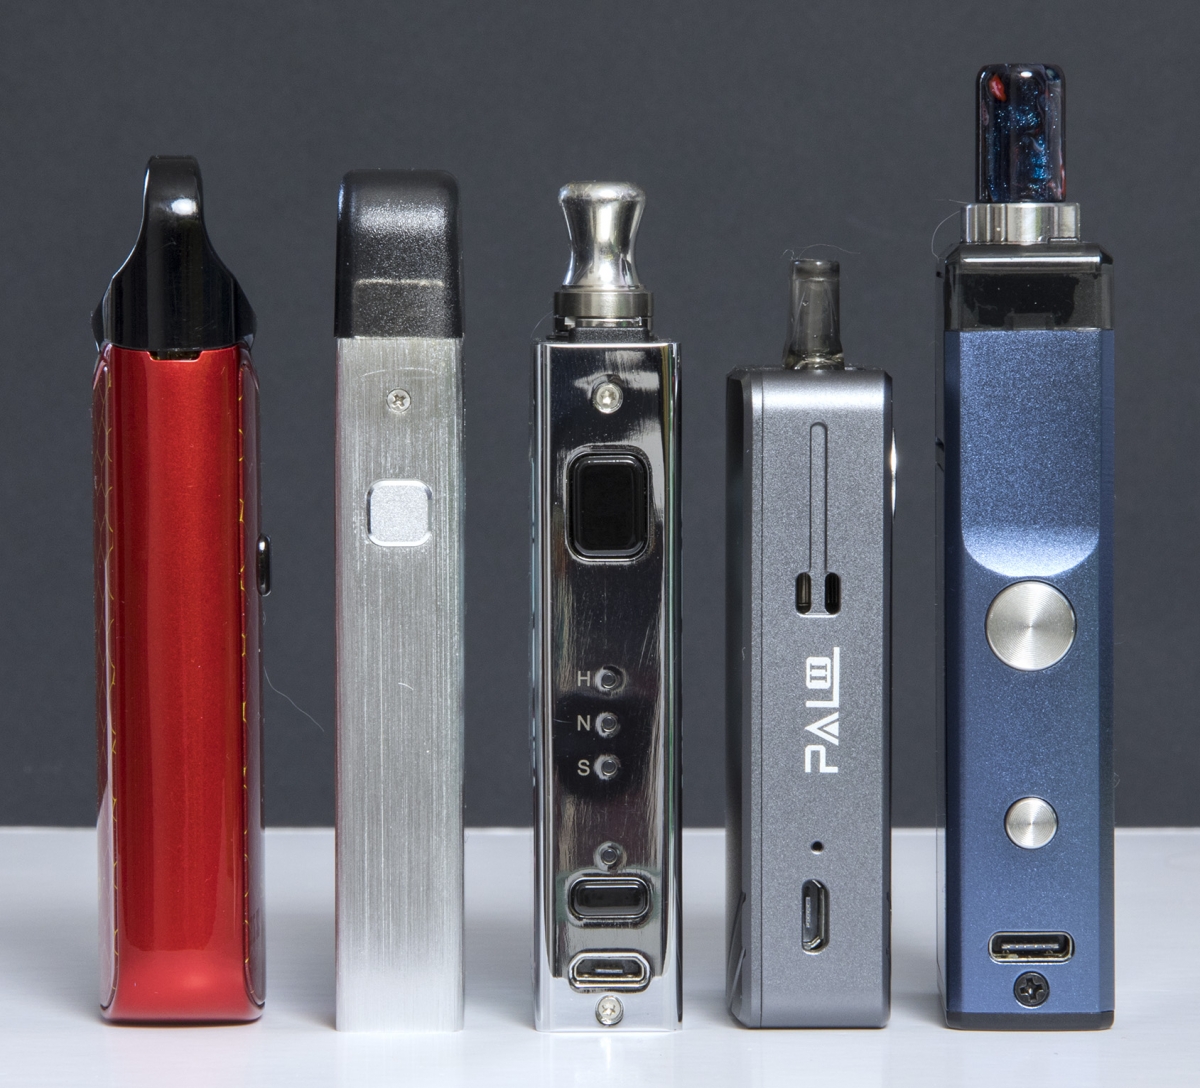
I won’t bore you with specifics, just what you need to know.
The only area that the Pasito loses out on is it's height, but we’re talking about already small devices and so it really isn’t an issue. The Smok Trinity Alpha is closest for features and flavour but let down big time by neglecting to include adjustable airflow as it’s VERY airy (review coming soon). The only other worthy mention is the Artery Pal II, which is very close on flavour and features adjustable airflow with new HP coils. It comes in a close 2nd place but with none of the adjustable power features. They have now release a Pal II Pro which tackles that, yet there’s one huge pro that knocks everything out the water, more on that after this.
So as an AIO (All In One) device, that’s pretty much everything covered, but then came the cherry on the icing!
Smoant optional RBA kit
This is a game changer and makes an already amazing AIO exceptional!
Includes:
- RBA Deck
- Chimney Section
- 510 Adaptor (so you can test the ohms and dry burn on a coil jig or mod)
- Wire x 2
- Cotton
- Screwdriver
- Spare Seals
I had to wait a couple of weeks for my RBA as I ordered it from China, so I happily used the coils. I didn’t expect it to beat stock coils but it’s a much cheaper option. Having done my first build, I was surprised how easy this tiny deck was to build on. Using the included wire (Ni80 I think), I hand wound a rather rough looking coil on a 2.5mm inside diameter rod.
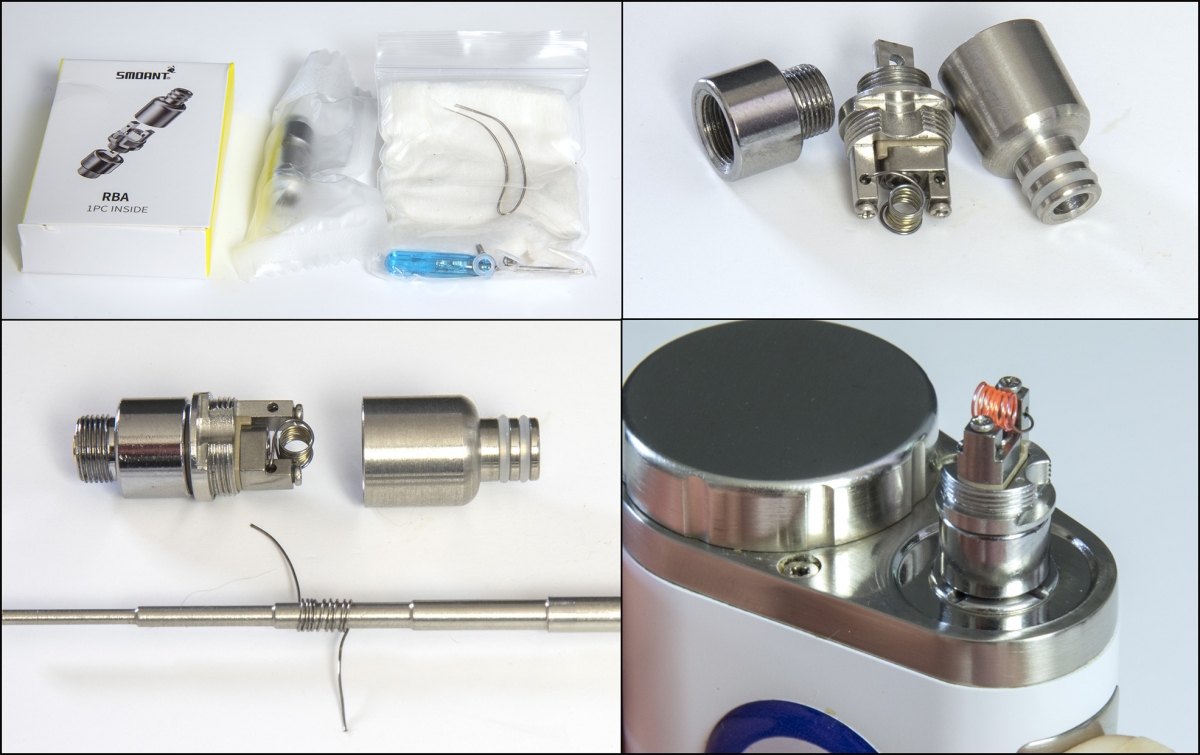
This might look fiddly but it’s quite easy to get the coil in. Hold it in the centre of the deck and pre-bend the legs to match the holes in the 2 posts. With the coil legs down, the first one goes in easily but the second one needs a bit more attention, I just used a small pair of needle nose pliers and shoved it in roughly. Slightly screw down the coil, not too tight as you need to pull the legs in with your pliers, and once you’re happy with the position you can tighten up the screws (ideally with your 2.5mm coil rod in place). It will deform slightly so tweak it with your coil rod and pull it upwards to clear the airflow and posts, then dry burn and squeeze it into shape with ceramic tweezers to remove any hotspots. Double check your Ohms are stable and you have no shorts (mine was 1.4 Ohms), it’s then ready to wick.
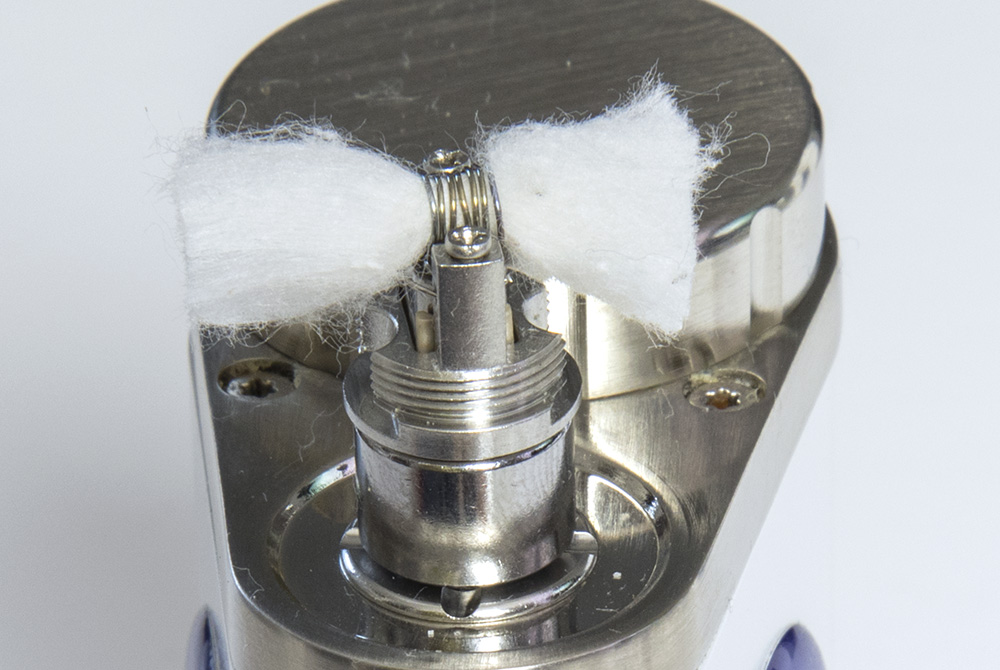
Cut a strip of wick around 6mm wide and remove the thin skin on both sides (don’t remove too much), roll it loosely then squeeze one end to thread it through your coil. I find pulling it through with slight tension on both ends helps to keep the shape of the coil. It should pull through with a little resistance. If it’s too tight, it will misshape your coil which means there’s too much cotton. Cut it to length, it should touch just short of the base, then thin out the ends a little. Then juice the coil and wick (pulse around 8 watts as you add juice) and when the legs are wet, they should comfortably tuck into the circular notches. Finally screw on the chimney making sure not to drag the cotton in the threads.
All that’s left to do is unscrew the 510 base and screw it into your Pasito coil base, job done!
It sounds long winded but it took a few minutes total.
If you are still unsure then YouTube is your friend, search “Smoant Pasito RBA”.
So I fitted the RBA Coil into the Pasito cartridge, filled it up and tested it. While not expecting much, I was blown away how frikkin fantastic the flavour was, especially with my dodgy first build! Smoant have excelled in their R&D of the whole package. Even though the stock coils are great, I only use the RBA now and as my skills have improved with each build, I actually enjoy building the RBA. It is far easier than a lot of MTL RTA’s I own.
Conclusion
Well if you have read this far (well done), you will see I am in love with this AIO device, especially with the superb RBA. I’m coming to the Pros & Cons soon and I am going to struggle with the Cons!
It would have been nice if they included the RBA but, to be fair, for the price it’s an amazing deal and I appreciate not everyone likes to build their own coils so understandably omitting the RBA kept the RRP down.
I have tried and own far too many pods and AIO’s but the Smoat Pasitio is in it's own league and will be a tough act to follow. Already others are following, and more devices with an RBA option are available or imminent, which is a welcome evolution. "Fire & forget" Pods still have their place and I can see the market fragmenting, but the Pasito will be the benchmark and if a new device beats it then even happier days! In the meantime, I am more than happy with it.
Would I buy another if I lost or broke mine – I already bought a ‘Spare’ and RBA so that’s a 100% YES.
Pros & Cons
Pros
- Market leading flavour.
- Variable Wattage.
- Quality construction.
- Magnetic ‘Pod’.
- Excellent stock coils.
- Easy to use.
- Packaging and presentation is the best I’ve seen.
- RBA option is superb.
- Battery Life.
- Fast charging.
- USB-C
- Adjustable airflow.
- Easy fill.
- Stylish (subjective).
- Pocket friendly.
- Lanyard friendly.
- 3ml tank (2ml TPD).
- Value for money.
Cons….. erm…….
- Patterns are love or hate.
- RBA not included.
- Taller than most.
- DTL airfow is a bit too restrictive.
- I have no idea what CPR is.
- The box is too good to throw away.
I think I will give up there!
Final thoughts
I think I have said it all above. If you like the aesthetics then buy it with no regrets, if you don’t like the aesthetics then you’re missing out. At the price it is a no brainer purchase.
Si Davies
Reviewer at POTVMy background is Engineering and Professional Photography. Mostly from POTV users knowledge I learned so much about pretty much all styles of vaping and equipment, Cloud Chasing, Squonking, Mouth To Lung, Direct To Lung, Pods, Mechs, Rebuild-able tanks and atomisers etc, and have experience with many many devices and atomisers, it's become a hobby and enjoy trying out the latest gear. I like to think my reviews are plain speaking and informative without getting too technical, if I have to resort to reading the manual then I don't consider it user friendly!
Join the discussion
SKE Crystal 4in1 Pod Kit
The SKE Crystal 4in1 pod kit is a clear winner, read on to see why
Nevoks Feelin AX Kit
Stephen checks out the Nevoks Feelin AX pod kit to see what it has to offer
VOOPOO Argus P2 kit
VOOPOO take things up a notch whilst keeping things small and tidy with the new Argus P2 kit
Sky Hunter Slim Twist Kit
Vape Club sent us over the Sky Hunter Slim Twist kit along with a load of flavours, a great alternative to disposable vapes


