Coil Master V3 Kit
We got to try the Coil Master V3 Kit, an essential all in one kit for all you DIY coil builders out there. Tool nerds assemble!
Share on:

I have been vaping for a long time and have been building my own coils for almost as long. I’ve seen many tools and gadgets proclaiming to make life easier come and go and most tend to actually do the opposite. My tool box is overflowing with kit that I’ve bought over the years, I guess I should chuck most of it out but it’s nice to have reminders of the history of vaping and my own personal folly, and I have enough stuff to open a museum. But the one tool I always wanted to try was one of those Coil Master box doobreys that doubles as an ohmmeter and allows you to heat things up to test your build and fettle your coil. The trouble is they have always been a bit expensive for something that I thought would just end up in my museum of failure so, despite adding it to my basket on several occasions, I could never quite make it to the checkout. So I was delighted and excited when the lovely folks at NewVaping offered to send me the Coil Master DIY Kit V3 for review!
Unboxing and First Impressions
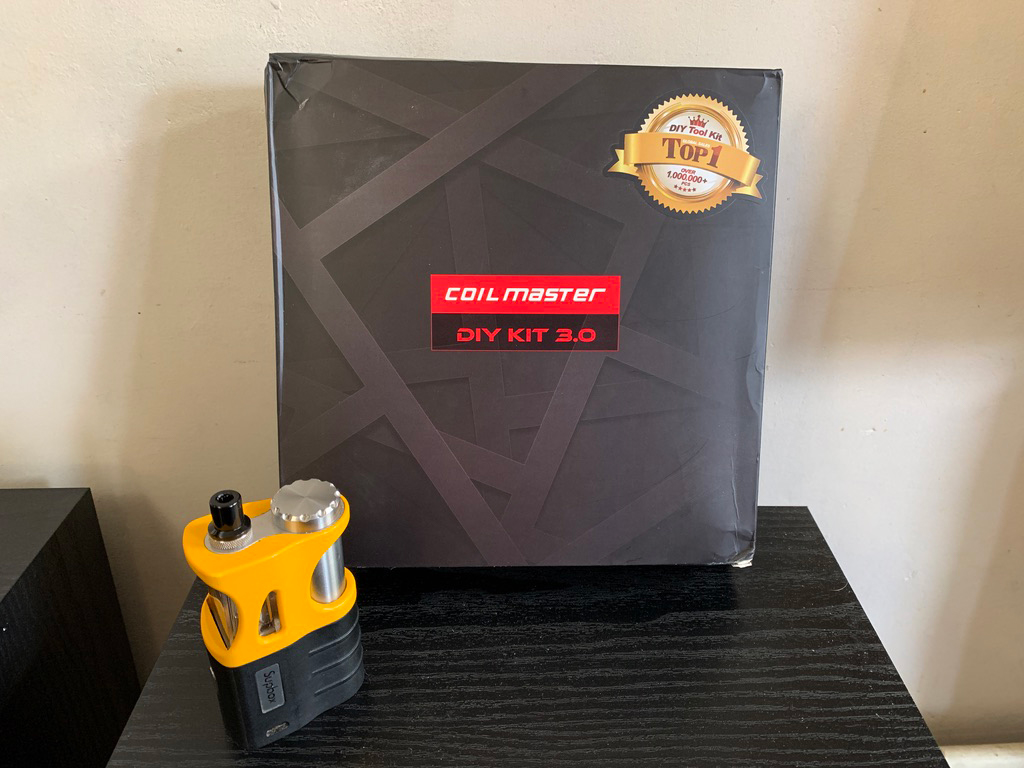
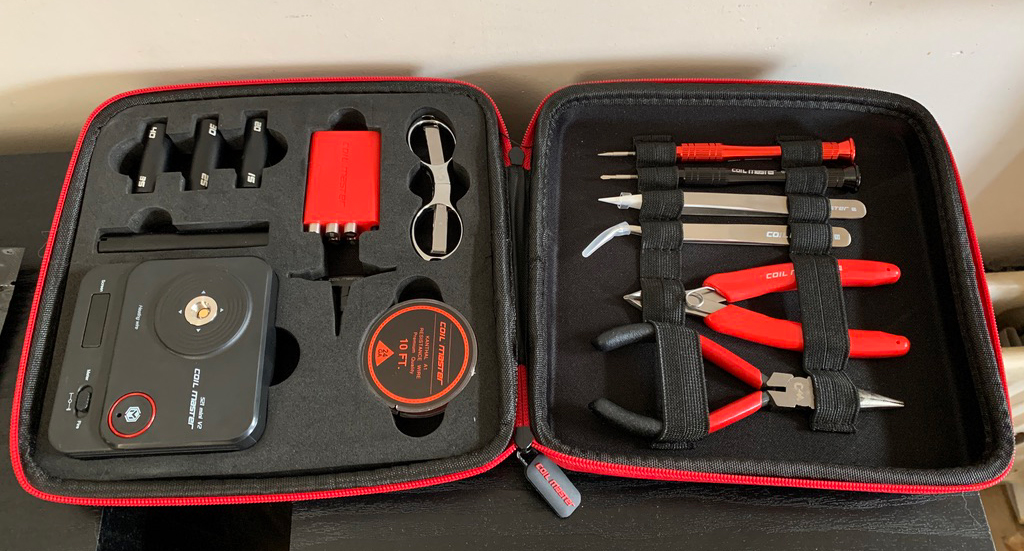
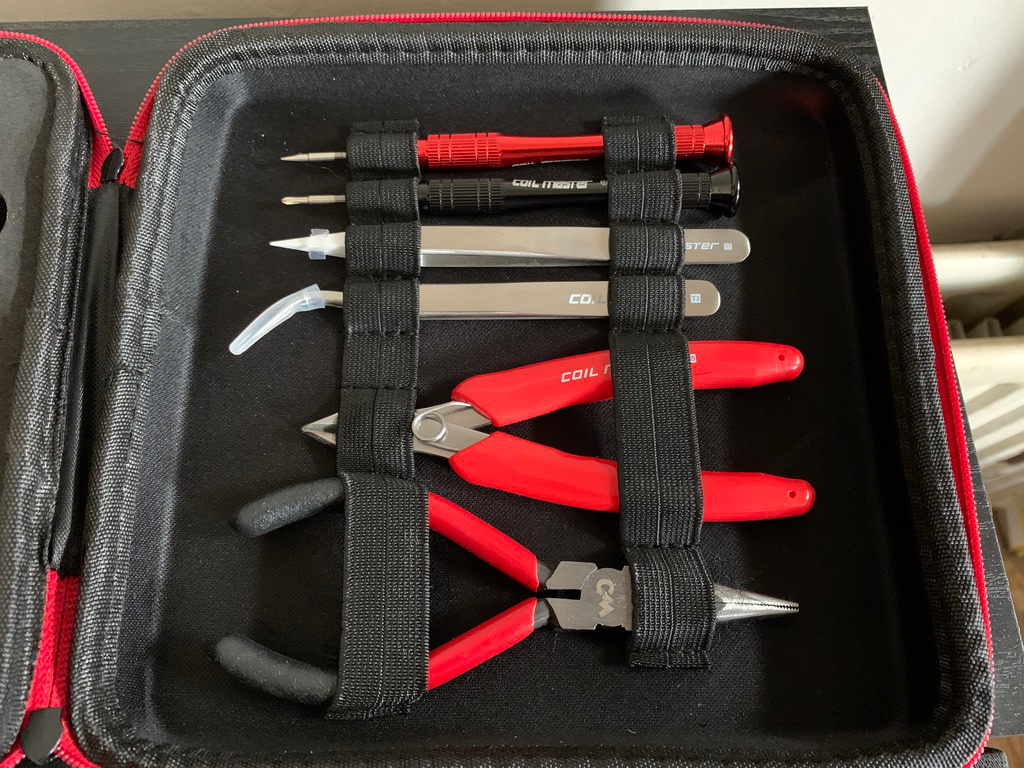
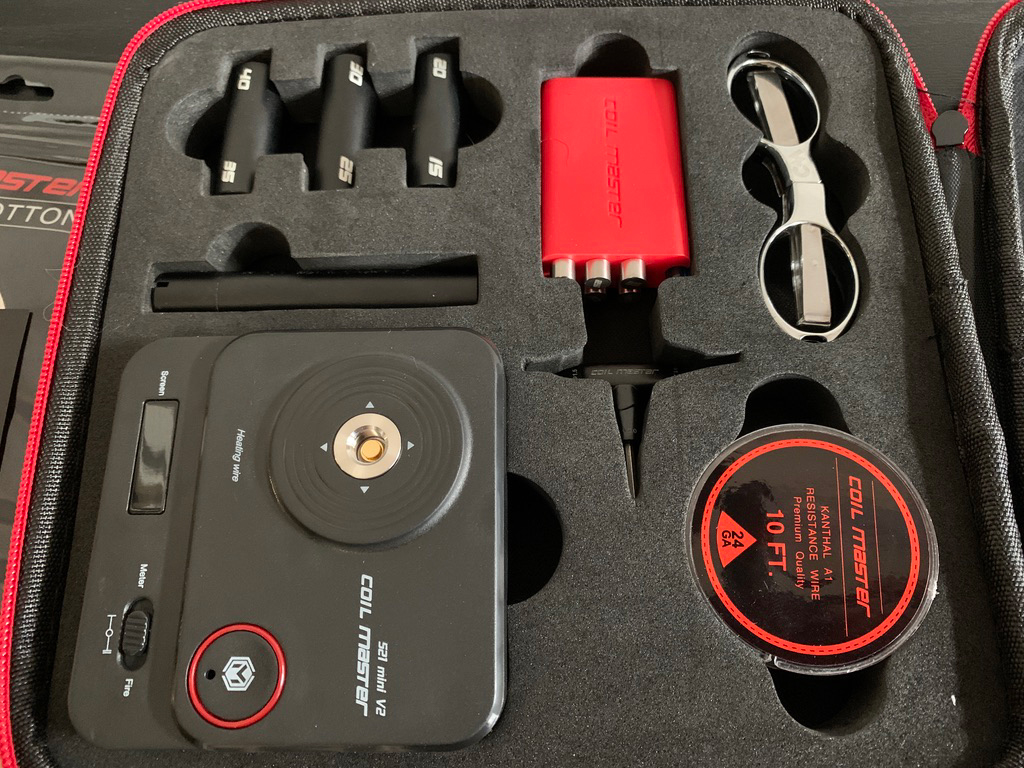
My package arrived and I couldn’t wait to get stuck in. I had only chucked a new build in my vapesnail the day before and I hate to waste a good coil, but in this case I was happy to make an exception. The kit came in a smart box with the kit name on the front and a large sticker that proudly announced it to be the “No.1 DIY Tool Kit”, and a contents list on the back. It looked smart but I didn’t really care about the box and I guess you, dear reader, probably care even less! But I’m on a flow now and I’m dragging you on the journey with me! Inside the box was the kit wrapped in a soft and sealed plastic bag. It was feeling a bit like pass the parcel but thankfully the prize was inside this layer. Ripping it off, I was in to the good bit, or at least I was down to the actual case, and things were getting exciting. The case is a toughened, double zipped affair which is covered in a hardwearing nylon weave type material which feels like it could survive anything and would be easy to clean should you accidentally knock a bottle of e-liquid over. The zips are smooth and everything really has a premium feel. Unzipping the two zips, the case opens like a clamshell and you are presented with everything you could ever need for building fantastic coils. Everything is clearly laid out and each tool has its own space. It is nerd heaven. The full kit list is as follows:
- 521 Tab Mini V2
- Coil Kit V4
- Silicon Rubber Case for Jigs
- T-Style Hex Screwdriver - 1.25mm, 1.5mm, 2.0mm
- Flush Wire Cutters
- Needle-Nose Pliers
- Folding Scissors - Stainless Steel
- Phillips Screwdriver - Pen-Style
- Flathead Screwdriver - Pen-Style
- Ceramic Tweezers
- Elbow Tweezers
- Kanthal A1 Wire Spool - 24 GA - 10 Feet
- Japanese Organic Cotton
Building a coil
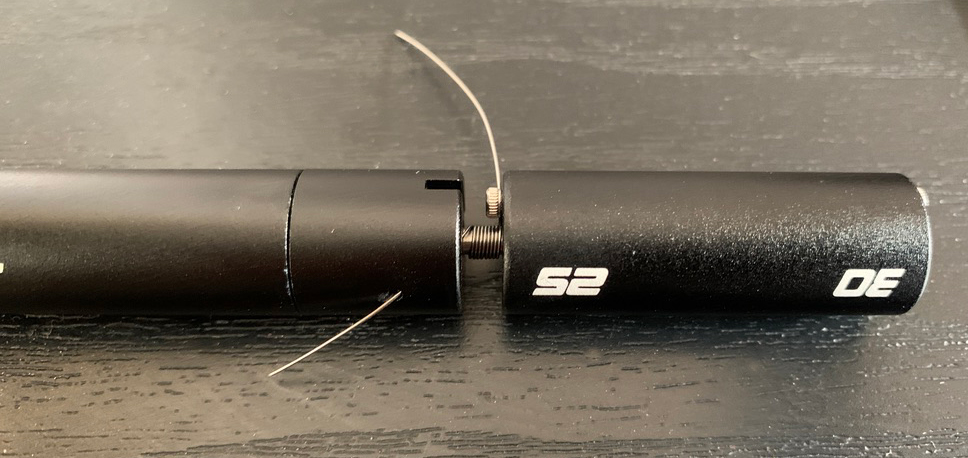
Normally I just build on my Danibox as this has always been very reliable and extremely accurate, and I use a 2.5mm metal rod and any screwdrivers that I have managed to keep hidden from everyone else in my house (they all moan about my crappy tools and yet they are all happy to use them and then not put them back, it drives me bonkers!). So it was really nice to have some decent, non worn-out tools to make my job easier. First up was the coil jig. I have had cheap versions before which do the job but tends to wobble around a bit as everything just slots into place rather badly. This jig is a different class altogether. There is a selection of rods which go from 1.5mm to 4.0mm so most regular builds should be easily doable. I selected the 2.5mm rod, unscrewed the top cap from the main body, inserted the rod and screwed the cap back on, everything was rock solid. The jig also has two holes for the wire to be fed through which is great as it means you can wind it legs up or legs down (my old jig only had one wire feed which made it rather limiting). Wire fed through and in place, you simply select the corresponding sized twisty counterpart, fit it over the protruding rod, catch the wire and twist. The hardest part is counting your turns, and as long as you can count to ten, this really isn’t difficult. This produced a very tidy coil which I was happy to admire for a few seconds until I thought I should probably mount it. This was where I came across a slight niggle. On my old jig, you could just pull the rod off the body and then use that to keep things steady and rigid when lining things up but it wasn’t quite as simple this time. I had to remove the coil and disassemble everything to get the rod out before threading the coil back on ready to put it on my build deck, not a major issue but it did slow things down a little. But it was such a sexy little coil, that it was worth the extra steps.
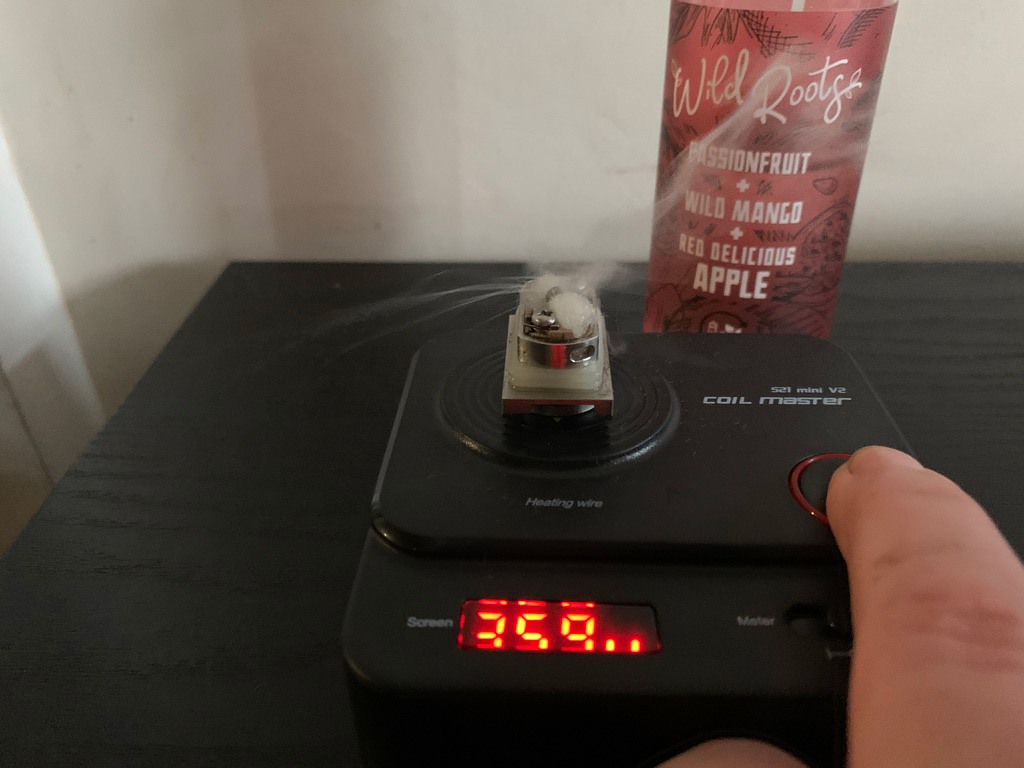
I lined everything up and pulled the phillips screwdriver out ready to tighten the screws to clamp the legs in place. The two screwdrivers are lovely, especially if you normally use the generic cheapo precision screwdrivers which are never easy to grip and are not particularly comfortable to use. These are a really good length and the tips feel like they won’t chip or bend easily. They have a nicely curved shape which feels very natural, and they are ribbed for her pleasure which means you can get a good grip on them. The tops are flat and spinny which allows you to put enough pressure whilst maintaining perfect control to tighten screws up securely. There is only one flat and one phillips but they should do for most atty screw sizes. Everything in place, i got the ceramic tweezers out and finally got to try the 521 Tab mini V2 out (after fitting it with an 18650 battery).
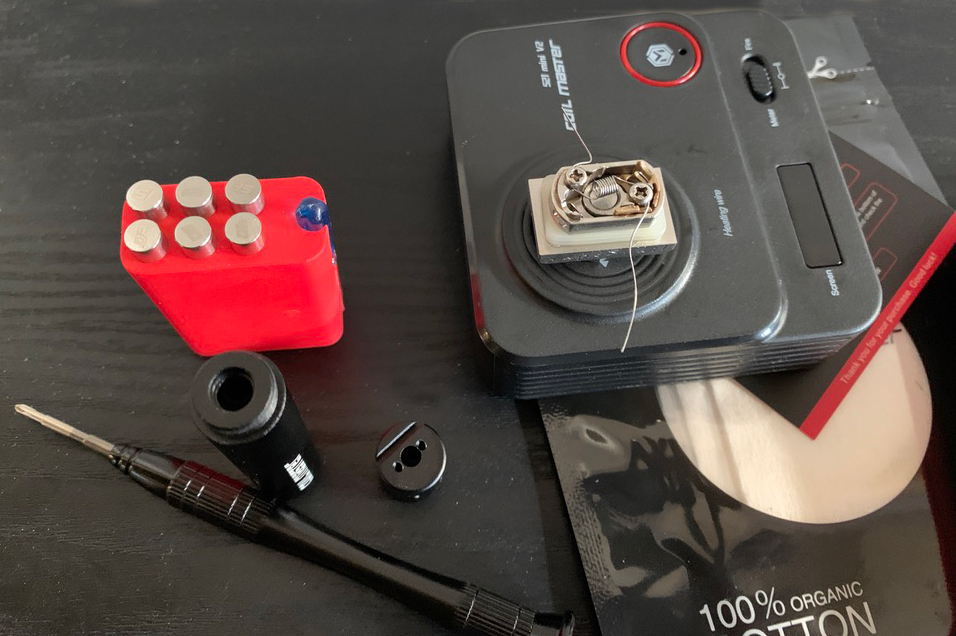
There are two settings on the Tab, one to read the coil and one to heat it up. I swiped left first to get a base reading and to check everything was working. It all looked good so I then flicked the switch the other way. There is a large button on the lower right of where the atty sits, press this and it slowly heats up. You can then use the ceramic tweezers to tweak your coil, personally I like a nice micro coil so I squeezed everything together and gave it a few strums to make sure that everything glowed equally.

Once I was happy, I set about wicking it. Normally I like to stick with my own preferred cotton, but the kit came with some samples of Coil Master’s organic cotton so I thought I’d give it a try. It is nothing special, just decent quality Japanese style cotton so any muji user will feel right at home. Using the fold up scissors (which were deceptively sharp), I cut a strip, threaded it through, cut it more precisely and then used the elbow tweezers to fluff and tuck the ends in place. Juicing things up and allowing the juice to absorb, I gave it another few test fires, checked the readings again and then took my base off to stick on my trusted Dani to compare readings and they were bang on so I feel very confident in its accuracy. All done and dusted, I filled up my boro and got busy with the serious business of having a vape. The cotton did the job well and settled very quickly giving no funky flavour and wicked like a champ from the off.
The rest of the included tools are all good quality. The wire cutters are sharp and the angle means you can cut flush even in hard to reach places. I am not too sure why there are needle nosed pliers but I am sure I will find a use for them. The ceramic tweezers aren’t as good as my old set that I bought many years ago, but they are better than the cheap set I got when the tip snapped off the first set so I would say they are a nicely average set. One of my favourite tools it the T style hex screwdriver. Each of the three sized tips is straight and feels strong and is essential if you have a tank that uses grub screw instead of regular screws. Often the tools provided with tanks are the cheapest of the cheap and are so small that any bends are a pain to work with so this tri tool really will be a godsend.
Final Thoughts
I thought this would be a bit of a gimmick, another vape drawer filler that would get used a couple of times until the novelty wore off, but I have been really impressed with the quality of all the items. The Coil Master DIY Kit V3 really does make DIY building so much easier and means that pretty much anyone will be able to produce top quality coils with ease. I may just clear out all my now redundant odds and sods as I don’t think I’ll be slumming it again now I have this kit.
If I have to be picky, which I normally am so don’t see why that would change now, it would have been nice if there was a pouch or section for you to put your own extras in. For example I have a little dremmel wire brush for cleaning things up and a 510 connector for my vapesnail, and it would be nice to keep them safely in one place. Also a user guide or some sort of manual would be handy. Whilst I’ve been building long enough to know what I’m doing, a new builder really should have some sort of reference information. Obviously you should do your research and learn how to vape safely before you start making your own coils, but it would be handy to include some sort of basic guide.
This is a really good all in one kit, consisting of top quality tools which are clearly presented, and it would make a great addition to any vaper’s arsenal. After using it, I’d almost class it as essential as it makes the whole process of coil building effortless and almost idiot proof! If you think this is the kit for you, pop over to New vaping. It usually retails for £39.99 but at the moment it is on offer for £18.99 (but this is subject to change so get in quick!). Considering you will easily spend £8+ for a set of ceramic tweezers, £10 for some decent screwdrivers and £9 for angled wire cutters (yeah you can get cheaper, but trust me when I say you buy cheap, you buy several times over…I know because I’ve thrown loads of dosh away trying to save money in the short term), you get one hell of a bang for your buck here.
Many thanks for NewVaping for sending this in for review.
Michelle (Purplefowler)
Reviewer at POTVWhen her usual forum closed, Michelle found herself in a brave new world full of excitement that something fresh and new was happening. A few days later she somehow found herself on the moderating team and is still not really sure how that happened. Even stranger, she slowly worked her way up to admin and now helps behind the scenes, liasing with vendors and coordinating social media but she can still be found making smutty comments on the forum. If all that wasn't enough, she also is a proud member of the Potv review team specialising in E-liquid reviews for the discerning vaper.
Join the discussion

Vandy Vape Pulse AIO Custom Parts
It don't mean a thing if it ain't got that bling. Vandy Vape totally get that and have released a load of custom parts for their Pulse AIO.
-
by Si Davies

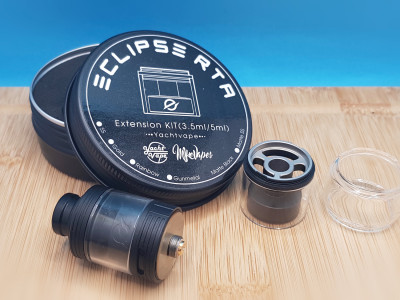
Yachtvape Eclipse Extension Kit
Antony recently reviewed the Yachtvape Eclipse rta, and now it is bigger and better than ever with the official extension kit!
-
by Antony Lord


Vaporesso GTX Coil Selection and RBA
We get up close and personal with the Vaporesso GTX range of coils. With such a huge choice, there should be something for everyone!
-
by Si Davies
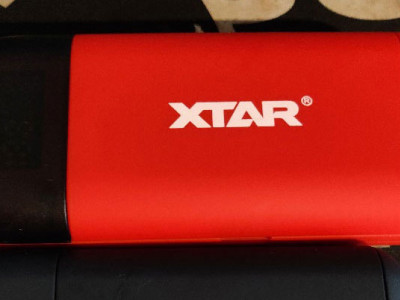
Xtar PB2S Charger
Check out the latest offering from Xtar in the shape of the PB2S portable charger/power bank. This is the big brother to the first offering, the PB2, & offers more options than its sibling