Anatomy of a Kayfun Lite
All about the popular Kayfun Lite series of RBAs by blademansw
-
by Toby Kilroy

Share on:

Introduction
The Kayfun series was originally designed and developed by SvoeMesto. It has been refined and developed over the last two years, and the current range consists of the following Rebuildable Tank Atomisers (RTA):
Kayfun 3.1
Kayfun Lite
Kayfun Lite Plus
Kayfun Mini V2.1
This guide will deal with the Kayfun Lite (KFL), and its various derivatives.
About the KFL
The Kayfun Lite was released as a simplified version of the Kayfun 3.1, with non adjustable airflow and a simple bottom filling screw. This was a much more affordable device than the 3.1 as an original product. It was rapidly cloned (as was the Kayfun 3.1), and all of the parts are interchangable with the exception of the base (or build deck as it is also known).
I personally currently use cloned devices as my vaping budget will not currently stretch to original devices. I would urge anyone who can afford the original devices to support SvoeMesto by purchasing the authentic models.
The Kayfun Lite is the basic model with non adjustable airflow. The Kayfun Lite Plus has bottom adjustable airflow using a small grubscrew which requires you to remove your atomiser from your mod to adjust the airflow.
A further development occured when the Kayfun Lite Plus clone was redeveloped by Kebo and the Russian 91% was born. This version features a side adjustable airflow grubscrew which allows you to adjust your airflow without removing the atomiser from your mod.
There are also various tank accesories and custom items available to personalise your KFL.
From left to right here we have a modified Russian 91% hybrid called the "Russian Lite", a modified KFL with a full polycarbonate tank and custom top cap, and a KFL with a Nano kit (which makes the device much shorter).
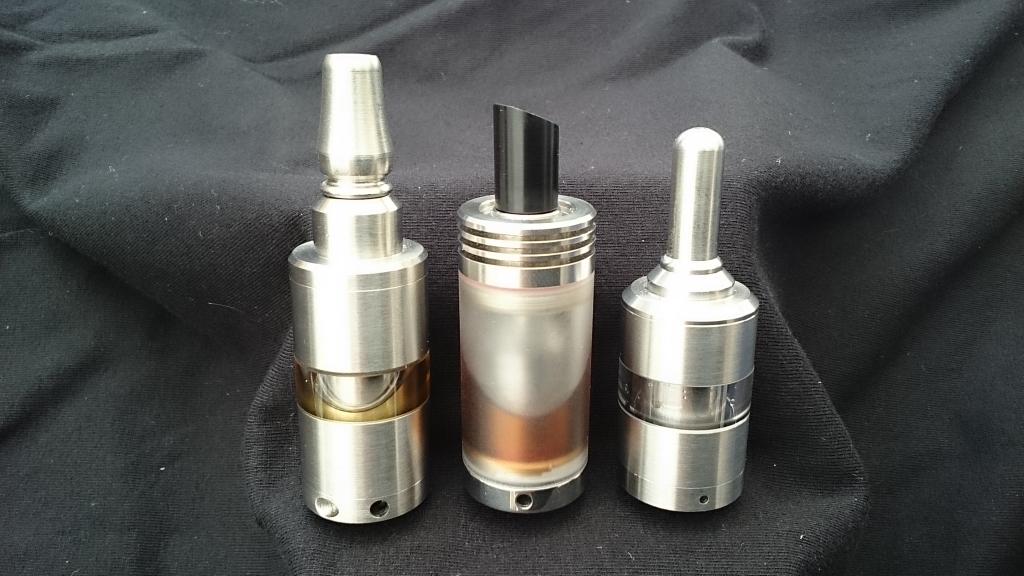
As the center tank section is plastic, you will need to be careful when using "tank cracker" juices, or you can configure the device with a stainless steel tank section.
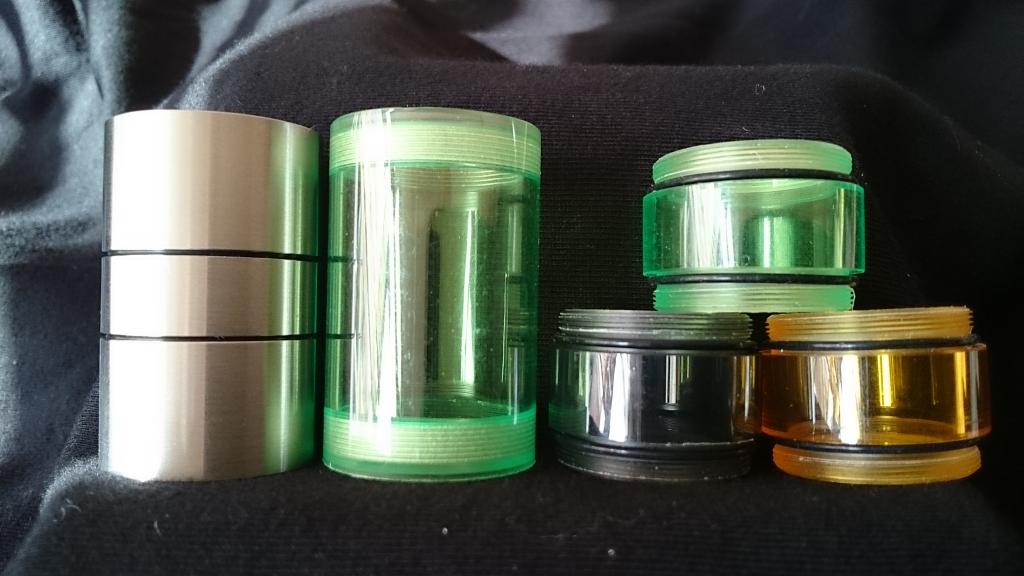
In this picture you can see some of the accessories available, including full height polycarbonate tank sections, and the stainless steel section.
Components of the KFL
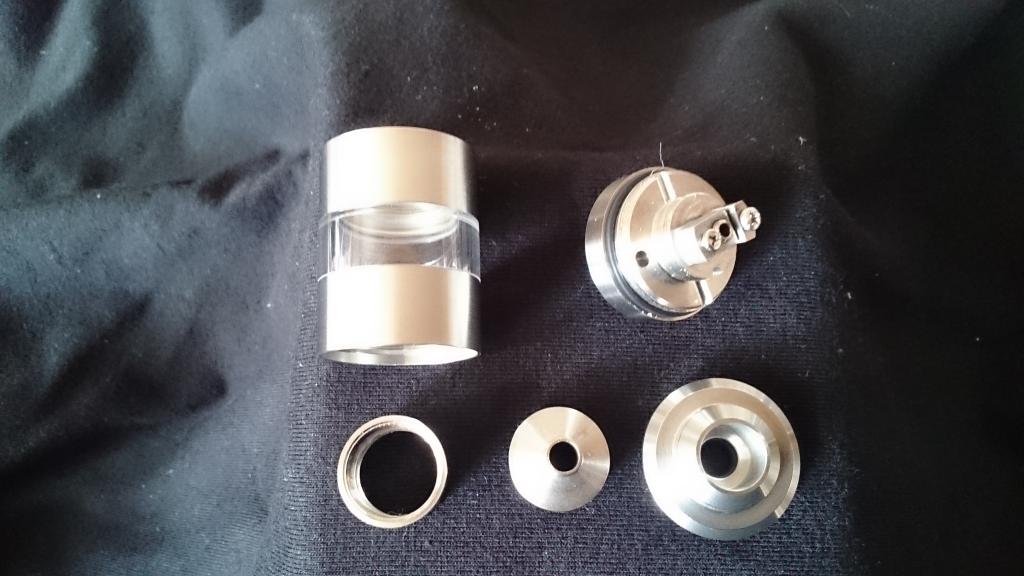
The KFL comprises of a base (or build deck), which houses a 510 connector, a chimney section, a top cap and a tank section.
All the sections are threaded and screw together and sealing is provided by silicone o-rings.
Here is the top cap, and the small o-ring which seals the chimney. If this is not present, the device will leak continuously.

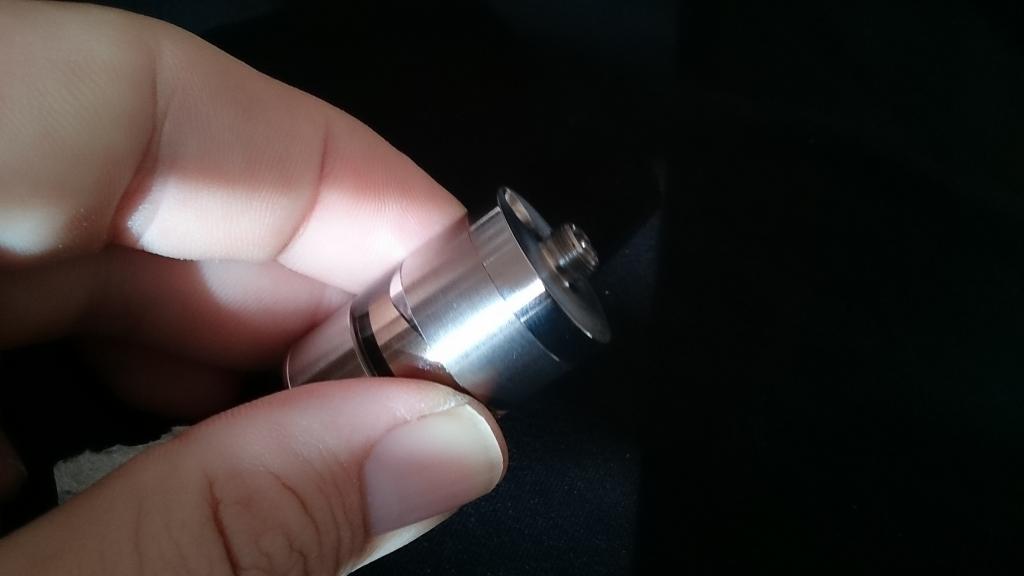
Here is the base, showing the non adjustable 510 connector and the fill screw.
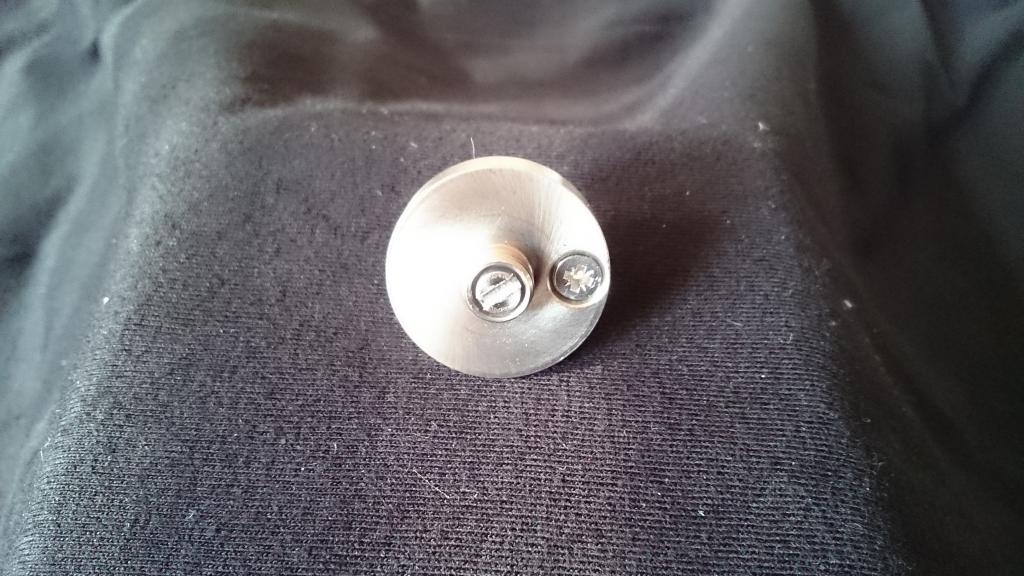
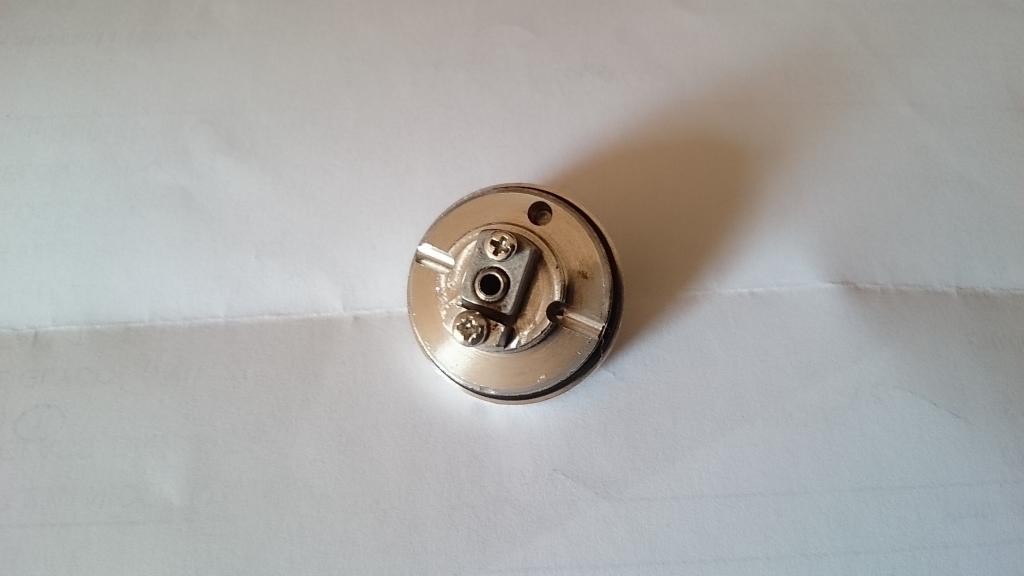
This is the base from the upper side. The positive terminal is the one with the hole in the middle (the hollow 510 screw). Short circuits are prevented by a insulator underneath this terminal.
When the chimney is attached, juice flows up the two juice channels into the chamber and to the wicking material.
Full Disassembly
If you have purchased a cloned KFL, I would recommend stripping the device in this manner to clean off any manufacturing residue using soapy water.
You may also need to carry out the procedure for fault finding or to carry out modifications or even a deep clean if the device has been used with strong e-juices.
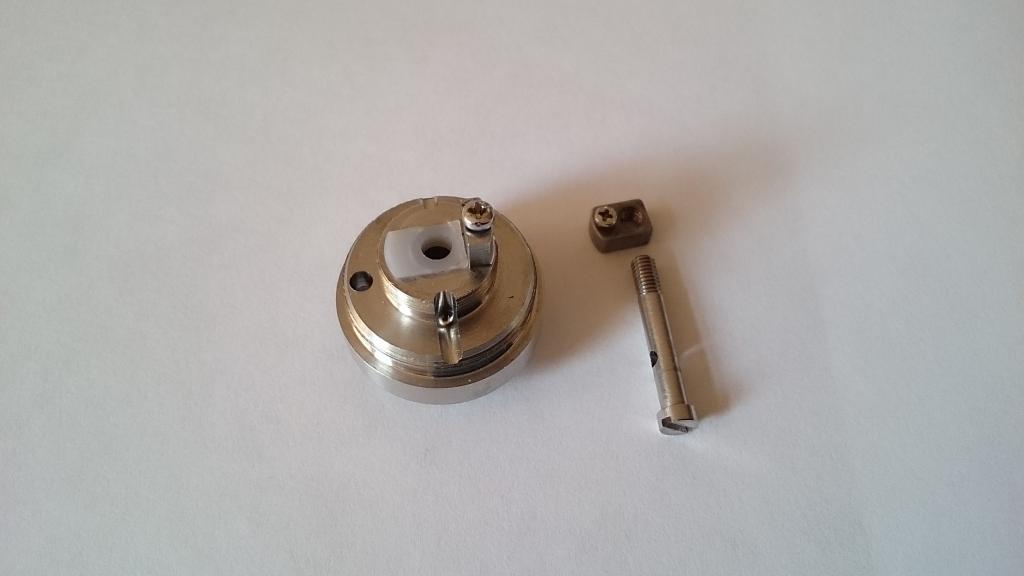
To disassemble the base, carefully unscrew the 510 screw with a flat headed screwdriver. Be careful not to loose the positive terminal or the insulator.
Here is the base completely disassembled for cleaning. Some clones have machinining debris inside the 510 screw, so if you have poor airflow, check for obstructions inside this screw.
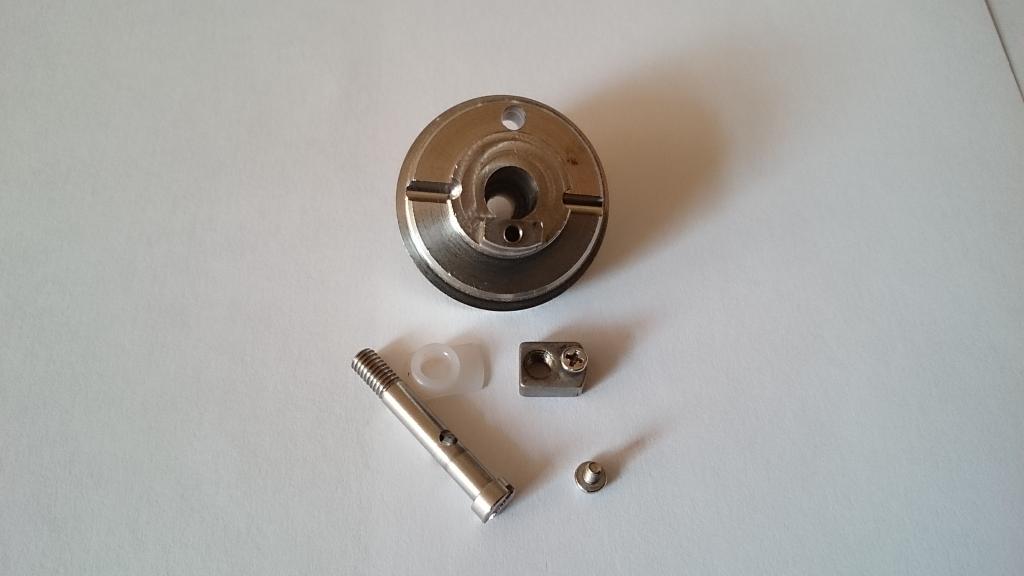
Once you have reached this point, you can either clean the device using a soapy water solution, followed by a rinse, or use an ultrasonic cleaner.
Reassembly is the reverse of dissambly, just be careful to line up the positive terminal and do not overtighten the 510 screw. Once the screw is tightened up you should not be able to move the positive terminal with strong finger pressure.
Don't forget to install the insulator!
Filling the KFL
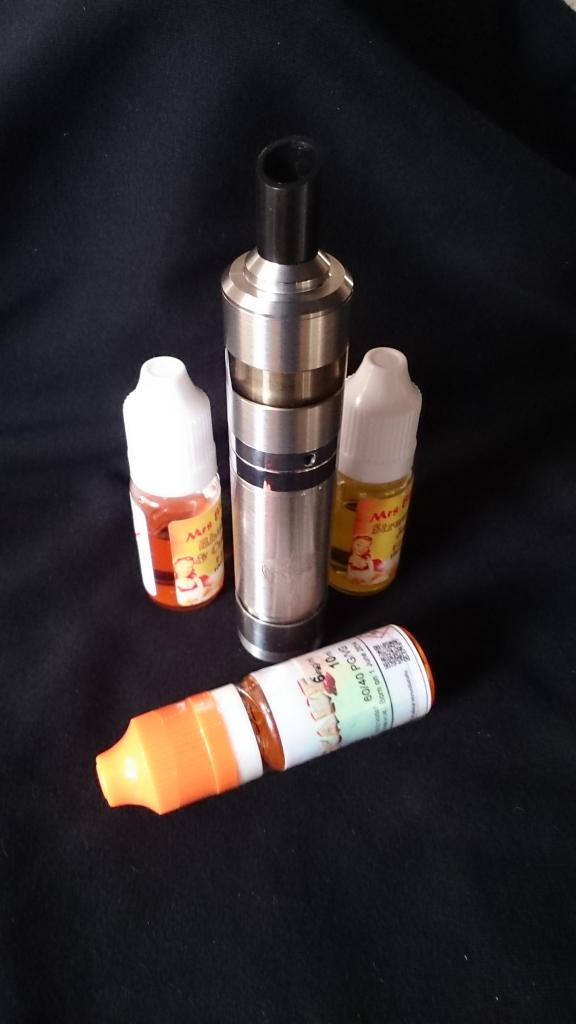
To fill the KFL, you will need either a needle nosed squeezy bottle, or a syringe with a either a metal needle or a green dispensing tip.
Remove the fill screw and jam a piece of tissue in the drip tip hole in the top cap (this helps stop leaks when the tank is partially full).
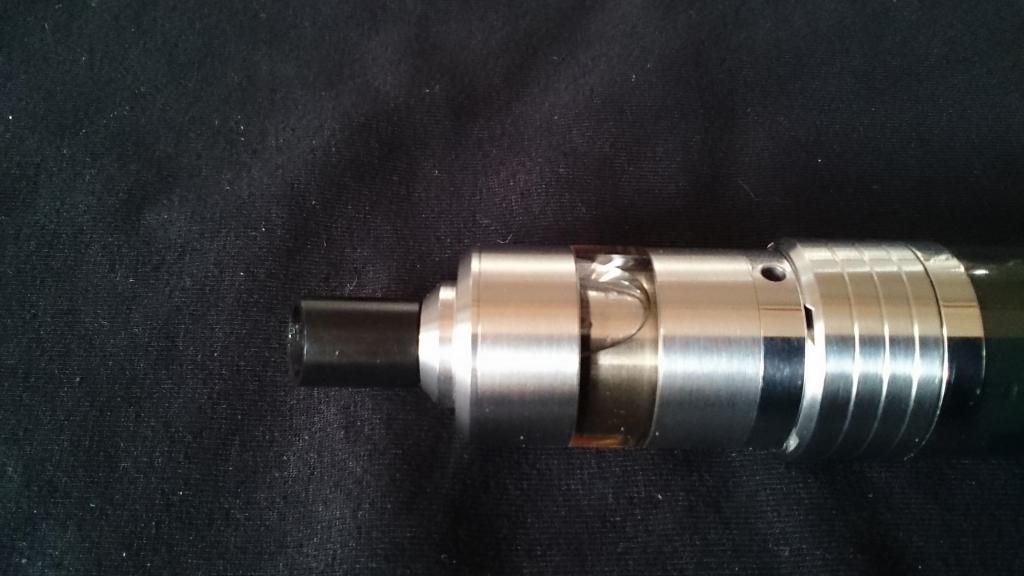
Tilt the KFL as shown at about 45%, and carefully squeeze juice into the tank with the fill hole uppermost.
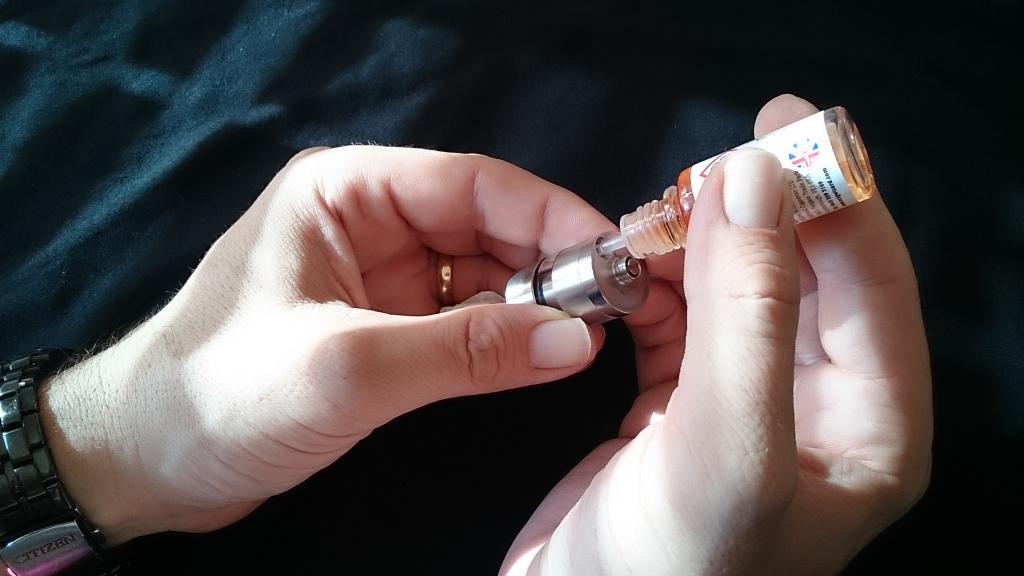
The key is not to overfill or force the juice into the tank. When you can still see a little bubble of air as shown, the tank is full. If you overfill it, the tank will be unable to build a vacuum and will flood.
Re-install the fill screw and install onto a mod. Take a couple of dry pulls on the KFL, if all has gone well, you should hear no gurgling and you should see one or two bubbles rising in the ejuice as it gets pulled through.
If you hear gurgling, the chamber has flooded, to rectify this position the tank horizontally with the airhole uppermost as shown, and vape until the gurgling stops.
Ready to go!
Troubleshooting
Poor flavour. Poor flavour can be caused by either the wick needing replacing, the coil being too far away from the airhole, or the coil is gunked up. This will require partial disassembly, just rinse the base under hot water, dry burn the coil until its clean (be careful not to overheat the base), re-wick and reassemble.
Dry Hits. Dry hits occur when the wick cannot feed the coil fast enough with juice. This can occur if using a very thick juice and you will need to make sure the wick is not covering the juice channels as mentioned above. With a KFL, less is quite often more with wicking material!
Gurgling. This can be caused when filling, or you are using a very thin juice and insufficient wicking material covering the juice holes. If you haven't used enough wicking material the only way to resolve this is to re-wick, taking note of the wicking instructions above. If this has occurred during filling, resolve the gurgling by following the instructions in the filling section above.
Toby Kilroy
Writer at POTVToby has been vaping since early 2012 and has used an array of devices and kit in that time. He sometimes writes up reviews but is often found with his head stuck in pages of code with a confused smile on his face. Toby also helps run his wife's site gethistory.co.uk and has two children. He sometimes fondly remembers having free time and occasionally manages to sneak away to put his head into a good book!
Join the discussion


The POTV Guide To Batteries
The POTV guide to batteries aims to answer all of your questions regarding lithium-ion cells for vaping
-
by Dave Cross


The POTV Guide to the Politics of Vaping
This guide looks at the laws that control what, how and where we vape as well as introducing the groups, charities and organisations that work to influence government policy
-
by Dave Cross

Can Pregnant Women Use Ecigs?
There are compelling reasons to quit smoking when pregnant, but should expectant mothers switch to vaping?
-
by Dave Cross
POTV’s Vape Tank and Atomiser Guide
With hundreds of options to choose from, how can anyone be expected to know what is a good buy when it comes to tanks?
-
by Dave Cross