- Joined
- Jul 18, 2012
- Messages
- 27,470
Right I'm doing this largely for @GROOF or anyone else who is considering one of these outstanding atomisers.
I'll state now, that this is not the correct way, the only way or the best way, this is just my way - and its had a 100% success rate with me so far.
Im going to assume you can build a basic micro coil and put it in place, and start from there ... if you can't do a search and learn the micro coil technique first, it will stand you in good stead for any atomiser you can use cotton with.
Also please excuse the dodgy late night photography!
----------------------------------------------
So, you have your coil in place right?
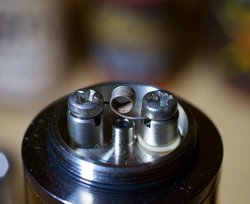
Next .. take a long thinnish piece of cotton, I've rested it here .. so you can see how much I use.
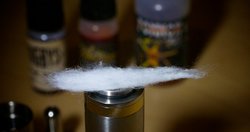
Now .. gently roll that cotton, squeeze it gently and slightly roll .. don't make a tight sausage .. keep it loose man. yeah.
you want a longer thinner end and a fatter end like so :

Now .. insert the THINNER end through your coil, and slowly draw it through .. you do NOT want the cotton to bunch up, if it does, pull it back smooth it and try again, it needs to be able to move freely backwards and forwards, while at the same time touching the inside of the coil all around.

Once thats done, take some tweezers - or your tool of choice ( @Merino-Teflon I CHOOSE YOU ) then curl the thinner end onto the deck off the atomiser.
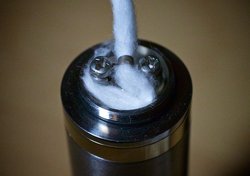
now .. slip the fatter end through the ring of the coil enclosure and screw it down like this
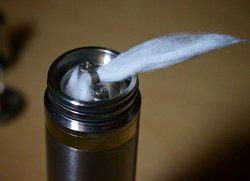
at this point I wet my wick .. oh yes I do, then I come back and squeeze a bit of juice onto the cotton like this
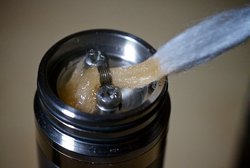
once this is accomplished, take the enclosure top and thread the fat end through it .. rest the top on top of the enclosure and press it into place
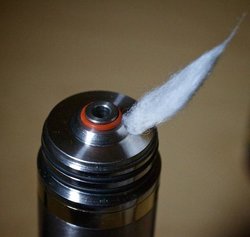
Now thats done, take a screw driver and push a hole down the wick hole gently .. you need a gap for the juice to flow
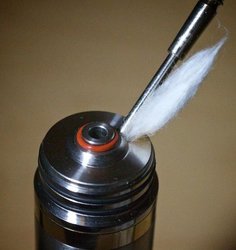
now, I like to trim my cotton into a pointy diagonal - no idea why .. I just do.
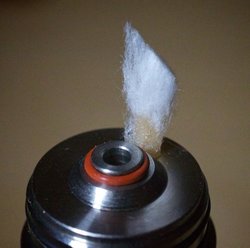
thats it .. done .. fill up the top cap with juice, then invert the atomiser base and lower it onto the inverted top cap .. making sure not to get the cotton down the central bell, but going between the bell and the top cap wall. You are done
Hope this has been of some help
The flavour and vapour achieved off these things is absolutely incredible - with very little effort and a serious lack of hideous twiddlyness.
ZT
I'll state now, that this is not the correct way, the only way or the best way, this is just my way - and its had a 100% success rate with me so far.
Im going to assume you can build a basic micro coil and put it in place, and start from there ... if you can't do a search and learn the micro coil technique first, it will stand you in good stead for any atomiser you can use cotton with.
Also please excuse the dodgy late night photography!
----------------------------------------------
So, you have your coil in place right?

Next .. take a long thinnish piece of cotton, I've rested it here .. so you can see how much I use.

Now .. gently roll that cotton, squeeze it gently and slightly roll .. don't make a tight sausage .. keep it loose man. yeah.
you want a longer thinner end and a fatter end like so :

Now .. insert the THINNER end through your coil, and slowly draw it through .. you do NOT want the cotton to bunch up, if it does, pull it back smooth it and try again, it needs to be able to move freely backwards and forwards, while at the same time touching the inside of the coil all around.

Once thats done, take some tweezers - or your tool of choice ( @Merino-Teflon I CHOOSE YOU ) then curl the thinner end onto the deck off the atomiser.

now .. slip the fatter end through the ring of the coil enclosure and screw it down like this

at this point I wet my wick .. oh yes I do, then I come back and squeeze a bit of juice onto the cotton like this

once this is accomplished, take the enclosure top and thread the fat end through it .. rest the top on top of the enclosure and press it into place

Now thats done, take a screw driver and push a hole down the wick hole gently .. you need a gap for the juice to flow

now, I like to trim my cotton into a pointy diagonal - no idea why .. I just do.

thats it .. done .. fill up the top cap with juice, then invert the atomiser base and lower it onto the inverted top cap .. making sure not to get the cotton down the central bell, but going between the bell and the top cap wall. You are done
Hope this has been of some help

The flavour and vapour achieved off these things is absolutely incredible - with very little effort and a serious lack of hideous twiddlyness.

ZT
Last edited:


