

Darthpistachio
Postman
- Joined
- Dec 12, 2012
- Messages
- 350
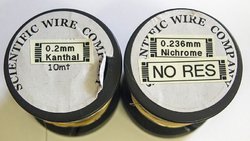
I have tried all manner of ways of joining the dreaded R-NR wires together. - The standard twist method is OK but more often than not ends up a bit loose with resistance readings wavering.
The wire zappers are OK but only if you have a good quality one costing over £50 - I have a cheaper version and it works but only about 50% of the time - and then you don't want to know how many expletives have been uttered when I wind the coil onto my wick and you hear that dreaded "ping" when the join breaks! Not fun at all ...
The reef knot variation is good in principle - BUT it's bulky and awkward to get them tight together so that the connection does not suffer with resistance dancing.
No for me with experience I found that the standard twist method with a bit more of an OCD variation works the best.
You will need some good tools for this method and they are as follows:


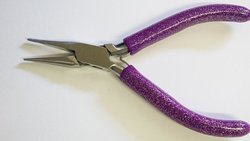
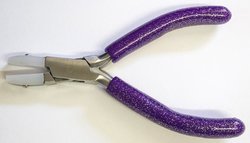
A good quality flat nosed non toothed pliers. These are the ones sold for beading aficionados - ideal.


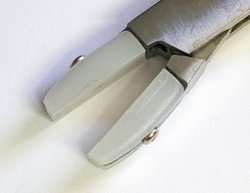
Plastic jawed pliers - again beading ones - ideal for holding differing diameter wires together..

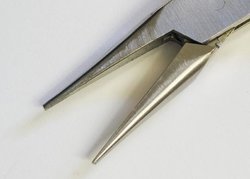
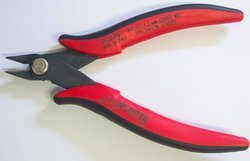
Good quality snips..

last but not least the wires -of course

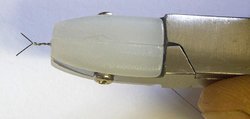
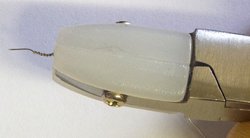
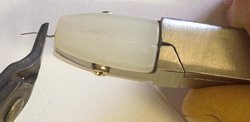
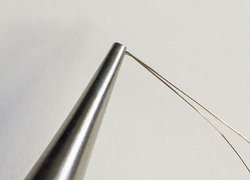
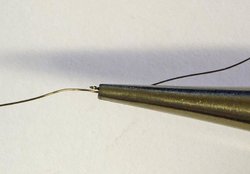
Now get the two wires alongside each other clamp them in the plastic jawed pliers and have about 8-10mm protruding and splay them apart.

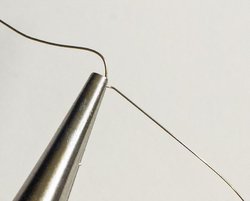
At this stage carefully twist them around each other about 4-5 times by hand...

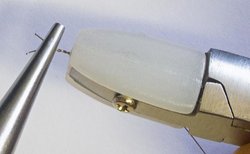
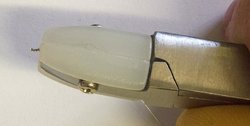
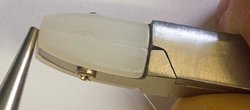
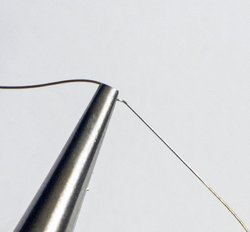
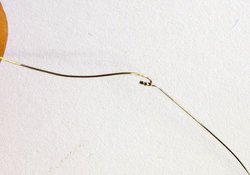
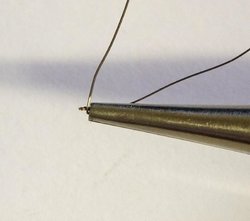
Now, using the metal pliers grip the twisted wires and continue twisting them again - this will make the twists very tight and ensure against them unraveling later on and during use - continue twists in the same direction for a further 4-5 turns ...

The wire zappers are OK but only if you have a good quality one costing over £50 - I have a cheaper version and it works but only about 50% of the time - and then you don't want to know how many expletives have been uttered when I wind the coil onto my wick and you hear that dreaded "ping" when the join breaks! Not fun at all ...
The reef knot variation is good in principle - BUT it's bulky and awkward to get them tight together so that the connection does not suffer with resistance dancing.
No for me with experience I found that the standard twist method with a bit more of an OCD variation works the best.
You will need some good tools for this method and they are as follows:
A good quality flat nosed non toothed pliers. These are the ones sold for beading aficionados - ideal.
Plastic jawed pliers - again beading ones - ideal for holding differing diameter wires together..
Good quality snips..
last but not least the wires -of course
Now get the two wires alongside each other clamp them in the plastic jawed pliers and have about 8-10mm protruding and splay them apart.
At this stage carefully twist them around each other about 4-5 times by hand...
Now, using the metal pliers grip the twisted wires and continue twisting them again - this will make the twists very tight and ensure against them unraveling later on and during use - continue twists in the same direction for a further 4-5 turns ...
Attachments
-
 rnr_step1.jpg57.2 KB · Views: 83
 -
 rnr_step2.jpg36.7 KB · Views: 87
 -
 rnr_step3.jpg36.4 KB · Views: 93
 -
 rnr_step4.jpg46.2 KB · Views: 84
 -
 rnr_step5.jpg37.4 KB · Views: 90
 -
 rnr_step6.jpg32.3 KB · Views: 83
 -
 rnr_step8.jpg29.3 KB · Views: 85
 -
 rnr_step9.jpg32.1 KB · Views: 86
 -
 rnr_step10.jpg39.2 KB · Views: 84
 -
 rnr_step11.jpg38.8 KB · Views: 32
Last edited:


")
 if you see blank posts like this one, just report it so one of us can come edit it


