Squidgy
Achiever
- Joined
- Nov 12, 2020
- Messages
- 1,026
As mentioned in a previous thread (Link below), I’m going to let you in on the way I build and wick my single coilers to get the best out of them, or to put it a better way, the best way I have found to get them to perform for me.
4 Way Vape off Eclipse v's Kylin Mini II v's Blotto Mini v's Juggerknot MR
As the title suggests, I’m going to start off with the Kylin Mini II, I know I done a kind-of-review on this back in February but water has passed under the bridge, tides have turned and to be frank much more tinkering has gone on. For anyone that wants a flashback to compare here’s the link…
Vandy Vape Kylin Mini II (Another Review sort of)
I’m not doing this guide for the Kylin just because it came at the top of my rankings list recently but because out of all my single coilers this one is a bit different.
This guidance may convince some to dig out the Kylin from the dark depths of a draw and bring it back out of retirement, or as this tank is still available it may provide some assistance to a RTA newbie, whatever it is it’s all good.
I’ve probably prep’d the Kylin in the way I'm about to explain 20+ times now and I’ve had no issues with spitting, flooding or dry hits, the flavour out this thing is top notch and I think this method is very consistent.
Starting with the build
Some of you will know that my preference of coil wire is a SS316L flat or flattened Clapton, for me I’ve found this provides the best results and produces copious amounts of vapour and along with it flavour. I personally think this is one of the reasons I get consistently good results with my RTA’s, after all the coil is the engine and putting a fiat 500 engine into a large high performance motor wouldn’t bode to well and be somewhat of a let-down.
I will add at this point I’ve tried loads of different coil wires from standard round wire up to more complex wires like juggernaut, framed staples and many in-between. In my opinion a flat/flattened Clapton or an Alien is great for an RTA, the more complex/exotic coils work so much better in RDA’s due to the amount of juice needed (that’s juice as in power and eliquid). Back to my analogy above putting a 5ltr V8 into a fiat 500 will also result in disastrous results.
Anyway back to the point, for the Kylin Mini II I fit a 3mm id, 6 wrap spaced coil coming in at around 0.25Ω. I use a spaced coil simply to make up the distance between the fixing points, it is possible to fit in a contact coil but it’s fiddlier to fit and get rid of hotspots. I find with the coil wire I use, normally there is no need to dry burn with a spaced coil, tried it several times before and never had a hotspot, I did do a quick dry burn on this occasion just because it was a fresh reel of wire and to be on the safe side. Contact coils with the same wire on the other hand are totally different and definitely require a fire up before threading the wick.
Now for some piccies…

When fitting the coil try and get the top edge of the coil in line with the top row of holes of the air inlets. You can go slightly lower than this but keep in mind, if the air coming in from the top row of holes totally misses the coil you will be diluting your vape with fresh air.
Wicking
Now for threading the wick, this is hard to describe or show in pictures. You’ve probably heard many times before that when threading a wick you don’t want too much cotton where it’s a struggle to pull it though and you’re pulling the coil about and you don’t want to little where it’s like a stick of rhubarb in a bucket, you need it just right. WHAT IS JUST RIGHT??? If you struggle with this I would suggest you get yourself a pack of 3mm cotton laces. It’s what I did, I'm not saying you need to stick with them, just get yourself one pack and take note of just how much cotton is just right. If you need a recommendation for laces Fire Bolt cotton is superb, I still use it now from time to time when I’m being lazy.
Anyway, we move on, with the cotton threaded trim the end to just past the deck and fluff um up, do not comb or thin the cotton out, just fluff.

This is now where it gets “different”. With a pair of tweezers gently caress the outer edges of the cotton to flatten the ends to make it look like a bow tie, looking side on. So with the tweezers very gently squeezing the cotton in-between working from the coil outwards.

You should end up with something similar to this…


Now the cotton can be trimmed, those that use mesh will be familiar with this next step!

Trim the cotton at an angle similar to the above, resulting in this…

Now with the tweezers push the cotton back towards the wicking channels, leaving the cotton dry at this point, it doesn’t need to be spot on, it’s just to get the cotton roughly into place it can be tidied up once moist (Love that word MOIST!!!)


This exposes all the ends of the cotton to the outer edge. Once this is done on both sides you can move on and juice up the cotton.

Almost there. Now that the cotton is juiced you can manipulate the cotton into the channels properly with tweezers. At this point if I have any cotton poking up above the coil I tend to ease it down into the channel.

That’s it, pop the top on fill err up and chuff away. With this build, it happily ticks along at 38-40w and when I so desire I can bump up the wattage to 48-50w for a warmer vape and quiet merrily chain vape and it keeps up no problem.
If you do give the above build a go, I would appreciate any feedback, good or bad, I won’t be offended, promise! Or if you have your own take on how to get the best out of the Kylin Mini II please share, let me know and I’ll give it a go.
Also
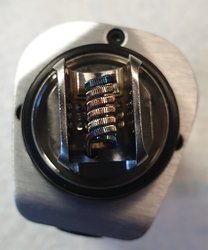
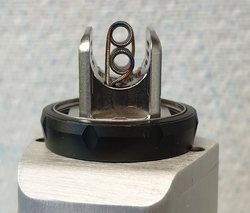
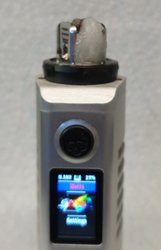
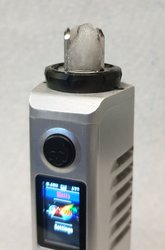
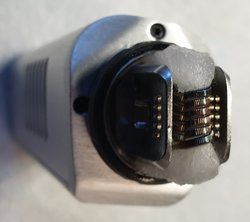
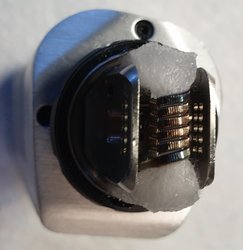
Just for shits and giggles, not so long ago when I wasn’t so busy and a tad bored I had a bash at putting in a dual coil build into this single coiler, how on earth I hear you say!!! Well it didn’t go all that well would be my reply.
I’ve added the thumbnails of the build if you’re interested, but let’s just say, please don’t try this at home, unless burnt dry hits are your thing.
4 Way Vape off Eclipse v's Kylin Mini II v's Blotto Mini v's Juggerknot MR
As the title suggests, I’m going to start off with the Kylin Mini II, I know I done a kind-of-review on this back in February but water has passed under the bridge, tides have turned and to be frank much more tinkering has gone on. For anyone that wants a flashback to compare here’s the link…
Vandy Vape Kylin Mini II (Another Review sort of)
I’m not doing this guide for the Kylin just because it came at the top of my rankings list recently but because out of all my single coilers this one is a bit different.
This guidance may convince some to dig out the Kylin from the dark depths of a draw and bring it back out of retirement, or as this tank is still available it may provide some assistance to a RTA newbie, whatever it is it’s all good.
I’ve probably prep’d the Kylin in the way I'm about to explain 20+ times now and I’ve had no issues with spitting, flooding or dry hits, the flavour out this thing is top notch and I think this method is very consistent.
Starting with the build
Some of you will know that my preference of coil wire is a SS316L flat or flattened Clapton, for me I’ve found this provides the best results and produces copious amounts of vapour and along with it flavour. I personally think this is one of the reasons I get consistently good results with my RTA’s, after all the coil is the engine and putting a fiat 500 engine into a large high performance motor wouldn’t bode to well and be somewhat of a let-down.
I will add at this point I’ve tried loads of different coil wires from standard round wire up to more complex wires like juggernaut, framed staples and many in-between. In my opinion a flat/flattened Clapton or an Alien is great for an RTA, the more complex/exotic coils work so much better in RDA’s due to the amount of juice needed (that’s juice as in power and eliquid). Back to my analogy above putting a 5ltr V8 into a fiat 500 will also result in disastrous results.
Anyway back to the point, for the Kylin Mini II I fit a 3mm id, 6 wrap spaced coil coming in at around 0.25Ω. I use a spaced coil simply to make up the distance between the fixing points, it is possible to fit in a contact coil but it’s fiddlier to fit and get rid of hotspots. I find with the coil wire I use, normally there is no need to dry burn with a spaced coil, tried it several times before and never had a hotspot, I did do a quick dry burn on this occasion just because it was a fresh reel of wire and to be on the safe side. Contact coils with the same wire on the other hand are totally different and definitely require a fire up before threading the wick.
Now for some piccies…
When fitting the coil try and get the top edge of the coil in line with the top row of holes of the air inlets. You can go slightly lower than this but keep in mind, if the air coming in from the top row of holes totally misses the coil you will be diluting your vape with fresh air.
Wicking
Now for threading the wick, this is hard to describe or show in pictures. You’ve probably heard many times before that when threading a wick you don’t want too much cotton where it’s a struggle to pull it though and you’re pulling the coil about and you don’t want to little where it’s like a stick of rhubarb in a bucket, you need it just right. WHAT IS JUST RIGHT??? If you struggle with this I would suggest you get yourself a pack of 3mm cotton laces. It’s what I did, I'm not saying you need to stick with them, just get yourself one pack and take note of just how much cotton is just right. If you need a recommendation for laces Fire Bolt cotton is superb, I still use it now from time to time when I’m being lazy.
Anyway, we move on, with the cotton threaded trim the end to just past the deck and fluff um up, do not comb or thin the cotton out, just fluff.
This is now where it gets “different”. With a pair of tweezers gently caress the outer edges of the cotton to flatten the ends to make it look like a bow tie, looking side on. So with the tweezers very gently squeezing the cotton in-between working from the coil outwards.
You should end up with something similar to this…
Now the cotton can be trimmed, those that use mesh will be familiar with this next step!
Trim the cotton at an angle similar to the above, resulting in this…
Now with the tweezers push the cotton back towards the wicking channels, leaving the cotton dry at this point, it doesn’t need to be spot on, it’s just to get the cotton roughly into place it can be tidied up once moist (Love that word MOIST!!!)
This exposes all the ends of the cotton to the outer edge. Once this is done on both sides you can move on and juice up the cotton.
Almost there. Now that the cotton is juiced you can manipulate the cotton into the channels properly with tweezers. At this point if I have any cotton poking up above the coil I tend to ease it down into the channel.
That’s it, pop the top on fill err up and chuff away. With this build, it happily ticks along at 38-40w and when I so desire I can bump up the wattage to 48-50w for a warmer vape and quiet merrily chain vape and it keeps up no problem.
If you do give the above build a go, I would appreciate any feedback, good or bad, I won’t be offended, promise! Or if you have your own take on how to get the best out of the Kylin Mini II please share, let me know and I’ll give it a go.
Also
Just for shits and giggles, not so long ago when I wasn’t so busy and a tad bored I had a bash at putting in a dual coil build into this single coiler, how on earth I hear you say!!! Well it didn’t go all that well would be my reply.
I’ve added the thumbnails of the build if you’re interested, but let’s just say, please don’t try this at home, unless burnt dry hits are your thing.


Last edited:


