decson
Postman
- Joined
- Aug 24, 2015
- Messages
- 388
Hi all
I am hoping this helps at least one person, as my first attempt at building the NexTiny was a day of pain lol. But it was my first ever build and when got advice from these good apes on the day after (when had a tube mod for coiling) it was a walk in the park.
Firstly I am doing this on an authentic NexTiny I have clones and yes they are not as easy, generally find issues with the 510 connector bit but just check yours make sure the screw is slightly out of the insulator and it's not rotating and you will get there... If I can you can!!


Ok the necessities.

A NexTiny
A piece of 0.3 Kanthal
40x13mm 300 mesh (keeping this simple, usually do a mesh with topper)
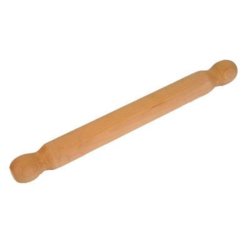
Rolling pin (that came with atty lol)
A mini cross screw driver for negative pin
A mini straight screw driver for playing with coil
Tweezers ceramic (and elbow for playing with coil but rarely use)
Wire cutters
Nose pliers for tightening nut after coiling (it gets hot so can get loose)
Flame thrower thingy (gas stove works as well, electric not so much, lighters can but never again.. Been there.. Btw it's fun!)
A regulated mod
And finally some vape to keep me going!
And if all else fails my balcony to throw it at.

Ok here we go.
1. Cut mesh to 40x13mm

2. Using flame thrower burn the crap off it, please use ceramic tweezers *ouchy*, make sure you get rid of any stragglers around edges and it is nicely done

3. Then role it round the rolling pin you got with your NexTiny (for In'ax if using the central pole it came with and grypsticks use the rolling pin with it, for the threaded stick just remove the central pole and use that) as it's quite thick mesh aim for quite tight, this is fun after a dozen times to start not so much.


4. Using tweezers' oxidise again with flame thrower!

Then let it cool down.
5. Put it on central pole in all honesty it didn't fit so I tightened it up on the rolling pin and voila!

Part 2 coming - will only let me load 10 Pix per post
I am hoping this helps at least one person, as my first attempt at building the NexTiny was a day of pain lol. But it was my first ever build and when got advice from these good apes on the day after (when had a tube mod for coiling) it was a walk in the park.
Firstly I am doing this on an authentic NexTiny I have clones and yes they are not as easy, generally find issues with the 510 connector bit but just check yours make sure the screw is slightly out of the insulator and it's not rotating and you will get there... If I can you can!!
Ok the necessities.
A NexTiny
A piece of 0.3 Kanthal
40x13mm 300 mesh (keeping this simple, usually do a mesh with topper)
Rolling pin (that came with atty lol)
A mini cross screw driver for negative pin
A mini straight screw driver for playing with coil
Tweezers ceramic (and elbow for playing with coil but rarely use)
Wire cutters
Nose pliers for tightening nut after coiling (it gets hot so can get loose)
Flame thrower thingy (gas stove works as well, electric not so much, lighters can but never again.. Been there.. Btw it's fun!)
A regulated mod
And finally some vape to keep me going!
And if all else fails my balcony to throw it at.
Ok here we go.
1. Cut mesh to 40x13mm
2. Using flame thrower burn the crap off it, please use ceramic tweezers *ouchy*, make sure you get rid of any stragglers around edges and it is nicely done
3. Then role it round the rolling pin you got with your NexTiny (for In'ax if using the central pole it came with and grypsticks use the rolling pin with it, for the threaded stick just remove the central pole and use that) as it's quite thick mesh aim for quite tight, this is fun after a dozen times to start not so much.
4. Using tweezers' oxidise again with flame thrower!
Then let it cool down.
5. Put it on central pole in all honesty it didn't fit so I tightened it up on the rolling pin and voila!
Part 2 coming - will only let me load 10 Pix per post
Last edited:


 .
.


 !
!


